Download
1 / 4
50 likes | 167 Views
RSLinx Classic Configuration to communicate with a DH from a computer using the ANC-100e

E N D
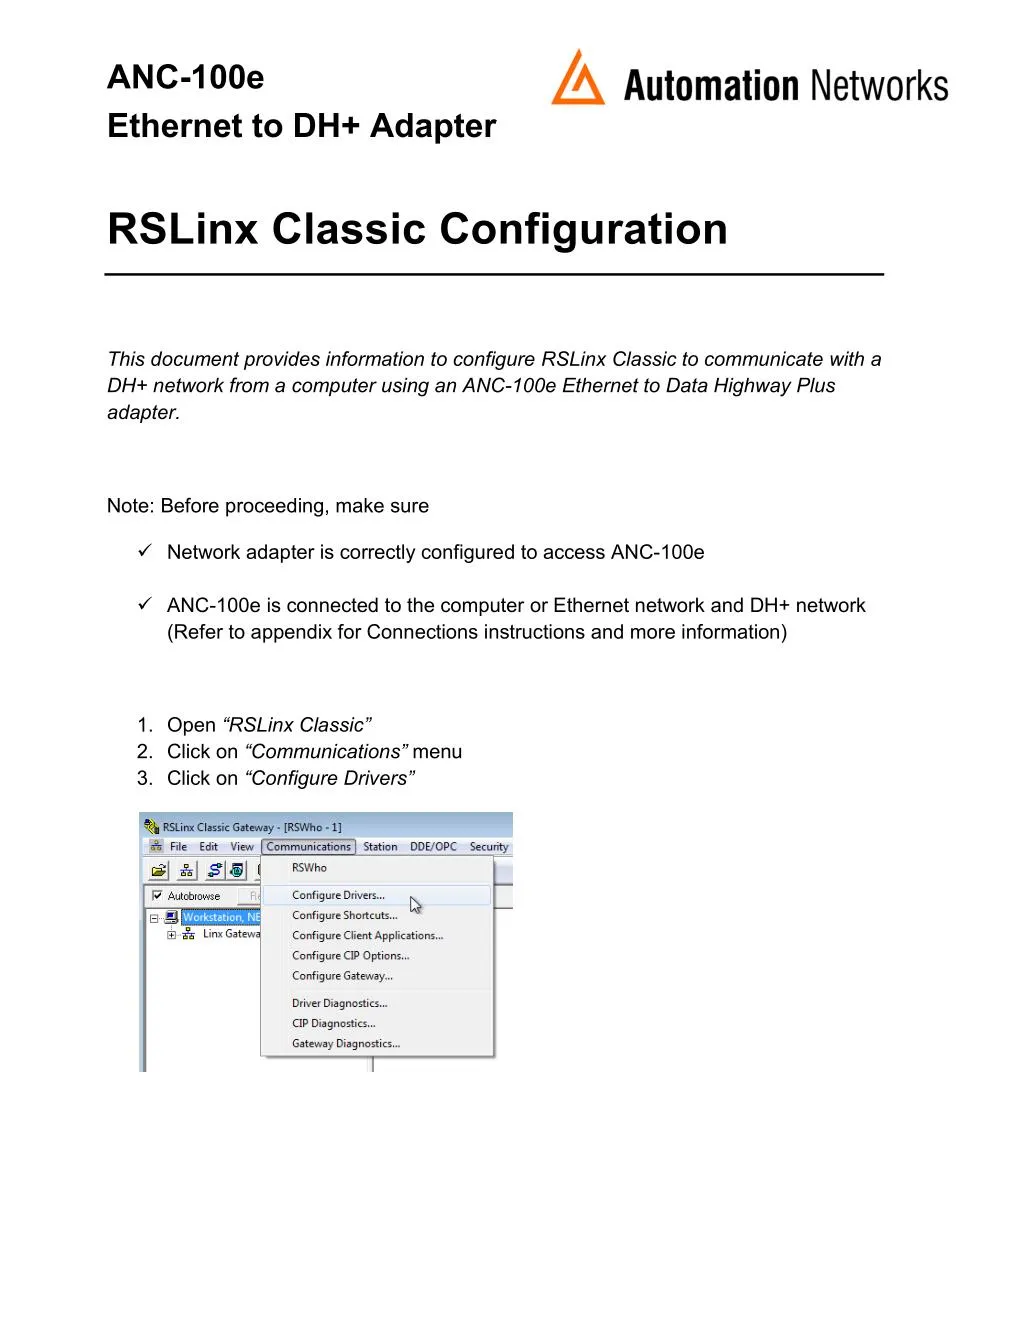
ANC-100e Ethernet to DH+ Adapter RSLinx Classic Configuration This document provides information to configure RSLinx Classic to communicate with a DH+ network from a computer using an ANC-100e Ethernet to Data Highway Plus adapter. Note: Before proceeding, make sure Network adapter is correctly configured to access ANC-100e ANC-100e is connected to the computer or Ethernet network and DH+ network (Refer to appendix for Connections instructions and more information) 1. Open “RSLinx Classic” 2. Click on “Communications” menu 3. Click on “Configure Drivers”
ANC-100e Ethernet to DH+ Adapter 2 4. Select “Remote Devices via Linx Gateway” from the Drop down list 5. Click on “Add New” Button 6. Enter the name for the driver or use the default name 7. Click “OK” 8. Enter the IP address of ANC-100e in the “Server’s IP Address or hostname:” field (Default is 192.168.137.2) 9. Click “OK”
ANC-100e Ethernet to DH+ Adapter 3 10. Verify that the Driver is “Running” 11. Click on “Close” button 12. Open “RSWho” window 13. Click the checkbox to activate “Autobrowse” option 14. Double click on the driver element (In our example is TCP-1) to start browsing the ANC-100e. During browsing, you will notice that more elements appear in a branch fashion 15. Keep browsing until you reach “CH A, Data Highway plus” All the devices connected to the same DH+ network as the ANC-100e will appear here
ANC-100e Ethernet to DH+ Adapter 4 Appendix ANC-100e DH+ connection There are 2 ways to connect to the DH+ network. - Connect to Processor’s 3-pin connector: Daisy chain a cable from the last DH+ node to the connector of ANC-100e. Polarity of blue and clear cables is irrelevant, as it is auto-detected by ANC-100e Connect to DH+ Programming Terminal on processor by using the ANC-100e Mini-Din Programming Cable - Connect the DH+ cable to ANC-100e and then connect to your Ethernet network or a free Ethernet port on your computer. When the unit turns on, the Ethernet LED blinks several times. Note: if AUTO Baud rate and AUTO DH+ Node options are active in ANC-100e, the device will automatically configure the correct DH+ network speed and find a free DH+ node number to use as its own address. So you don’t need any configuration to start programming DH+ processor. The ANC-100e DH+ LED blinks every 3 seconds if it is associated with the DH+ network and nothing is being transmitted on the DH+ link. When DH+ data exchange takes place, the LED will indicate this by blinking rapidly upon transmitting/receiving a valid DH+ packet. DH+ LED will remain off if the DH+ network is not connected or there are no devices on the connected network. About RSWho window and AutoBrowse option RSLinx “Autobrowse” option is good to initially discover all active nodes on a particular DH+ network quickly and easily, however, because of the extra traffic this feature generates, it is recommended to have the “Autobrowse” checkbox unchecked in the production environment. For more information about settings and other options, please refer to ANC-100e User Manual.