Download
1 / 12
120 likes | 128 Views
D&F Liquidatorsu2019 success has been built by serving our customersu2019 electrical construction materials needs for over 30 years. Our 180,000 square foot facility located in Hayward, California is ready to meet the unique requests we receive. If itu2019s ordinary, diff

E N D
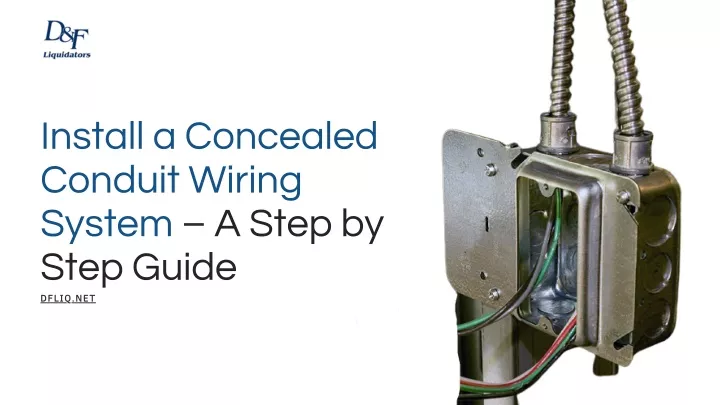
Install a Concealed Conduit Wiring System – A Step by Step Guide DFLIQ.NET
The wires are installed in 4 steps. 1 2 3 4 Laying the electrical conduits in the slab Installation of Switch Boards Back Boxes Laying the electrical conduits in the wall Installation of Distribution Boards
In any electrical circuit, appliances and wiring will burn out to protect the fuse - Robert Byrne
Introduction Concealed conduit electrical wiring systems are a popular choice in domestic premises as they are aesthetically appealing. They are the most commonly used house electrical wiring system as it protects the wires from external damage and increases their longevity.
Step-1: Laying of Electrical Conduits in Slab Theslabconduitsforhousewiring Useonlydeepjunctionboxesinslabs. shouldbe2mmthickand25mmin 1 2 ProperlybindthePVCconduitsusing sizeforPVCconduits.Laytheslab thebindingwire. conduitsbetweenthetopandbottom reinforcement. Itwouldbeidealtofollowthe Checktheconductingas colorcodingforconduitsfor pertheservicedrawings electricalwiresanddatasuch checkthewalldrops andseewherethe asLANandtelephonewire.Use 3 4 5 carefullyanddetermine switchboardsarelocated greyPVCpipesfordata,black theconcretethickness. andhowmanypointsneed PVCpipesforelectricalwires tobeinstalledateach andPVCsolventforjoiningthe location accessories
Takespecialprecautionswhile 6 7 Replaceallthebrokenpipes concretingtheslab Oncetheslabandbeam arede-shuttered,pass Provideallthenecessary theGIwiring sleeveinbeams,columns Ensurethatallthejointsare 8 9 10 immediately.Document priortoslabcastingasper watertight anychokeupor electrical & air-conditioning alternaterouteforfuture references Don’tclusterthepulland junctionboxesatoneplace. Providethepullboxes Arrangethemsothatthey 11 12 atsuitablelocations can’tbeseeneasilyfrom heavymovementareasas pertheelectricaldrawings
Step-2: Laying of Electrical Conduits in Wall Oncethecuringofbrickworkis Carryouttheconcealedconduitwork completed,carryoutthechasing 1 2 aftertheconstructionofmasonrywalls work.Ideally,maintainagapof7days butbeforetheplasteringworkstarts betweenthetwoactivities Oncetheconduits,boxes andaccessoriesarefixed, Fixtheelectricalconduits Dothewallchasingwithwall fillthechiseledsurfacewith withtheapprovedclipsto 3 4 5 cuttersonlyasthiswouldavoid cementmortarandchick ensureproperroutingand damagetothewalls meshwrappedaroundthe wiring conduits
Startthewallconductingactivitywith Limitthewidthofchasingasperthe levelmarkingonthewall,keepingthe 6 7 numberofconduits heightaboveFFL(Finishedfloorlevel) inmind Makesurethatallthe horizontalconduitrunsare Don’tuseanyelbowsor Thedepthofchasingshould straightattheboxlevel.The bends.Useaspringtobend beatleast10mmfromthe 8 9 10 lightpointconduitshouldrun ifyouwanttochangethe masonrywalltohavethe straightverticallytothe conduitrecess directionofthepipe. switchbox.Makesurenowall conduitistakenhaphazardly Runtheconduitsabovethe falseceilingwithproper Don’trunpower support.Don’trestthemon 11 12 conduitsnearany thefalseceilinginanycase. communicationline Sealtheverticalrunswith openendsatthetopifyou havefalseceilingwork
Step-3: Installation of Switch Boards Back Boxes Fix the concealed switchboard Ensurethatthegapbetweenthe properly in level based on the concealedswitchboardsisuniform. 1 2 architect’s design, for example, Maintainthesameuniformityacross distanceandheightfromthefinished alltheinstallations. floorlevel (FFL) finishtheboxfixingbeforethe The switchboards must be plasteringworkwhiledoingthe readymademodulartypemetal 3 4 wallconduiting.Filltheboxes boxesoftheapprovedmake. Fixtheconcealedbox3mm with thermocol while the belowtheplasteredsurface. plasteringworkisbeingdone.
Step-4: Installation of Distribution Boards FixtheDBboxinaproperlineand Concealthedistributionboardbefore 1 2 leveltherecessprovidedinthe theplasterwork brickwork Readytheboxasperthe PlacethePVCpipesfrom designsuchasfixingthe 3 4 numberofconduitsentering thegivenentryholesonly thedistributionbox
Conclusion Make sure that you go through all these steps in an orderly manner for the successful installation of the concealed electrical wiring system. Our experts at D&F Liquidators, Inc. can help you with the successful installation of concealed electric wiring at your home. Do contact us to know more details about the same.
SEASTON REALTY Contact details For bookings and quotation Are you in search of high-quality, reliable electrical materials from top brands at competitive rates? Look no further because D&F Liquidators have a large inventory of electrical supplies, safety switches, and circuit breakers. WEBSITE dfliq.net MOBILE PHONE 800-458-9600 GET QUOTE www.dfliq.net/get-a-quote D&F LIQUIDATORS 1810 W. WINTON AVENUE HAYWARD, CA 94545-1232