Download
1 / 11
0 likes | 6 Views
Deep dive into WordPress Gutenberg. What it is and How to Use WordPress Gutenberg Block Editor.

E N D
WordPress Gutenberg: How to Use WordPress Gutenberg Block Editor? Are you still wondering what Gutenberg is? In WordPress 5.0 the classic editor was replaced with the brand new editor known as Gutenberg which is also known as Block Editor. Gutenberg introduced a new concept of block: each piece of content in Gutenberg is a block. There are many useful blocks available in Gutenberg by default and a lot more can be added via third-party plugins, search and install from WordPress adding and working with Gutenberg is super easier as compared to the classic editor.
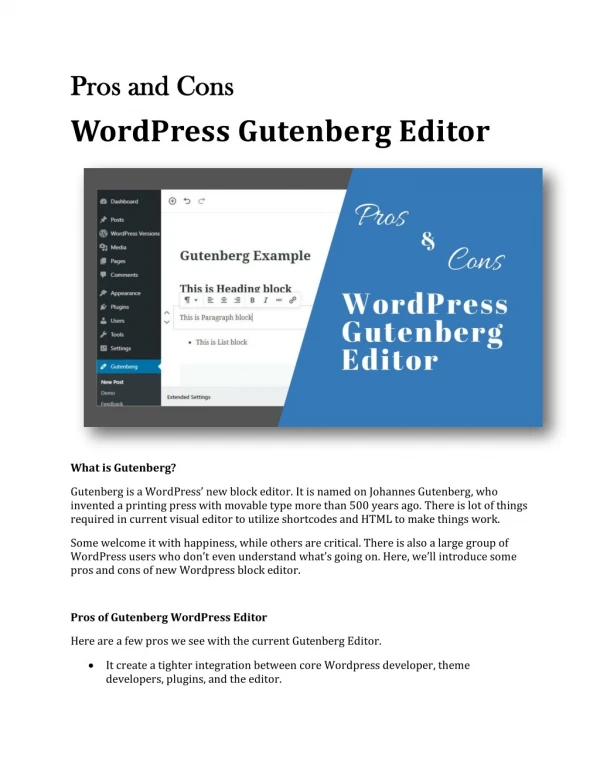
What Is Gutenberg? The classic editor that was previously used by WordPress has been replaced by Gutenberg. With a drag-and-drop interface, it gives users the ability to organize and generate content using separate blocks for text, photos, videos, and other site elements, giving them more creative and flexible options. How is the Classic Editor different from Block Editor (Gutenber Editor)? It’s time to discuss the major difference between a classic editor and a block editor. Here is what the classic editor in WordPress looked like: And this is what the modern WordPress block editor looks like: Both the editors are completely different, as you can in the images. On WordPress, there is a layout or interface for working on WordPress using the classic editor or block editor. WordPress Classic Editor is the old editor, resembling the ecosystem of MS office. In the new versions of WP, the block editor has divided each section into blocks. You must know the basic difference between classic and block editors. The old Editor was a text editor with formatting buttons very similar to Microsoft Word. The new Editor uses a different approach, called
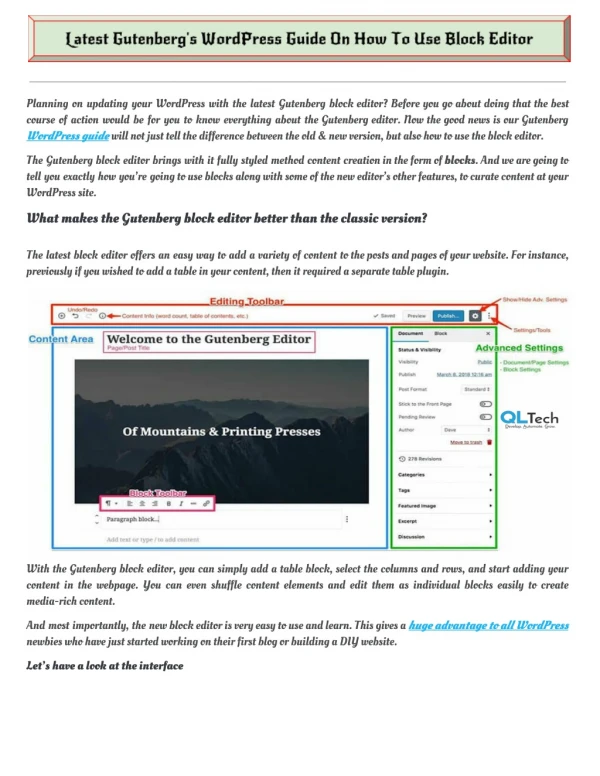
‘blocks’ (the name block editor). Blocks are content elements that you add to the edit screen to create layouts. WordPress Gutenberg Block Editor Vs Classic Editor? These two are completely different editors for creating content in WordPress. Each piece of content in Gutenberg is a block whether it’s an image, Gallery, or headline whatever each piece of content blocks in Gutenberg. In Gutenberg you have different controls for different blocks of content for example this is an image block and it has different options Size, Style, and Frame. You can simply adjust any media by drag and drop method. In Gutenberg you got different tools or different controls for each block depending on the nature of the block. On the other hand classic editor has simply the same control panel on the top for all content you add there is not much control for individual content elements. “Here is the Example” if you want to add a table to your content then you need to install some third-party plugin for table insertion and in Gutenberg, you can simply add a table from elements. Block Editor Surface Alright let’s get started with a detailed explanation of the WordPress Block editor so first let’s look at the layout of the Gutenberg editor at
the top you have your toolbar here, you have the ability to add a block, and this ability to add a block and this gives you access to the full Gutenberg block library. You can also choose an editing mode you can use edit or select. I have never had occasion to choose but it’s there if you want it. Next are the undo and redo buttons and the next one is the detail button and this is where you find things like the word count of your post. Finally, we have the outline for what I call the block navigator view and as we build out this post you’ll find a structured view of all your blocks that have been added so far and it makes it easy to quickly jump to a specific block even if it’s nested inside another block, The next important part of the Gutenberg editor is the settings panel and if it’s not open by default you can just click on the gear icon on the top right corner to open it and there are two tabs under the settings menu. We have a post-level settings menu. We have post-level settings and this is where you will find things like your permalink, the ability to choose categories for your post and tags, features, images excerpts, etc. If your theme supports it you can also choose a sidebar layout or default post layout and then we also have the block level settings depending on what type of block you’re using you will find different settings here, for example, if we’re inside paragraph block you’ll find things like font size or font color settings every block also has an advanced tab and under here you’ll find two things you’ll have the
ability to add an HTML anchor and this lets you create anchor links or jump links that skip right to a certain section on the page and you can also add a CSS class to your element for additional styling. At Last, we have the main editor view and this is where we’re going to add and rearrange our blocks now there are several different ways to add a block as we covered you can click the plus icon over here to add a block and either choose from the list of most recently used block or you can search for a block by name, for example, Shortcodes block and finally you can use the Shortcodes which is the forward slash and then start type the name of the block so if we just type image and then hit enter to complete it will insert an image from the media library. Adding New Blocks As we discussed before we can add a new block to our content whenever we want, and we can use separate blocks as well. You just need to click on the + icon to add a new block, and after that, you can select the type of block you want. As you can see below: We show you how you can add paragraph blocks in the above example you can add several types of blocks similarly. •Text— you can add headings lists quotes, etc from these group
•Media— it consists of blocks for images, videos, audio files, and other media. •Design— you can add a spacer, buttons, etc with this, •Widgets — For WordPress widgets, like a list of categories or your latest posts. •Embeds— you can embed content from third-party sites like YouTube, Twitter, Facebook, and others. Way To Build A Basic Layout With Gutenberg Editor Let’s start this with building a simple blog post with the use of Gutenberg — WordPress Block Editor. We will use some different elements to design this. Regular Text: We will start writing the simple text for you to block either you can also write this in Google docs and paste it here or you can directly type it here but according to my perspective google docs is better for writing. When you write a complete text block you can add more blocks for several things like we want to add a quote for our text then we will add a quote block
Quote: Where you want to add a quote in between any blocks you need to just click on + and search for quotes then simply click on the quotes option as shown below. Image: Image is very useful for our content. It’s helpful to the readers for a better understanding of what we want to tell them. you can add an image option as well in between the text or any element. Once you have added an image you can also select its alignment. The way to add any image block is shown below. These are some ways to add something from your server you can also add some elements from third-party sites like you want to add any YouTube video to your content then it is very simple what you need to do is just copy the URL of the video and add a block named YouTube and just paste that URL over there. And your Video is placed in your blog. When you add all these blocks you just need to click publish, and your blog will be published. Rearrange Individual Blocks Rearranging blocks on your page generally is very easy. There are two ways in which you can move blocks around.
One way first click on the block you can hover over to the little dots over here and you’ll see a hand appear. just click on the dots and you’ll see the hand is making a grabbing motion, once you’ve got that you can basically drag this block around now at the moment it won’t go anywhere. I will need to drag it to the center area and look out for a blue line to appear once where I want it to be placed. Just let go. I could place it in this column here or again, I can drag it out. That’s the first way. The second way which is just as easy is by clicking the up or down arrow and you can rearrange the blocks that way you won’t be able to place up we clean columns though you will have to drag using this method in order to get into a column. Gutenberg Advance Tricks There are several things to do in WordPress block editor but few can be done easily with the tricks discussed below. Add a new Block by Typing: As we discussed, how to add a new block earlier with the help of the insert button. But it takes some time to save. This time we will use a short command to add a new block “/BLOCK-NAME” after a box will appear called the auto-suggest box it will help you to find relevant blocks as shown below. Short Code:
If you want the Source code of your post at any stage then you just need to click on the three dots on the top right and then select Code Editor. You can edit the source code here as well. Full-Screen Mode and Fixed toolbar: Gutenberg also consists of a few different modes that let you change the editing experience. •Full-screen mode •Fixed Toolbar •Spotlight Gutenberg Editor keyboard shortcuts Gutenberg offers us a few Keyboard shortcuts for different operations like: •Full screen Mode: ctrl+shift+alt+f •Navigation of next part of the editor: Alt+shift+n •Undo: ctrl+z •Block List View: shift+alt+o FAQs about Gutenberg (WordPress Block Editor)
How to add a link in the block editor? In block editor, you can add blocks for almost every type of content, but there are some important things that you need to link to a different URL of your site or some other external sites you can add a URL to any text with the help of Gutenberg. How can I add a Button in the Block Editor? In a classic editor adding a button is not so easy, you need to install a plugin to create a Shortcodes for the button or you need to edit the code in HTML. But in Gutenberg you don’t need to install any plugin, you can add a button block directly to any page or post. Can I still keep using the old editor? Yes, you can still use the old editor, what you need to do is simply download and install the classic editor plugin. When you install the plugin it will disable the block editor, after that, you can use your classic editor. Maybe the use of the classic editor is up to 2022, it’s better to work on the block editor so that you get familiar with it. What about my Older post and page? Can I still edit them?
Yes, you can edit them, your previous post and pages will not be affected by the block editor. The Block editor will transfer them itself. What if your Block Editor is not working with the theme or plugin you are using? If your Block Editor is not working then maybe Gutenberg is under development, or there are also some chances of Gutenberg not working for some plugins or themes so you can use classic editor or find some other plugins and themes.