1 / 10
100 likes | 110 Views
Get the best out of your creativity in design, photography and painting with Mohit Bansal Chandigarh. The Ultimate Guide To Drag And Drop Photoshop Templatest<br><br>https://mohitbansalchandigarh.in/the-ultimate-guide-to-drag-and-drop-photoshop-templates/

E N D
The Ultimate Guide To Drag And Drop Photoshop Templates
If you're looking for an easy and efficient way to create amazing graphics for your website or blog, you need to check out drag-and-drop Photoshop templates. With these templates, all you need to do is add your own images and text and you're ready to go! By simply dragging and dropping various content regions into your Template, you may edit material using the Drag & Drop Template function. In this guide, we'll show you where to find the best drag-and-drop Photoshop templates, as well as how to use them to create stunning graphics that will make your site or blog stand out from the rest.
A Drag And Drop Template: How Can I Make One? Step 1: Create a new document in Photoshop To start, open a new document and give it a name in Photoshop by clicking File>New in the top menu bar. Set the width and height of your documents to inches before printing them. You may maintain the 11-inch width and 14-inch height for this specific document. If you are creating a document for the web, you may easily modify it to pixels. In terms of resolution, keep in mind that 300 pixels per inch are excellent when producing content for print. Between 72 and 150 pixels is appropriate for site templates. Click OK.
Step 2: Photoshop's Ruler Feature Should Be Activated The Photoshop Ruler function should be enabled so that you can easily build the shapes required for the template. If the ruler isn't currently visible in Photoshop, choose View>Rulers from the menu bar at the top of the screen. Photoshop rulers should now show up. Naturally, you can just select Rulers again in the menu to uncheck it if you wish to turn it off later. Create shapes on your Photoshop template in step three. For our template, which we will later utilize to put photos into, we must next lay down a variety of shapes. For each form you make in Photoshop, you should work on a different layer. Scroll to the bottom of this layered panel and choose the new layer icon. You'll see that it is a little square with a folded corner. In the top menu, you may also select Layer>New>Layer.
Step 4: Add Images To Your Photoshop Template The ability to swiftly and simply insert photos into a reusable layout is one of the primary goals of creating a Photoshop template. You must first choose the layer to which you wish to apply the picture before you can add it. Navigate to the picture you wish to use with the template after that. Place the picture by clicking it. At first, it could appear a little strange. That's alright. Just hit Return or Enter. Here comes the magic! When you select Layer>Create Clipping Mask from the main menu, your picture will automatically be clipped into the desired form! You may now click and drag or resize your image to precisely fit into the form you need with the Photoshop Move Tool. For each form layer, repeat the "Add Image" steps.
Step 5: Save Your Template To guarantee that all of your layers are saved for the next time you wish to utilize your template, save the file as a PSD after you are through. Use the File>Save As menu option to save your work as a JPEG if you want to print this document.
How to Make a Photoshop Template Our new layer has no data at all. On that layer, we need to design a form. This is the form that we will later use to insert our picture. Set the marquee tool to active. The item is the second tool down. The marquee tool's right-click menu lets you choose from a variety of forms. Once the shape has been formed, you will notice the little marching ants—as I like to refer to them—moving down the edges. We will now complete our shape. Select Edit>Fill from the top menu. Ensure that "Color" is chosen in the first drop-down menu. Any shade will work. Now, we have two options: either click once to remove our selection, or choose Select>Deselect in the menu bar. For each form you add to your template, you must repeat these steps (just step 3). Simply activate the Move tool (click "V" on the Photoshop keyboard shortcut) and choose the layer for the form you need to resize if your shape is the incorrect size or you want to alter it later. To modify the shape, use the transform handles all around it. To maintain the original aspect ratio while enlarging your image, hold down the Shift key. To establish the new form size, press Enter/Return after that.
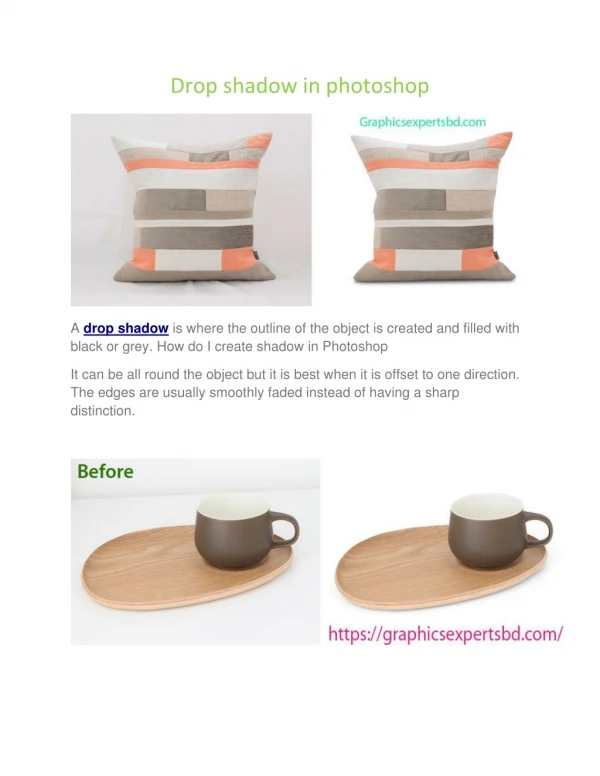
How Do I Drop An Image Into A Photoshop Template? Choose The Shape Layer - Decide the shape layer you wish to use for the photo placement. This is occasionally referred to as a photo layer, mask, or clipping mask. In essence, it's simply the form into which you want your image to be clipped. Insert Your Image: Navigate to FILE, choose PLACE EMBEDDED, and select your image from your stored location. Immediately above the form layer you've chosen, the photo will now insert itself into the collage on its own layer. Resize - When the picture first appears in Photoshop, its "handles" are already activated, allowing you to resize it to the required size. Drag the picture in the collage above the form with the move tool. Checkmark - Once the picture has the appearance you like, click on the checkmark or tick in the menu bar above.
How Do I Drop An Image Into A Photoshop Template? Clip - To make only that portion of the photo visible, you must now clip the image to the form layer beneath. Using the keyboard shortcut CTRL + ALT + G (or CMD + ALT = G on a Mac), you may accomplish this in Photoshop. Alternately, you may use the CREATE CLIPPING MASK option under LAYER to accomplish the same goal. Once you've done so, an arrow indicating that the picture you've just placed has been clipped to the form layer will appear between them. Ctrl+T - If necessary, move the picture or resize it once more. Now that you can see how the image looks inside the form, you might wish to do so. You'll need to bring up those "handles" once more to do this. Pressing CTRL + T (or CMD + T on a Mac) will allow you to achieve this. Again, follow Steps 3 and 4 directions. Repeat With All Photos - With a collage or storyboard, you usually won't just have one form for your images; rather, you'll probably have many. In that case, just keep repeating the steps above until all of your images are in position. Save - Remember to save your project as a PSD so that all the layers are still visible. This will allow you to change the entire collage later on if you'd like, and remember to save a JPEG version for printing.
Where Are The Templates For Photoshop Kept? The "Templates" sub-folder contains the Photoshop template files. By selecting one of the templates, Photoshop creates a new document with the accompanying PNG file (which has the same root filename as the XML description file). The string "Copy" is appended to the end of the document name, which is the name of the template image.