Download
1 / 4
40 likes | 45 Views
Learn how to lay a concrete floor like a pro! This step-by-step guide covers everything you need to know, from preparing the subfloor to finishing the concrete. With our help, you'll be pouring a perfect concrete floor in no time.<br>

E N D
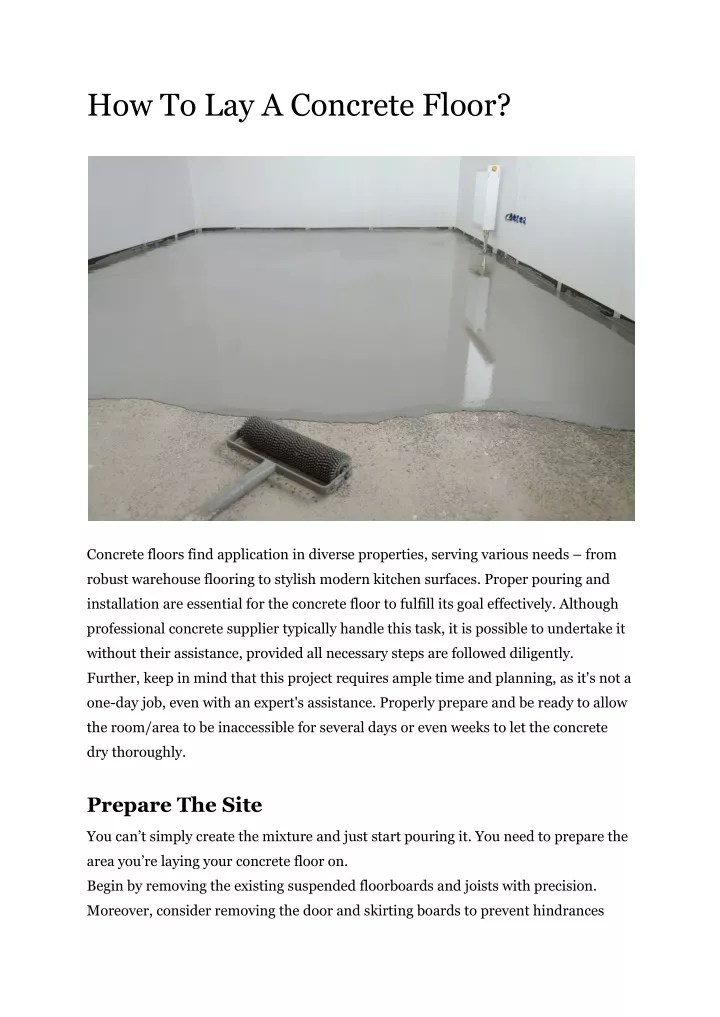
How To Lay A Concrete Floor? Concrete floors find application in diverse properties, serving various needs – from robust warehouse flooring to stylish modern kitchen surfaces. Proper pouring and installation are essential for the concrete floor to fulfill its goal effectively. Although professional concrete supplier typically handle this task, it is possible to undertake it without their assistance, provided all necessary steps are followed diligently. Further, keep in mind that this project requires ample time and planning, as it's not a one-day job, even with an expert's assistance. Properly prepare and be ready to allow the room/area to be inaccessible for several days or even weeks to let the concrete dry thoroughly. Prepare The Site You can’t simply create the mixture and just start pouring it. You need to prepare the area you’re laying your concrete floor on. Begin by removing the existing suspended floorboards and joists with precision. Moreover, consider removing the door and skirting boards to prevent hindrances
later on. Applying a strong chemical fungicide solution to the subfloor and walls below ground level is a good precaution. Next comes another important factor, accurate measurement of the floor area. If constructing on soil, compact the earth thoroughly for a strong and level surface, guaranteeing a crack-free concrete floor. The Essential Base Layer For the infill layer, ponder using tile or brick rubble or opt for gravel rejects. These are coarse stones derived from quarry waste. ● Lay these materials in layers of no more than 200mm thickness, compacting each layer down and breaking up larger pieces using a sledgehammer. ● Remove any wood or metal debris from the infill material, as they can adversely affect the concrete once it's laid. ● Add compacted infill layers until you achieve a level approximately 25 mm below your lowest chalk line. ● The final 25mm should consist of a layer of sand. Also, it should be carefully tamped flat to create a level surface for the concrete pouring process. Reinforcements for Strength Think about the types of loads your concrete floor will bear when deciding on reinforcements. For floors expected to handle light loads, reinforcement may not be necessary. Yet, if your floor will endure significant weight, reinforcement bars (rebars) become almost essential. In the case of large structures, a structural engineering firm should calculate and certify the reinforcement work. Using 10 rebars spaced 600mm apart for smaller spaces will effectively fortify your floor. Concrete Floor Insulation Properly insulating your concrete floor is vital to prevent the cold from rising from the ground beneath. A well-insulated floor may eliminate the demand for an additional thermal insulation layer on top of the finished concrete floor.
When installing insulation boards, maintain a snug fit against the walls, leaving no gaps. Further, polystyrene insulation boards are readily available at reputable DIY stores or builder's merchants, making them a convenient choice for this purpose. Pouring the Concrete Furthermore, create a medium-strength concrete mix by combining the following: ● 1 part cement ● 2 1/2 parts sand ● 4 parts aggregate Avoid adding excessive water to maintain a fairly stiff consistency. Moving on, begin laying the concrete strips across the room. Make them no wider than 600mm, and start from the farthest wall from the doorway. Besides, equal and squeeze each strip and work back toward the doorway. Keep in mind to hold a flat surface for the concrete. Although the floor screed layer will address slight unevenness, strive to attain the most even surface possible and fill any significant dips or hollows as you proceed. Once spread, cover the damp concrete with polythene sheeting and allow it to cure for a minimum of three days before further construction. Applying the Screed Layer Prepare two 600mm long battens from 38 x 38mm timber. ● Create a screed mortar mix using 3 parts sharp sand to 1 part cement. Additionally, combine water, cement grout, and PVA bonding agent in equal proportions to form a creamy white paste. ● Further, dampen the concrete floor and apply a 600mm wide strip of the paste solution across the room. It should start at the wall farthest from the door, as previously done. ● On each end of this 600mm wide strip, lay a bed of screed mortar and position the 600mm battens you prepared earlier into the mortar. ● The battens should align with the direction of your work and be level, with the chalk mark indicating the finished floor level.
● Besides, use a spirit level and a straightedge to ensure the battens are perfectly level. The tops of these battens will serve as your reference points for achieving a flat and even screed layer. Achieving a Polished Screed Surface After applying the screed, utilize a float to buff the surface thoroughly. Are you satisfied with the screed's flatness, smoothness, and levelness? Now carefully remove the battens from their beds. Further, fill the gaps they leave behind with screed mortar and guarantee these strips are flattened and honed as done previously. Upon completion, let the screed firm up. Cover the entire floor with polythene sheeting again, leaving it to cure - undisturbed for at least a week. Estimated Installation Time for Concrete Floors The timeline for installing a decorative concrete floor can vary significantly depending on the project's complexity. For smaller projects like basement floors, the installation may take two to five or six days. In contrast, more intricate projects involving multiple stain or dye colors, overlays, decorative saw cuts, and custom graphics will require much longer. Moreover, the condition of the existing concrete substrate extremely influences the project's duration. If the concrete slab is ready for staining, polishing, or applying a decorative coating or overlay, the procedure should proceed relatively quickly. Yet, if the floor necessitates extensive surface preparation or repairs, expect to allocate at least an additional day or two to the schedule. Takeaway Following the steps mentioned, the DIY in you can have a sleek concrete floor to walk on in ten days. After that, the sense of achievement you feel will be unmatched. However, if you feel like you won’t be able to manage the project on your own, professional help is always an option.