Download
1 / 54
690 likes | 1.89k Views
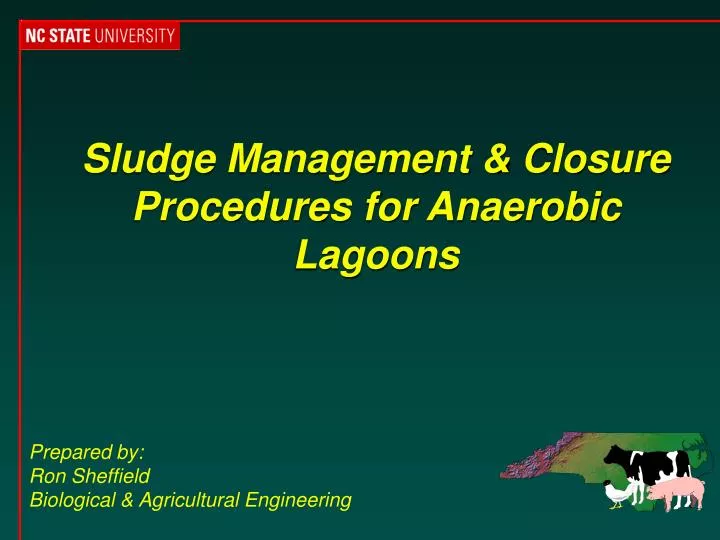
Sludge Management & Closure Procedures for Anaerobic Lagoons. Prepared by: Ron Sheffield Biological & Agricultural Engineering. What is Sludge?. Natural byproduct of anaerobic digestion Dead microbial cell mass Rich in nutrients May be called biosolids or residuals

E N D
Sludge Management & Closure Procedures for Anaerobic Lagoons Prepared by: Ron Sheffield Biological & Agricultural Engineering
What is Sludge? • Natural byproduct of anaerobic digestion • Dead microbial cell mass • Rich in nutrients • May be called biosolids or residuals • Settled inorganic matter • debris (pens, bottles, veterinary supplies) • rocks and sand
Properties of Sludge • Color: Black • Consistency: described as a gritty tar or like applesauce • Particle size: extremely small, difficult to separate/dewater • Odor: significantly less than raw manure, but more than “pink” lagoon effluent
Nutrient Concentrations Table 2
Sludge Storage Volume • Sludge storage is required to maintain an adequate permanent treatment volume • Necessary to support bacterial growth and proper level of manure treatment and odor control • Majority of lagoons designed before 1996 do not have any or adequate sludge storage • Sludge storage is not required for existing operations to be certified
Undersized Lagoons • Increase the need for more intensive management and pumping frequency • Loss of “pink or purple” color and associated beneficial bacteria • Increase odor potential • Increase nutrient levels in lagoon effluent • Increase the rate of sludge buildup
Principles of Sludge Management 1. Identify practices to minimize sludge accumulation 2. Identify “Trigger Point” for sludge removal 3. Monitor sludge accumulation in relation to “Trigger Point” 4. Do not remove the last 2 ft of sludge 5. Protect the integrity of earthen liner 6. Land apply at agronomic rates 7. Minimize odors
Minimizing Sludge Production • Rate of lagoon sludge buildup can be reduced by: • proper lagoon sizing • mechanical solids separation of flushed waste • gravity settling of flushed waste solids • minimizing feed wastage and spillage
Lagoon OperationSludge Removal: • Lagoon sludge that is removed annually rather than stored long-term will: • have more nutrients • have more odor • require more land to properly use the nutrients
“Trigger Point” • Physical depth in lagoon where sludge exceeds the designated sludge storage layer • Insures that sludge accumulation does not reduce the permanent treatment volume (PTV) • Minimum: 1 cu.ft. PTV/# SSLW • Use Worksheet 1 to calculate • Sludge should be removed once accumulation reaches the “Trigger Point”
“Trigger Point” Sludge Accumulation Layer
Monitor Sludge Depth • Estimate Sludge Depth • Based on accumulation rate • Seasonal pump down • Once pumped down to stop marker,observing sludge at this point generally means that the sludge volume has exceeded allowable storage and should be removed • Measure Sludge Depth
Measuring Sludge Depth • Use a 14’ long lightweight rigid pole • Take a minimum of 10 measurements from around lagoon • Avoid areas around: • Inlet pipes • Recycle pumps • Irrigation intakes • Measure depth of lagoon below the top pumping marker - a.k.a. “Start” pumping marker
Measuring Sludge Depth 1. Measure the depth of supernatant. Depth = 6.5 ft 2. Measure the depth of sludge. Depth = 10 ft 6.5 ft 10 ft 3. Sludge depth: 10’ - 6.5’ = 3.5ft
Estimating Lagoon Volume • Once you have calculated the average depth of sludge you can calculate the volume of sludge • estimating removal costs • sludge application planning • Use Worksheet #1 • Requires: • Lagoon/Farm steady state live weight, permanent treatment volume, berm slope, lagoon dimensions • Information can be found in farm’s Certified Waste Management Plan, contact local S&WCD for copy
When Removing Sludge • Do not remove the last two feet of sludge, if the lagoon is to remain in operation • Insure the integrity of the earthen liner • minimize sidewall erosion by agitator pumps • monitor draglines so operators are not removing soil along with sludge • divert all runoff minimize and control
Land Applying Sludge • As with other wastes, always have your lagoon sludge analyzed for its nutrient value. • Sludge samples should be taken prior to land application • A waste utilization plan is required to be developed for all fields receiving sludge applications
Land Applying Sludge • Maintain application records • IRR-1/IRR-2 or SLUR-1/SLUR2 • Apply only to growing crops, or those which will be planted or breaking dormancy within 30 days • Soil incorporating or injecting applied sludge is recommend to minimize odors & flies, and to prevent runoff
Land Applying Sludge - P Issues • Lagoon sludge has a much higher phosphorus content than lagoon liquid. • sludge should be applied to land with low phosphorus, as indicated by a soil test, and incorporated to reduce the chance of runoff • sludge applied to fields with high soil test phosphorus should be applied only at rates equal to the crop removal of phosphorus
Application Options • Irrigation • Tank Spreader • Surface broadcast • Injection • Umbilical Hose Injector • Manure Spreader
Advantages less expensive ease of operation utilize existing equipment Disadvantages requires dilute sludge & water/effluent mixture equipment erosion/wear by sludge particles aesthetics, drift and odors to prevent clogging, irrigation lines and equipment should be flushed after each day with effluent or fresh water Irrigating Sludge
Application Using Spreader Equipment • One important issue is the “trafficability” of the fields, or how easily your equipment can be operated to obtain uniform waste application without rutting the field or causing soil compaction. • Once the decision has been made to perform waste application, you must be aware of your equipment’s waste application rate. This requires the calibration of the land application equipment.
Advantages provide more transport mobility allow direct soil injection Disadvantages require more time and labor have higher operating costs require improved travel roads and proper soil trafficability soil compaction Pump and Haul Systems
Advantages provide more transport mobility allow direct soil injection requires less time and labor than tank spreaders Disadvantages requires more time and labor than irrigation higher tractor HP requirement if injecting require improved travel roads and proper soil trafficability Umbilical Hose Application Systems
Injection options Different injectors are available for tanks or umbilical hose systems • Knife injectors • Sweep injectors • “No Till” injectors
Soybean Stubble in SC, Coastal Plain. Applied at 10,000 gallons per hour. Sweep Injector No-Till Injector
Advantages reduce number of trips minimize hauling water cheaper to haul longer distances Disadvantages very difficult to dry solids or separate liquids additional handling & processing difficult to calibrate less uniform application Manure Spreader
Taking a Sludge SamplePrior to agitation - Step 1 1. Use 14 ft long 3/4” PVC 2. With gloves on, insert pipe to the bottom of the lagoon 3. Place thumb over the end of pipe forming a vacuum and slowly raise the pipe out of the lagoon 4. Lift the end of the PVC pipe over the mouth of a 5-gallon bucket
Taking a Sludge SamplePrior to agitation 5a. If completely mixing lagoon, then Use for irrigation or hose-drag injection • remove your thumb and place the entire contents of the pipe into the 5-gallon bucket • collect at least 5 samples from around the lagoon • mix samples in plastic bucket,and send sub-sample for analysis
Taking a Sludge SamplePrior to agitation 5b. If dewatering lagoon prior to agitation, then Use for tank spreader or sludge dewatering • slowly break the vacuum by remove your thumb from the end of the pipe • place only the black sludge in the 5-gallon bucket, divert supernatant back into the lagoon • collect at least 5 samples from around the lagoon • mix samples in plastic bucket,and send sub-sample for analysis
Sampling Sludge Prior to Agitation 1. If irrigating, take a lagoon core (supernatant and sludge) 2. If dewatering lagoon, sample sludge only Take at least 8 samples from around the lagoon, mix thoroughly and send sub-sample to lab
Taking a Sludge SampleDuring agitation • Draw down supernatant, if applicable • Agitate lagoon • Collect a minimum of 8 samples from around the lagoon • similar to taking lagoon sample • avoid clumps of sludge • Place samples in plastic bucket, mix, and send sub-sample for analysis
Sludge Removal Techniques • Hire a custom applicator • Agitation • Dewatering • Soil incorporation
Hiring a Custom Applicator • Applicators are available to provide almost “turn-key” sludge removal services However, most do not: • prepare waste utilization plans, or plan modifications • sample lagoon sludge prior to application • contact neighboring landowners for land availability • complete required records
Hiring a Custom Applicator • Cost • Range: 1.5¢ - 5.0¢ per gallon of liquid (1998) • Factors affecting cost • Lagoon close-out or regular sludge removal • Land availability near lagoon • Site access for agitation equipment - more of an issue for inactive lagoons • Application method • Soil injection or incorporation
Working with a Custom Applicator • Receive written estimate based on sludge volume • Contact technical specialist to prepare/modify waste utilization plan • Discuss with applicator who will complete required records and specify application rates • Inspect fields during application • Be flexible - sludge removal is not a quick and easy job
Agitation PTO powered Agitator/Pump
Lagoon Agitation - Equipment • Agitators • PTO powered mixers • No pumping capabilities • Agitator/Pumps with recirculation nozzles • PTO powered with hydraulic controls • Require additional pumps if sludge is to be irrigated • More efficient sludge mixing • Direct loading for tankers or separation equipment
Lagoon Agitation - Management • Agitators require large HP tractors (100 HP min.) • overheating • fuel use • engine wear • Monitor lagoon berm to prevent scouring of liner by recirculation nozzle • Remove floating debris from lagoon - will damage agitator (wood, bottles, turtles) • Monitor hoses, couplings and pipes for leaks and discharges
Dewatering • Option 1 • dewater the upper part of lagoon by irrigation onto nearby cropland or forageland • mix remaining sludge • pump into liquid sludge applicator • haul and spread onto cropland or forages • soil incorporate
Dewatering • Option 2 • dewater the upper part of lagoon by irrigation onto nearby cropland or forageland • dredge sludge from lagoon with dragline or sludge barge • berm an area beside lagoon to receive the sludge so that liquids can drain back into lagoon • allow sludge to dewater • haul and spread with manure spreader onto cropland or forageland • soil incorporate
Lagoon Closure • If animal production is to be terminated, the owner is responsible for obtaining and implementing a closure plan to eliminate the possibility of a pollutant discharge. • An alternative to closure may be to maintain a certified waste management plan and operate the system according to that plan even though there is no additional manure input.
Lagoon Closure - Options • “Complete” Closure • Breaching the Lagoon Berm • Conversion to a Farm Pond Closure must adhere to NRCS Standard-709 Closure of Abandoned Waste Facility