Download
1 / 9
90 likes | 92 Views
This is a presentation summarising all the key information about the use of lighting in music videos.

E N D
LIGHTING WORKSHOP WITH MATT A summary of key points and useful information BY VITALIIA CHEREPANOVA
INTRODUCTION PRESENTATION CONTENTS Media terminology This workshop was particularly useful as it was filled with important information about lighting equipment and its application as well as relevant media vocabulary. The key terms and phrases will be included in this presentation. Practice I find workshops in general very useful due to their focus on practice rather than theory. During this session, we all got an opportunity to explore various lighting equipment and obtain a vague idea of the things we could use for our music videos as well.
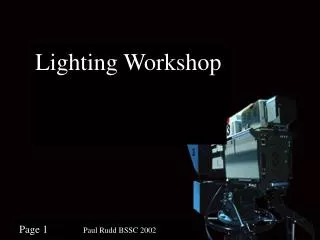
KEY KNOWLEDGE 01 02 03 Three point lighting House lights ("workers") Redhead light House lights or workers are basically the general lights in the studio. They are not particularly used for music videos, as they are not designed for footage collection (necessary to just light up the studio) Redhead light usually plays the role of the key light. Behind its "doors" (which are supposed to be opened up) there is a metal mesh (or a safety glass) inside. This is designed for safety, as the light bulbs often burst. When making a shot, the redhead light should be placed right next to the camera lense. This type of lighting is often used for interview recordings. Three redheads are used for this setup. One becomes the key light (the strongest source), the other becomes the fill light (covers up the shadows created by the key light) and the third becomes the back light (gives an edge to the object and visually separates it from the background)
Screen to see what the lighting looks like Redhead light
KEY KNOWLEDGE 05 04 "Blade runer" lighting setup "Trace" "Trace" is the semi-transparent white gauze that can be used to soften the light: it takes the edge off and blends in the majority of shadows. It can be attached to a big frame and back lit with the redhead, which expands the space and direction of the light, making it softer. We were taught that the more we adjust the exposure, the more objects in the shot are in focus. However, we still want it to look cinematic (blurry at the background), and we use lighting to do so. No key light is used, however a strong bright redhead is places behind the object (back light). Polystyrene is used to bounce that light back on the main object. After the polystyrene is placed at the front to reflect the light, we turn down the back redhead till the shot looks exposed. The artist can also use their hands to direct the light or bounce it towards their face. So overall we get a very unnatural bright edge on one side of the face of the person and a super soft and natural on the other.
KEY KNOWLEDGE 06 07 08 Fluorescent lights General advice Titan tubes Fluorescent lights are the long white light tubes with different colour gels that can be attached to them. They are more difficult to use in comparison to titan tubes, however they light up fully, while the second only light up on one of the sides of the cylinder (in one direction). When using titan tubes, there is no need to insert gels, as various colours can be chosen on the panel. You just need to turn it on, press plus to get the "static colour", then press enter and pick any colour you like (there are hundreds of them). One of the filming tips is that the shot can be exposed with shutter: if it is turned down, the shot looks edgy and cold. Another tip for the shoot day: if something is wrong (i.e. the singer has lipstick on their teeth), don't stop the take, finish it and then another one (otherwise the artist might feel insecure and awkward).
OVERALL CONCLUDING ON ALL THE INFORMATION This workshop gave us the necessary knowldege within the use fo lighting in music videos, which we will undoubtedly apply during our shoot day as well.