Download
1 / 17
170 likes | 323 Views
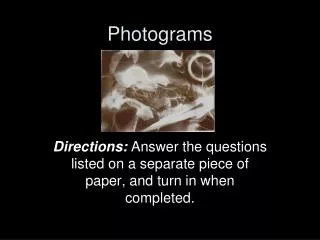
Photograms. Photography without a camera. History. Some of the first photographs taken were photograms . Revived as an artform by the Surrealist photography Man Ray. Used today as an artistic form of photography. Anna Atkins. Anna Atkins. Man Ray. Man Ray. How to make a Photogram.

E N D
Photograms Photography without a camera
History • Some of the first photographs taken were photograms. • Revived as an artform by the Surrealist photography Man Ray. • Used today as an artistic form of photography
How to make a Photogram • Adjust the enlarger to make sure the size will cover your paper. • Place your paper shiny side up under the enlarger. • Expose the photogram for a few seconds. • Develop the print.
How to make a Photogram • Paper cut-outs • Tracing paper • Small object • Organic material • Opaque object • Transparent objects
Processing your Print • Place the print in the developer tray for 2 min.Agitate by gently rocking the tray.Remove with print tongs and drain the developer off the print. • Place in the Stop Bath for 30 sec. Agitate gently, drain and remove with print tongs. • Place in Fixer for 2 minutes. Agitate gently, remove and place in water bath
Processing your Print • Gently run the water bath and wash the print for 2 minutes. • Hang your print up to dry a peg on one corner.
Processing Stuff ups • Don’t get the print tongs mixed up. The Developer will get contaminated with fixer and stopbath and wont work properly. • Drain the developer off the print. Other wise the developer level will go down and it ends up in the stopbath. • Don’t flick the wet print to remove water. It gets water on the floor or other peoples work.
What happens next…… After creating your photogram in the darkroom. • In Photoshop, scan the photogram using the flat bed scanner. • Make a copy and digitally manipulate the photogram by using the filters or effects, colourising using the brush or using the paint bucket tool. • Save final as JPG ready for digital presentation display.
Marking Criteria • Exposure of the print • Processing of the print • Composition and Design • Personal and Imaginative Approach • Finished quality of the display