1 / 5
0 likes | 11 Views
Wavlink Extender Setup is the process of installing and configuring a Wavlink Wi-Fi range extender to enhance the wireless coverage of your existing home or office network.

E N D
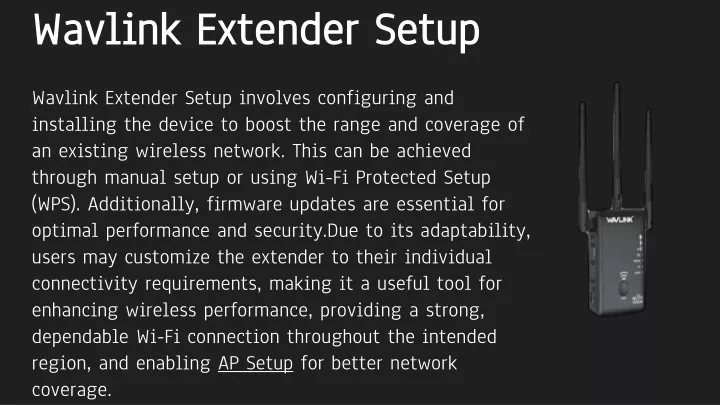
Wavlink Extender Setup Wavlink Extender Setup involves configuring and installing the device to boost the range and coverage of an existing wireless network. This can be achieved through manual setup or using Wi-Fi Protected Setup (WPS). Additionally, firmware updates are essential for optimal performance and security.Due to its adaptability, users may customize the extender to their individual connectivity requirements, making it a useful tool for enhancing wireless performance, providing a strong, dependable Wi-Fi connection throughout the intended region, and enabling AP Setup for better network coverage.
How do I Setup Wavlink Extender Manually ? • Plug the Wavlink extender into a power outlet and wait for it to power on. • Connect your computer or phone to the extender's Wi-Fi using the credentials found in the extender's manual. • Open a web browser and enter the extender's default IP address 192.168.10.1 • Log in using the provided username and password from the manual. • The extender's web page will guide you through the setup process. Follow the instructions. • Choose the Wi-Fi network you want to extend during the setup and enter the network password if prompted. • Customize the network name or password if needed, or keep the defaults. • Complete the Wavlink Extender Setup and allow the extender to connect to the Wi-Fi network. • Place the extender in a location where it can effectively extend Wi-Fi coverage. • Reconnect your devices to the extended Wi-Fi using the new settings if you made any changes.
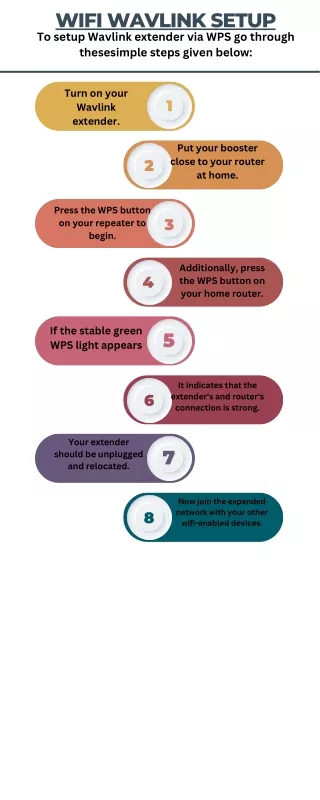
WPS Setup for Wavlink Extender • Plug the Wavlink extender into a power outlet and ensure it's powered on. • Locate the WPS button on the extender (typically labeled as "WPS"). • Press and hold the WPS button on the extender until the WPS LED starts blinking. • Within a couple of minutes, press the WPS button on your Wi-Fi router to enable WPS mode. • Once the WPS LED on the extender remains steady, it indicates a successful connection. • Use a Wi-Fi-enabled device to connect to the extended Wi-Fi network (usually indicated by "_EXT" added to the original network name). • Access the extender's settings via a web browser by entering the default IP address (192.168.10.1).
Firmware Update for Wavlink Extender • Visit the official Wavlink website or the product's support page to find and download the latest firmware for your specific extender model. • Connect your computer or device to the extender's Wi-Fi network. • Access the extender's settings via a web browser using the extender's IP address. • Navigate to the firmware update section within the settings. • Upload the downloaded firmware file to the extender. • Follow on-screen instructions to start the firmware update. The extender will reboot during this process. • Allow the extender to complete the firmware update, which may take a few minutes, and it may reboot again.
Wavlink Extender Reset Process • Locate the reset button on the extender (usually a small hole labeled "Reset"). • Use a paperclip or similar tool to press and hold the reset button for about 10-15 seconds. • Release the button once you see the lights on the extender flash or reset. • The extender will be reset to its factory settings.