Download
1 / 16
160 likes | 299 Views
INVENTORY TRANSFER. RLM System. What is Inventory Transfer?. The Inventory Transfer program can move units or prepacks between styles and sizes, between warehouses and divisions or between combinations of factors

E N D
INVENTORY TRANSFER RLM System
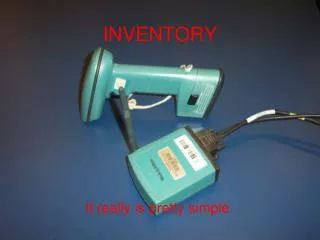
What is Inventory Transfer? • The Inventory Transfer program can move units or prepacks between styles and sizes, between warehouses and divisions or between combinations of factors • Note that to change sizes and styles the units in question must be in a Return or Repack location. Moving units to those locations should be done with the RF guns. (Skip to the Main Menu)
Glossary of Training Terms • The following terms will be used throughout this training program: • Field: A box on the screen into which you enter information • Value: The information (data) being entered in the field. Example: Division number, FGPO number • Icon: An image you may click to perform a function such as select, submit or exit • (Single-)Click: Also “Select.” Hitting the left mouse button once. This will activate an icon or select a row in a list of values • Double-click: Hitting the left mouse button twice o the same part of the screen. Used only to select and return a value from a list.
Sign On Enter your User ID and Password here Hit the Enter key to proceed Note: User ID and Password are initially assigned by MIS. You will be prompted to change it the first time you login. The password field IS case-sensitive.
Welcome Press the Enter key
RLM Main Menu Enter the company number here Type the line number from your menu for Cut & Sold
Cut & Sold Menu Type “2” for Maintenance and press Enter
Inventory Maintenance Menu Type “5” for Finished Goods Stock Transfers and press Enter
Inventory Transfer Main Menu Type the number of the transfer type (e.g., 04) and press Enter
Enter Reference Number and Reason Code Enter the division number Enter a reference number Enter a reason code (F21 to select)
Select Reason Code If you pressed F21 to select a reason code, this window appears: Type “S” on a line to select that reason code Use the PgDn key to scroll down the list Press F2 once a line has been selected to return the value
Select FROM and TO style(s) Type the plant number Type the FROM and TO season and full style numbers. F21 to select from the lists Press Enter when finished
Select Return or Repack Type 1 for Repack, 2 for Return and press Enter
Setup FROM-TO transfer Note: If the cursor does not appear in the “T” field either the location is incorrect or the style has no units available for transfer. You will not be able to enter anything on this screen until the units are in Repack or Return Update the quantity to be changed if less than the available Type “T” here Type the Ins/PP value Press Enter when finished
Assign Units to New Size Type the new size here (below the original size). Note that the alignment of the number in the field must match the alignment of the size in the TO scale below Note: Each size scale must be done separately. Multiple sizes in the same scale may be updated at once, if inventory exists in the FROM size. 14 Update the size bucket in the FROM scale with the quantity to be changed Press Enter when finished
Transfer Complete! The message “Transferred” appears in the TO style to confirm the completed transfer Press F2 or F3 to go back or exit, or F4 to return to the Transfer Options