Download
1 / 44
720 likes | 1.72k Views
Basic Principles of Ultrasound. Objectives. Define Scope of Practice Understand Principals Understand Physics Understand Transducers Understand Terminology Understand Artifacts. Scope of Practice. eFAST in Trauma Abdomen Chest. Musculoskeletal/Soft tissue Fracture/dislocations.

E N D
Objectives • Define Scope of Practice • Understand Principals • Understand Physics • Understand Transducers • Understand Terminology • Understand Artifacts
Scope of Practice • eFAST in Trauma • Abdomen • Chest • Musculoskeletal/Soft tissue • Fracture/dislocations • Vascular • Access • Blood flow/DVT • Ocular • FB/retinal detachment • Retrobulbar hemorrhage • Genitourinary • Bladder • Ectopic pregnancy • scrotal pain & swelling
3-Tiers • Basic • eFAST, MSK, Skin/Soft Tissue, & Vascular Access • Intermediate • Ocular, Renal, Regional Anesthesia, & DVT • Advanced • OB/Gyn, Testicular, Aorta (AAA), Cardiac (Critical Care), & Pericardiocentesis
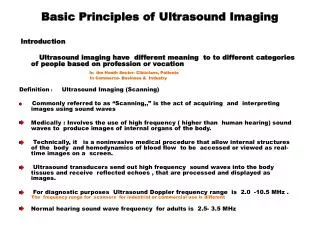
Basic Principles • Ultrasound machine and probes create sound waves • Generate waves of vibration from the probe that travel through the tissue of the patient and return to the probe • Received by the machine and interpreted to provide images on screen • Different tissue densities affect the ultrasound beam
Principles • The intensity of the returning echo determines the brightness of the image on the screen • Strong signals = white (hyperechoic) images • Weak signals or lack of signal all together = black (hypoechoic) images • Tissue densities determine the many shades of gray in between
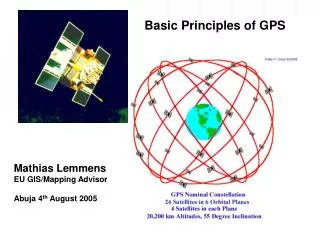
Physics • Diagnostic ultrasound uses sound waves in the frequency range 2-20 MHz • Key properties of sound waves: • Frequency is number of times per second the sound wave is repeated • Wavelength is the distance traveled in 1 cycle • Amplitude is distance between peak and trough
Physics – Parallel Concepts • Conceptually, ultrasound is similar to a laser range finder. • Sound waves sent from the transducer bounce off the object and return. • The ultrasound machine calculates distance to the object from the round-trip time, and creates a grey scale image on the screen.
What does it mean to me? • Lower frequencies image deep structures, but sacrifice resolution. • Higher frequencies provide better resolution, but sacrifice depth. LOWER FREQUENCY Longer wavelength HIGHER FREQUENCY Shorter wavelength
Transducer Function • Ultrasound waves are generated by an electric current -> sent to the crystals -> excites the crystals which vibrate -> creating the resulting wave in the tissue • Beam is ~ 1mm
Transducer Characteristics • The workhorse of the US machine • Sends out sound waves 1% of the time • Listens for echoes 99% of the time • Frequencies are fixed or adjustable • “Footprint” is what touches the patient
Transducer Use • Hold the probe lightly in your hand • Like a pencil • Small movements equal big changes
Transducer Use • Probe marker facing the patient’s right or head • Exceptions: cardiac & procedures
Probe indicator – leading edge Generally to the patient’s head or right side.
Transducer Choices • Curvilinear Array (Curved Probe) • Freq range (5-2 MHz), 30cm depth • Abdomen, FAST, AAA • Linear Sequential Array (Linear Probe) • Freq range (10-5 MHz), 9cm depth • Vascular access, pneumothorax, regional anesthesia • Phased Array (Sector or Cardiac Probe) • Freq range (5-1 MHz), 35cm depth • Cardiac, eFAST, AAA
Transducer directions • Rotating • Fanning/Tilting • Rocking • Sliding • Compression
Transducer directions • Sliding
Transducer directions • Fanning/Tilting • Compression
Transducer directions • Rotation • Rocking
Scanning Planes Sagittal Axial
Screen Orientation Near Field Receding Edge Leading Edge Far Field
Image Quality – The 5 P’s • Use Plenty of Gel • Parallel to the table/stretcher • Perpendicular to structure • Pressure (right amount) • Scan in multiple Planes
Ultrasound transmission gel USE LOTS OF IT!!!
Image Quality - Machine • Depth: Place the object of interest in the center of the screen • Machine will autofocus to the center of the screen giving it the best resolution • Right side markings show depth in cm • Gain: brightness of the image • Can be adjusted for each scan • Be careful not to use too much or too little gain • Autogain
Depth Too Little Too Much
Gain Too Little Too Much
Image Resolution • Spatial Resolution • The ability to distinguish two separate objects close together • Temporal Resolution • The ability to accurately locate structures or events at a specific point in time • Can be improved by decreasing depth & narrowing the sector angle
Spatial Resolution Axial Lateral The ability to distinguish two objects that are laying side-by-side Dependent upon the beam width Two objects cannot be distinguished if they are separated by less than the beam width High freq = narrow width Low freq = wider width • The ability to differentiate two separate objects in the axial plane • Determined by the pulse length • High freq = short length & better axial resolution • Low freq = long length and poor axial resolution
Scanning Modes • B-Mode: • Nearly all of your scans will begin and stay in this mode • Organs appear differently based on their tissue densities
Scanning Modes • M-Mode: • Motion mode provides a reference line on screen • Shows motion towards and away from probe at any depth along that line • Used for detecting fetal heartbeatsand pneumothoracies
Scanning Modes Spectral Doppler Color Flow Doppler Blue – Away : Red – Towards Power Doppler
Attenuation • As the ultrasound beam travels through the body, it looses strength & returns less signal • Certain tissue densities cause this effect: • Slow: Bone, Diaphragm, Pericardium & air = bright (Hyperechoic) images • Moderate: Muscle, Liver, Kidney = gray (Isoechoic) images • Faster: Blood, Ascites, Urine = Darker (Hypoechoic) images
Artifacts • Posterior Enhancement • Reverberation • Edge Artifact • Shadowing • Mirror Image • Comet Tail
Posterior Enhancement Hyperechoic streaking distal to interface of anechoic structure Not a true artifact
Reverberation Bouncing of signal from two reflective surfaces Often seen as a “needle artifact” during procedural ultrasound Called “Ring Down artifact” when seen with air in the bowel or soft tissue
Edge Artifact A distal shadow from the edge of spherical fluid filled structures Scan at different angles to reduce the artifact
Shadowing Anechoic streaking distal to surface with high reflectivity (behaves like light) Stones Bones
Mirror Image Appearance of same image on both sides of highly reflective surface Misinterpretation by machine of signal timing puts image where it thinks it “should be” Often seen on cardiac and around diaphragm
Comet Tail Pathognomonic for excluding pneumothorax