Download
1 / 32
340 likes | 510 Views
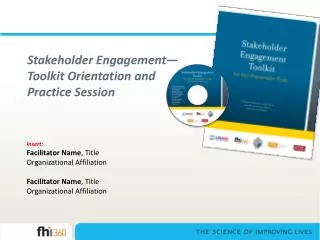
The Orientation Toolkit for CARE Offices. The Orientation Toolkit for CARE Offices provides you with tools and resources to create a successful orientation program in your office. This toolkit contains: Instructions for implementing orientation in your office

E N D
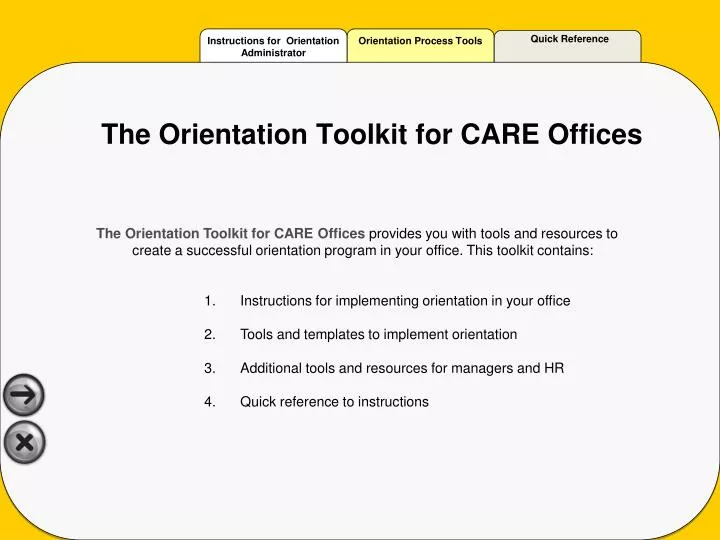
The Orientation Toolkit for CARE Offices • The Orientation Toolkit for CARE Offices provides you with tools and resources to create a successful orientation program in your office. This toolkit contains: • Instructions for implementing orientation in your office • Tools and templates to implement orientation • Additional tools and resources for managers and HR • Quick reference to instructions
Before You Start Click here to print your Administrator Checklist Click here and read first! Click here to print Orientation Implementation Instructions Click here for instructions on how to copy the toolkit to your computer
As the Orientation Administrator, you will: Customize the toolkit materials to meet the needs of your office. Implement orientation process and procedures for your office. Make tools and resources available for managers. Ensure the office follows the orientation guidelines. 1 2 3 4
Implementation Instructions for the Orientation Administrator Step 1 Understand how the Orientation Toolkit works Step 3 Customize the Office Reference Guide template and the Face-to-Face Orientation template Step 2 Define the orientation process in your office and determine how you will implement the process Step 4 Customize the content in the Welcome Package Tools and Resources to fit the needs of your office Step 5 Add documents to the Welcome Package Step 6 Distribute Welcome Package to New Hires For Printable Version of the Instructions Click here
Step 1:Understand how the Orientation Toolkit Worksa.Toolkit Materials Make sure to archive an original version of the toolkit on a CD or on your computer in case you ever need to reference the materials. You will then want to keep a separate copy of this toolkit on your computer or on a USB flashdrive to customize for your office.
Step 1:Understand how the Orientation Toolkit worksb.What is the CARE Welcome Package? The CARE Welcome Package offers tools and resources for the new hire and can be tailored to meet the needs of each Country Office. A master copy of the package exists in the Welcome_Package folder in this toolkit.When you open the Welcome_Package folder, you will see the Microsoft PowerPoint file, CARE_Welcome_Package.pps, the linked Microsoft Word files, and the system files that are used to control the how these files work on a CD. When the files in this folder are copied to a CD-R the PowerPoint file will play automatically when the disc is placed in a CD drive. If the computer has autorun disabled and the PowerPoint file does not open, double-click CARE_Welcome_Package.pps. When you open the Welcome_Package folder you will see: CARE_Welcome_Package. pps This file is what the new hire will open to access the tools and resources. It is a PowerPoint presentation that has been saved as a “presentation show”. You can find both the show version and the original presentation in the Welcome_Package folder. Only the pps version should be copied to the student’s disc or USB Flash Drive. 2. Microsoft Word and PowerPoint Files The CARE_Welcome_Package.pps file has links to documents in the Welcome_Package folder. If you choose to deliver the Welcome Package in an electronic format (by USB or CD-R) then you will use the PowerPoint file and all the other files in the Welcome_Package folder. Instructions are provided in the Quick Reference section to copy the files to a CD or USB Flash Drive. If you prefer to deliver the orientation in a hard copy format, then you will only need to print the Word files in this folder.
Step 1:Understand how the Orientation Toolkit works c.The CARE Welcome Package When a new hire opens the Welcome Package, there will be two different selections for the new hire to choose from: Your Job: Orientation and About CARE: Orientation. Each section contains information for the new hire to use during the orientation process. Your Job: Orientation About CARE: Orientation
Step 1:Understand how the Orientation Toolkit works d.Your Job: Orientation • When the Tools for the New Hire tab is clicked, a screen opens with links to specific tools for the new hires to use. These tools include: • New Hire Checklist • Tips on a successful orientation • Manager Meeting Guide • Office Resource Guide • Orientation Review • Required Courses Quiz • Orientation Evaluation
Step 1:Understand how the Orientation Toolkit works e.About CARE: Orientation • When the Information about CARE tab is clicked, a screen opens with links to specific resources for the new hire to read. These resources include: • History of CARE • CARE’s Work Today • CARE’s Program Approach • CARE Strategic Plan • CARE USA Structure and Funding • Employee Expectations • Resources and Links You have completed Step 1. Click here to return to the instructions.
Step 2:Define the orientation process in your office and determine how you will implement the process Questions to Ask: What will your orientation process look like? Each office will do orientation differently and it is important that you define your process. When will you offer face-to-face orientation? How often will you offer it? When will the new hire receive the orientation materials? A suggested process can be found in the Orientation Process tools. How should the Welcome Package be delivered? Think about your audience. Will your new hires have access to a computer or printer? Or, will your new hires prefer to have orientation in the form of a paper guide? It is important to think about this before implementing. The CARE Welcome Package is designed to allow you to offer a copy on a CD Rom, USB or print out materials in a hard copy format. Who will be involved? The country director, managers, HR, and colleagues of the new hire all have a part in welcoming new employees. When planning your orientation process make sure all key players understand what you are doing and what role they will play. You can use the Orientation Overview to help clarify roles and responsibilities. You have completed Step 2. Click here to return to the instructions.
Step 3:Customize the Office Reference Guide template and the Face-to-Face Orientation templatea. How to Customize the CO Reference Guide Go to the Welcome_Package folder. Open the Office Reference Guide, 4_Office_Ref_Temp.doc (Do NOT move this document from the folder). Follow instructions to complete the template. Complete the template and delete the template instructions on the first page. Save the document (Do NOT change the name of the document or you will break the hyperlink to the Welcome Package).
Step 3:Customize the Office Reference Guide template and the Face-to-Face Orientation templateb.How to Customize the Face-to-Face Orientation PowerPoint Open the Face-to-Face Orientation Template (Orient_Temp.ppt) in the Administrator folder Follow instructions to complete the template Complete the template and rename the document (i.e. CARE Ethiopia Orientation Presentation) Save document and use when giving face-to-face or one-on-one orientation to new hires Update as needed You have completed Step 3. Click here to return to the instructions.
Step 4:Customize the content in the Welcome Package Tools and Resources to fit the needs of your office a.All materials in the toolkit can be customize to your office. Below are all the documents in the Welcome Package. The items highlighted in bold are the most likely items that need to be customized for your office. • Tools for the New Hire • New Hire Checklist • Tips on a successful orientation • First Meeting with Your Manager • Country Office Resource Guide • Orientation Review • Required Courses Quiz • Orientation Evaluation • Information About CARE • History of CARE • CARE’s Work Today • CARE USA • CARE’s Program Approach • CARE’s Structure and Funding • Employee Expectations • Resources and Links
Step 4: Customize the content in the Welcome Package Toolsand Resources to fit the needs of your officeb.How to Customize the Document Contents in the Welcome Package Go to the Welcome_Package folder. Open the document you wish to customize. Make the changes. Save document. WARNING: Do NOT move or change the name of the document or your hyperlink will break. You have completed Step 4. Click here to return to the instructions.
Step 5: Add documents to the Welcome Package You can always add more tools to your Welcome Package if needed. If you have office policies, organizational charts, or other materials, you may want to add them. Go to the New Hire Documents Folder. Open the folder labeled “Office Specific Documents” Place the document you would like to add in the “Office Specific Documents” Close the folder. The Welcome Package is linked to the Office Specific Folder. When a new hire clicks on the hyperlink, it will automatically open this folder. You have completed Step 5. Click here to return to the instructions.
Step 6: Distribute Welcome Package to New Hiresa.How to copy Welcome Package to a CD ROM Place blank CD ROM in computer Go to the Welcome_Package Folder Open the Welcome_Package Folder and select all files Select Copy Go to My Computer Click on CD and open the blank CD When the CD opens, right click and select Paste Once the files appear, select “write these files to CD” If you prefer you can click and drag the files in the Welcome_Package Folder to the CD drive and then select “write these files to CD”
Plug USB Flash Drive into USB Port on your computer Select my computer and open the USB drive Go to the Welcome_Package folder Open the folder and select all the files. Right click on the files and select Copy (or you can drag and drop to the USB drive) Right-click on the USB drive and select paste Safely remove USB Port by properly ejecting it from the computer before physically removing the USB port Plug in USB port and open package to make sure all links are working Give USB Flash Drive to New Hire Step 6: Distribute Welcome Package to New Hires b. How to copy Welcome Package to a USB Flash Drive
Print out all documents in the New Hire Folder Print out Title Page/Table of Contents found in the Administrator Documents Place printed documents in order of table of contents (you will want to put the Office Reference Guide last) Place Title Page and Table of Contents on top of the materials You can also customize the table of contents based on any changes you make to the Welcome Package(if you want to include page numbers you will need to combine all New Hire Documents into one document and insert page numbers in the Table of Contents) Step 6: Distribute Welcome Package to New Hiresc. How to Print the Materials You have completed Step 6. Click here to return to the instructions.
You have now completed all steps in the “Instructions for Orientation Administrators” To return to the beginning of the instructions click here
Orientation Process Tools Tools for the Orientation Administrator Tools for the Manager Tools for the HR Representative
Quick Reference How to Reset Hyperlinks How to Customize Content How to Add Documents How to Customize Templates How to Transfer the Welcome Package to CD How to Print Materials
How to Customize the Documents in the Welcome Package Go to the Welcome_Package folder. Open the document you wish to customize. Make the changes. Save document. WARNING: Do NOT move or change the name of the document or your hyperlink will break.
Add documents to the Welcome Package You can always add more tools to your Welcome Package if needed. If you have office policies, organizational charts, or other materials, you may want to add them. Go to the Welcome_Package folder. Open the folder labeled “Office Specific Documents” Place the document you would like to add into the “Office Specific Documents” folder Close the folder. The Welcome Package includes a link to the Office Specific Folder. When a new hire clicks on the hyperlink, it will automatically open this folder.
How to copy Welcome Package to a CD-R Place blank CD-R in computer Go to the Welcome_Package Folder on your computer Open the Welcome_Package Folder and select all files Select Copy Go to My Computer Click on CD drive and open the blank CD When the CD opens, right click and select Paste Once the files appear, select “write these files to CD” If you prefer you can click and drag the files in the Welcome Package Folder to the CD and then select “write these files to CD”
How to Customize the CO Reference Guide Go to the Welcome_Package folder on your computer Open the Office Reference Guide, 4_Office_Ref_Temp.doc (Do NOT move this document from the folder). Follow instructions to complete the template. Complete the template and delete the template instructions on the first page. Save the document (Do NOT change the name of the document or you will break the hyperlink to the Welcome Package).
How to Customize the Face-to-Face Orientation PowerPoint Open the Face-to-Face Orientation Template, Orient_Temp.ppt, in the Administrator folder Follow instructions to complete the template Complete the template and rename the document (i.e. CARE Ethiopia Orientation Presentation) Save document and use when giving face-to-face or one-on-one orientation to new hires Update as needed
Print out all documents in the New Hire Folder Print out Title Page/Table of Contents found in the Administrator folder Place printed documents in same order as table of contents (you will want to put the Office Reference Guide last) Place Title Page and Table of Contents on top of the materials You can also customize the table of contents based on any changesyou make to the Welcome Package(if you want to include page numbers you will need to combine all New Hire Documents into one document and insert page numbers in the Table of Contents) How to Print the Materials
Select the text that you want to display as the hyperlink in the CARE Welcome package Go to the Insert tab and click Hyperlink Under “Link to”, click Existing File, and then choose the specific document you want to link to. When you are finished adding your hyperlinks, select File and click Save As Choose Save As PowerPoint Show When prompted to replace existing PowerPoint show choose YES Test the presentation to make sure hyperlinks work How to Reset Hyperlinks If a document is moved or renamed, then the hyperlink in the CARE package will break and you will need to reset the hyperlink before giving the Welcome Package to a New Hire. Follow these instructions to reset your hyperlinks.
Copy the toolkit to your computer • Create a new folder on your computer • Select all the contents of the toolkit • Copy all the contents of the toolkit • Open the new folder and paste ALL toolkit contents into the new folder