Download
1 / 19
0 likes | 5 Views
u0e04u0e39u0e48u0e21u0e37u0e2d GX 120, 160,200 u0e40u0e1eu0e37u0e48u0e2du0e40u0e1bu0e47u0e19u0e1bu0e23u0e30u0e42u0e22u0e0au0e19u0e4cu0e2au0e33u0e2bu0e23u0e31u0e1au0e1cu0e39u0e49u0e17u0e35u0e48u0e2au0e19u0e43u0e08

E N D
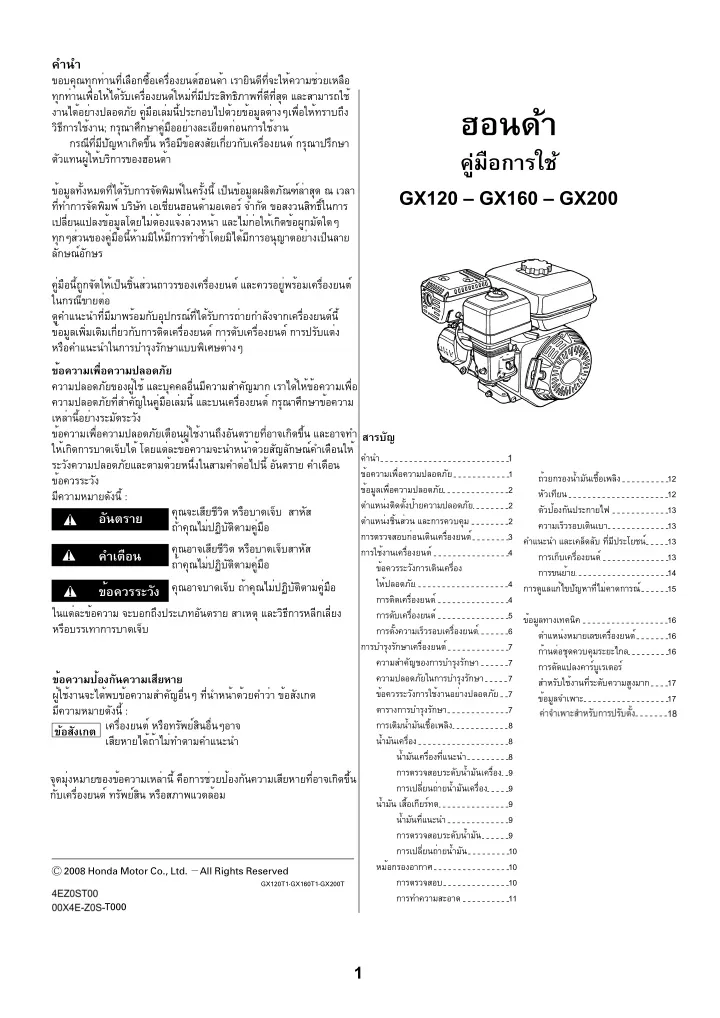
คำนำ ขอบคุณทุกท่านที่เลือกซื้อเครื่องยนต์ฮอนด้าเรายินดีที่จะให้ความช่วยเหลือ INTRODUCTION ทุกท่านเพื่อให้ได้รับเครื่องยนต์ใหม่ที่มีประสิทธิภาพที่ดีที่สุดและสามารถใช้ งานได้อย่างปลอดภัยคู่มือเล่มนี้ประกอบไปด้วยข้อมูลต่างๆเพื่อให้ทราบถึง วิธีการใช้งาน; กรุณาศึกษาคู่มืออย่างละเอียดก่อนการใช้งาน กรณีที่มีปัญหาเกิดขึ้นหรือมีข้อสงสัยเกี่ยวกับเครื่องยนต์กรุณาปรึกษา ตัวแทนผู้ให้บริการของฮอนด้า Thank you for purchasing a Honda engine. We want to help you to get the best results from your new engine and to operate it safely. This manual contains information on how to do that; please read it carefully before operating the engine. If a problem should arise, or if you have any questions about your engine, consult an authorized Honda servicing dealer. ข้อมูลทั้งหมดที่ได้รับการจัดพิมพ์ในครั้งนี้เป็นข้อมูลผลิตภัณฑ์ล่าสุดณเวลา ที่ทำการจัดพิมพ์บริษัทเอเชี่ยนฮอนด้ามอเตอร์จำกัดขอสงวนสิทธิ์ในการ เปลี่ยนแปลงข้อมูลโดยไม่ต้องแจ้งล่วงหน้าและไม่ก่อให้เกิดข้อผูกมัดใดๆ ทุกๆส่วนของคู่มือนี้ห้ามมิให้มีการทำซ้ำโดยมิได้มีการอนุญาตอย่างเป็นลาย ลักษณ์อักษร OWNER’S MANUAL All information in this publication is based on the latest product information available at the time of printing. Honda Motor Co., Ltd. reserves the right to make changes at any time without notice and without incurring any obligation. No part of this publication may be reproduced without written permission. GX120 · GX160 · GX200 This manual should be considered a permanent part of the engine and should remain with the engine if resold. คู่มือนี้ถูกจัดให้เป็นชิ้นส่วนถาวรของเครื่องยนต์และควรอยู่พร้อมเครื่องยนต์ ในกรณีขายต่อ ดูคำแนะนำที่มีมาพร้อมกับอุปกรณ์ที่ได้รับการถ่ายกำลังจากเครื่องยนต์นี้ ข้อมูลเพิ่มเติมเกี่ยวกับการติดเครื่องยนต์การดับเครื่องยนต์การปรับแต่ง หรือคำแนะนำในการบำรุงรักษาแบบพิเศษต่างๆ Review the instructions provided with the equipment powered by this engine for any additional information regarding engine startup, shutdown, operation, adjustments or any special maintenance instructions. SAFETY MESSAGES ข้อความเพื่อความปลอดภัย ความปลอดภัยของผู้ใช้และบุคคลอื่นมีความสำคัญมากเราได้ให้ข้อความเพื่อ ความปลอดภัยที่สำคัญในคู่มือเล่มนี้และบนเครื่องยนต์กรุณาศึกษาข้อความ เหล่านี้อย่างระมัดระวัง ข้อความเพื่อความปลอดภัยเตือนผู้ใช้งานถึงอันตรายที่อาจเกิดขึ้นและอาจทำ ให้เกิดการบาดเจ็บได้โดยแต่ละข้อความจะนำหน้าด้วยสัญลักษณ์คำเตือนให้ ระวังความปลอดภัยและตามด้วยหนึ่งในสามคำต่อไปนี้อันตรายคำเตือน ข้อควรระวัง มีความหมายดังนี้ : คุณจะเสียชีวิตหรือบาดเจ็บสาหัส ถ้าคุณไม่ปฏิบัติตามคู่มือ คุณอาจเสียชีวิตหรือบาดเจ็บสาหัส ถ้าคุณไม่ปฏิบัติตามคู่มือ คุณอาจบาดเจ็บถ้าคุณไม่ปฏิบัติตามคู่มือ ข้อควรระวัง Your safety and the safety of others are very important. We have provided important safety messages in this manual and on the engine. Please read these messages carefully. The illustration may vary according to the type. สารบัญ คำนำ 1 A safety message alerts you to potential hazards that could hurt you or others. Each safety message is preceded by a safety alert symbol and one of three words, DANGER, WARNING, or CAUTION. CONTENTS ข้อความเพื่อความปลอดภัย ข้อมูลเพื่อความปลอดภัย ตำแหน่งติดตั้งป้ายความปลอดภัย ตำแหน่งชิ้นส่วนและการควบคุม การตรวจสอบก่อนเดินเครื่องยนต์ การใช้งานเครื่องยนต์ ข้อควรระวังการเดินเครื่อง ให้ปลอดภัย การติดเครื่องยนต์ การดับเครื่องยนต์ การตั้งความเร็วรอบเครื่องยนต์ การบำรุงรักษาเครื่องยนต์ ความสำคัญของการบำรุงรักษา ความปลอดภัยในการบำรุงรักษา ข้อควรระวังการใช้งานอย่างปลอดภัย 7 ตารางการบำรุงรักษา การเติมน้ำมันเชื้อเพลิง น้ำมันเครื่อง น้ำมันเครื่องที่แนะนำ การตรวจสอบระดับน้ำมันเครื่อง 9 การเปลี่ยนถ่ายน้ำมันเครื่อง น้ำมันเสื้อเกียร์ทด น้ำมันที่แนะนำ การตรวจสอบระดับน้ำมัน การเปลี่ยนถ่ายน้ำมัน หม้อกรองอากาศ การตรวจสอบ การทำความสะอาด 1 2 2 2 3 4 คำแนะนำและเคล็ดลับที่มีประโยชน์ การเก็บเครื่องยนต์ การขนย้าย การดูแลแก้ไขปัญหาที่ไม่คาดการณ์ ข้อมูลทางเทคนิค ตำแหน่งหมายเลขเครื่องยนต์ ก้านต่อชุดควบคุมระยะไกล การดัดแปลงคาร์บูเรเตอร์ สำหรับใช้งานที่ระดับความสูงมาก ข้อมูลจำเพาะ ถ้วยกรองน้ำมันเชื้อเพลิง หัวเทียน ตัวป้องกันประกายไฟ ความเร็วรอบเดินเบา 12 12 13 13 13 13 14 15 SEDIMENT CUP SPARK PLUG SPARK ARRESTER IDLE SPEED HELPFUL TIPS & SUGGESTIONS STORING YOUR ENGINE .13 TRANSPORTING TAKING CARE OF UNEXPECTED PROBLEMS FUSE REPLACEMENT TECHNICAL INFORMATION .16 Serial Number Location Battery Connections for Electric Starter Remote Control Linkage Carburetor Modifications for High Altitude Operation Specifications Wiring Diagrams .................. ...................... ............. ......................... .12 .12 .13 .13 These signal words mean: อันตราย INTRODUCTION SAFETY MESSAGES SAFETY INFORMATION SAFETY LABEL LOCATION COMPONENT & CONTROL ................................ LOCATION ................................ FEATURES BEFORE OPERATION .................................... CHECKS .............................. OPERATION SAFE OPERATING PRECAUTIONS STARTING THE ENGINE STOPPING THE ENGINE SETTING ENGINE SPEED SERVICING YOUR ENGINE THE IMPORTANCE OF MAINTENANCE MAINTENANCE SAFETY SAFETY PRECAUTIONS MAINTENANCE ............................ SCHEDULE ........................... REFUELING ........................... ENGINE OIL Recommended Oil Oil Level Check Oil Change REDUCTION CASE OIL Recommended Oil Oil Level Check Oil Change AIR CLEANER ........................ Inspection .......................... Cleaning ....................... ................ .1 .1 .2 .2 You WILL be KILLED or SERIOUSLY HURT if you don’t follow instructions. .......... ..... You CAN be KILLED or SERIOUSLY HURT if you don’t follow instructions. คำเตือน ...................... .13 .2 .3 ... 4 4 5 6 7 7 7 ................ .14 You CAN be HURT if you don’t follow instructions. .3 .4 .... .15 .15 ในแต่ละข้อความจะบอกถึงประเภทอันตรายสาเหตุและวิธีการหลีกเลี่ยง 16 16 16 ........ Each message tells you what the hazard is, what can happen, and what you can do to avoid or reduce injury. หรือบรรเทาการบาดเจ็บ .. ..................... .4 .4 .5 .6 .7 ..... .16 ...... ...... ..... ..... DAMAGE PREVENTION MESSAGES .................... .16 .16 ข้อความป้องกันความเสียหาย ..... You will also see other important messages that are preceded by the word NOTICE. ผู้ใช้งานจะได้พบข้อความสำคัญอื่นๆที่นำหน้าด้วยคำว่าข้อสังเกต มีความหมายดังนี้ : ข้อสังเกต 17 17 ..... .17 .17 .18 .................... .7 .7 .7 7 8 8 8 This word means: ..................... ................ ...... ....... เครื่องยนต์หรือทรัพย์สินอื่นๆอาจ Your engine or other property can be damaged if you don’t follow instructions. เสียหายได้ถ้าไม่ทำตามคำแนะนำ .7 .8 .8 .8 .9 .9 .9 .9 .9 The purpose of these messages is to help prevent damage to your engine, other property, or the environment. จุดมุ่งหมายของข้อความเหล่านี้คือการช่วยป้องกันความเสียหายที่อาจเกิดขึ้น กับเครื่องยนต์ทรัพย์สินหรือสภาพแวดล้อม 9 9 9 9 10 10 10 11 ............ .................. ......................... ......... ............ .................. ....................... ...................... .10 .10 .10 .11 2008 Honda Motor Co., Ltd. All Rights Reserved - GX120T1·GX160T1·GX200T 42Z0ST00 00X42-Z0S-T000 1 1
COMPONENT & CONTROL LOCATIONS ??????????????????????????? ????????????? ????????????????????? ??????????????????????? ???????? SAFETY INFORMATION ?????????????????????? • ???????????????????????????????????????? ?????????????????? ??????????????????????????????????????? ???????????????????????? ??????????????????????????????????????????????????????? • ????????????????????????????????? ?????????????????????????????????? ????????????????? • ??????????????????????????????????????????????????? ??????? ??????????????????????????????????????????? ??????????????? • ?????????????????????? ??????????????? ???????????????????????? ???????????????????? ?????????????? ????????? 1 ???? (3 ???) ???? ???????????????????? ??????????????????????????????????? ????????????? AIR CLEANER ????????????? หม้อกรองอากาศ ฝาถังน้ำมันเชื้อเพลิง FUEL FILLER CAP MUFFLER ???????? ????????? RECOIL STARTER ????????????????? ?????????????????? Understand the operation of all controls and learn how to stop the engine quickly in case of emergency. Make sure the operator receives adequate instruction before operating the equipment. Do not allow children to operate the engine. Keep children and pets away from the area of operation. FUEL TANK SPARK PLUG Your engine’s exhaust contains poisonous carbon monoxide. Do not run the engine without adequate ventilation, and never run the engine indoors. The engine and exhaust become very hot during operation. Keep the engine at least 1 meter away from buildings and other equipment during operation. Keep flammable materials away, and do not place anything on the engine while it is running. ???????????????? โบ๊ลท์ถ่ายน้ำมันเครื่อง ELECTRIC STARTER (applicable types) OIL FILLER CAP/DIPSTICK ??????????????????? ?????/?????????????????? STARTER GRIP ???????????? OIL DRAIN PLUG ????????? ???????????????????????? SAFETY LABEL LOCATION ????????????????????????????? ????????????????????????????????????????????????????? ??????????????????? ????????????? ??????????????????? ?????????????? ?????????????? ??????????????????????????????????? ???????????? AIR CLEANER ????????????? ENGINE CONTROL TYPES ?????????????????????????? This label warns you of potential hazards that can cause serious injury. Read it carefully. RECOIL STARTER ????????????????? ?????????????????? EXCEPT ELECTRIC STARTER TYPES ?????????????????????????? ?????/?????? MUFFLER ???????? ????????? FUEL VALVE LEVER ??????????????????????? If the label comes off or becomes hard to read, contact your Honda servicing dealer for replacement. CHOKE LEVER ??????? SPARK PLUG ??????????????????????? THROTTLE LEVER ???????? ??????? SAFETY LABEL ??????????????? ENGINE SWITCH ????????????????? STARTER GRIP ???????????? ??????? CHOKE LEVER (air cleaner low profile type) (?????????????????????????) ENGINE CONTROL TYPES ?????????????????????????? ?????????????????????????? ?????/?????? ENGINE SWITCH EXCEPT ELECTRIC STARTER TYPES FUEL VALVE LEVER ??????????????????????? CHOKE LEVER ??????? ??????? THROTTLE LEVER ELECTRIC STARTER TYPES ENGINE SWITCH ??????????????????? ENGINE SWITCH ????????????????? ??????? CHOKE LEVER (air cleaner low profile type) (?????????????????????????) CIRCUIT PROTECTOR ENGINE SWITCH ELECTRIC STARTER TYPES ENGINE SWITCH CIRCUIT PROTECTOR 2 2
FEATURES BEFORE OPERATION CHECKS การตรวจสอบก่อนการเดินเครื่องยนต์ เครื่องยนต์ของคุณพร้อมใช้งานแล้วหรือยัง ? เพื่อความปลอดภัยและยืดอายุการใช้งานของอุปกรณ์สูงสุดเป็นเรื่องสำคัญ มากที่จะเสียเวลาเพียงเล็กน้อยก่อนการเดินเครื่องเพื่อตรวจสอบสภาพเครื่อง เสียก่อนควรตรวจสอบให้แน่ใจว่าได้ให้ความสนใจกับทุกๆปัญหาที่ตรวจพบ หรือได้ให้ตัวแทนการให้บริการแก้ไขปัญหานั้นๆแล้วก่อนทำการเดินเครื่อง OIL ALERT SYSTEM (applicable types) The Oil Alert system is designed to prevent engine damage caused by an insufficient amount of oil in the crankcase. Before the oil level in the crankcase can fall below a safe limit, the Oil Alert system will automatically stop the engine (the engine switch will remain in the ON position). IS YOUR ENGINE READY TO GO? For your safety, and to maximize the service life of your equipment, it is very important to take a few moments before you operate the engine to check its condition. Be sure to take care of any problem you find, or have your servicing dealer correct it, before you operate the engine. If the engine stops and will not restart, check the engine oil level (see page ) before troubleshooting in other areas. 9 คำเตือน การบำรุงรักษาเครื่องยนต์ที่ไม่เหมาะสมหรือการแก้ไขปัญหาก่อน การเดินเครื่องที่ล้มเหลวเป็นสาเหตุให้เกิดการทำงานที่ผิดพลาด Improperly maintaining this engine, or failure to correct a problem before operation, can cause a malfunction in which you can be seriously hurt or killed. และส่งผลให้ผู้ใช้บาดเจ็บรุนแรงหรือเสียชีวิตได้ ให้ดำเนินการตรวจสอบก่อนการเดินเครื่องทุกครั้งและแก้ไขทุกๆ ปัญหาที่ตรวจพบ CIRCUIT PROTECTOR (applicable types) The circuit protector protects the battery charging circuit. A short circuit, or a battery connected with reverse polarity, will trip the circuit protector. Always perform a pre-operation inspection before each operation, and correct any problem. The green indicator inside the circuit protector will pop out to show that the circuit protector has switched off. If this occurs, determine the cause of the problem, and correct it before resetting the circuit protector. Before beginning your pre-operation checks, be sure the engine is level and the engine switch is in the OFF position. ก่อนเริ่มการตรวจสอบก่อนเดินเครื่องตรวจสอบให้แน่ใจว่าเครื่องยนต์อยู่ใน แนวราบและสวิทช์เครื่องยนต์อยู่ในตำแหน่งปิด “OFF” ให้ตรวจสอบรายการต่อไปนี้ทุกๆครั้งก่อนที่จะติดเครื่องยนต์ : Always check the following items before you start the engine: CIRCUIT PROTECTOR Check the General Condition of the Engine ตรวจสอบสภาพทั่วๆไปของเครื่องยนต์ 1. ตรวจสอบโดยทั่วไปและใต้เครื่องยนต์เพื่อตรวจสอบคราบการรั่วไหล ของน้ำมันเครื่องหรือน้ำมันเบนซิน 2. ขจัดสิ่งสกปรกออกโดยเฉพาะบริเวณรอบๆท่อไอเสียและชุดรีคอยล์สตาร์ท 3. หาร่องรอยความเสียหายต่างๆ 4. ตรวจสอบฝาครอบและแผ่นป้องกันทั้งหมดอยู่ในตำแหน่งน๊อตโบ๊ลท์ และสกรูทุกตัวอยู่ในสภาพขันแน่น ตรวจสอบเครื่องยนต์ 1. ตรวจสอบระดับน้ำมันเชื้อเพลิง (ดูหน้า 8) การติดเครื่องยนต์โดยมีน้ำมัน เชื้อเพลิงเต็มถังช่วยกำจัดหรือลดการขัดจังหวะการเดินเครื่องเพื่อเติมน้ำมัน 2. ตรวจสอบระดับน้ำมันเครื่อง (ดูหน้า 9) การเดินเครื่องยนต์โดยที่มีระดับ น้ำมันเครื่องต่ำอาจเป็นสาเหตุให้เครื่องยนต์เสียหายได้ 3. ตรวจสอบระดับน้ำมันในเสื้อเกียร์ทดของประเภทเสริม (ดูหน้า 9) น้ำมัน เครื่องจำเป็นต่อการทำงานและอายุการทำงานที่ยาวนานของเสื้อเกียร์ทด 4. ตรวจสอบไส้กรองอากาศ (ดูหน้า 10) ไส้กรองอากาศที่สกปรกจะทำให้ อากาศเข้าคาร์บูเรเตอร์ได้น้อยลงทำให้ประสิทธิภาพเครื่องยนต์ตกลง 5. ตรวจสอบอุปกรณ์ที่ได้รับการส่งถ่ายกำลังจากเครื่องยนต์นี้ ศึกษาคำแนะนำที่มาพร้อมกับอุปกรณ์ที่ได้รับการส่งถ่ายกำลังจาก เครื่องยนต์นี้สำหรับข้อควรระวังและขั้นตอนที่ควรทำก่อนการติด เครื่องยนต์ 1. Push the circuit protector button to reset. Look around and underneath the engine for signs of oil or gasoline leaks. 2. Remove any excessive dirt or debris, especially around the muffler and recoil starter. ON OFF 3. Look for signs of damage. 4. Check that all shields and covers are in place, and all nuts, bolts, and screws are tightened. Check the Engine 1. Check the fuel level (see page help to eliminate or reduce operating interruptions for refueling. 8 ). Starting with a full tank will 2. 9 Check the engine oil level (see page with a low oil level can cause engine damage. ). Running the engine The Oil Alert system (applicable types) will automatically stop the engine before the oil level falls below safe limits. However, to avoid the inconvenience of an unexpected shutdown, always check the engine oil level before startup. 3. Check the reduction case oil level on applicable types (see page ). Oil is essential to reduction case operation and long life. 9 4. Check the air filter element (see page element will restrict air flow to the carburetor, reducing engine performance. 10 ). A dirty air filter 5. Check the equipment powered by this engine. Review the instructions provided with the equipment powered by this engine for any precautions and procedures that should be followed before engine startup. 3 3
OPERATION ???????????????????? ??????????????????????????????????? ?????????????????????????????????? ?????????? ?????????????????????? ??????? 2 ??? ????????????????????????????????????????? 3 Turn the engine switch to the ON position. Turn the engine switch to the ON positi 4. 4.?????????? ??????????? ???????????? ???? “ON” 4. EXCEPT ELECTRIC STARTER TYPES STARTER TYPES ??????????????????????????????? ยกเว้นประเภทติดเครื่องด้วยไฟฟ้า ELECTRIC STARTER TYPES ELE SAFE OPERATING PRECAUTIONS EXCEPT ELECTRIC ON Before operating the engine for the first time, please review the SAFETY INFORMATION section on page OPERATION CHECKS on page 3 2 and the BEFORE . ENGINE SWITCH ENGINE SWITCH ?????????????????? ??????? ??? “OFF” ??????????????????????????? ???????????????????????? Carbon monoxide gas is toxic. Breathing it can cause unconsciousness and even kill you. ????????????? ?????????????????????? ???????????????? ????????????????? ?????????????????????????????????????????????? ON ON ???? “ON” Avoid any areas or actions that expose you to carbon monoxide. ON ON ON ON ?????????????????????????????????????????????????????????????? Review the instructions provided with the equipment powered by this engine for any safety precautions that should be observed with engine startup, shutdown or operation. ?????????????? ???????????????????????????????? ?????????????????? ?????????????????????? ?????????????? ?????????????????????????? STARTING THE ENGINE ????????????????? 1. ????????????????????????????????????????????? “ON” 1. Move the fuel valve lever to the ON position. FUEL VALVE LEVER ??????????????????????? ENGINE SWITCH ON ENGINE SWITCH O O ON N N ??? OFF ???? 2. 2. ????????????????????????????????????? ???????????????????????????? To start a cold engine, move the choke lever to the CLOSED position. ??? “CLOSED” CHOKE LEVER ??????? O O OP P PE E EN N N ??? C C CL L LO O OS S SE E ED D D ???? ?????????????????????????????????????????????????? ??????????????????????????? To restart a warm engine, leave the choke lever in the OPEN position. ???? “OPEN” ??????????????????????????????????? ???????????????????????????? ??? ????????????????????????????????????????????????????? ??????????????????????? Some engine applications use a remote-mounted choke control rather than the engine-mounted choke lever shown here. Refer to the instructions provided by the equipment manufacturer. ??????????????????? 3. ????????????????????????????????? “MIN” ?????? 1/3 ????????????? 3. Move the throttle lever away from the MIN. position, about 1/3 of the way toward the MAX. position. ????????????? “MAX” M M MI I IN N N. . . ?????????????? “MIN” ????????????? “MAX” ?????????????? “MIN” THROTTLE LEVER ??????? Some engine applications use a remote-mounted throttle control rather than the engine-mounted throttle lever shown here. Refer to the instructions provided by the equipment manufacturer. ??????????????????????????????????? ???????????????????????????? 4 ??????????????????????????????????????????????????????????? ????????????? ????????????????????????????? 4
MIN. STOPPING THE ENGINE ????????????????? ?????????????????????????????? ????????????????????????????????????? ????????????? “OFF” ?????????????? ????????????????????? ?????????????? ????????????????? 1. ???????????????????????????????? “MIN” ??????????????????????????????????????? ???????????????????????? ?????????????????????????????????????????????????? ?????? Operate the starter. 5. ???????????????????? ???????????????? ??????????????????? ??????????????????????????? ?????????????????????????? ??????? ??????????????????????????????? ????????????????????????? 5. RECOIL STARTER: To stop the engine in an emergency, simply turn the engine switch to the OFF position. Under normal conditions, use the following procedure. Refer to the instructions provided by the equipment manufacturer. MIN. Pull the starter grip lightly until you feel resistance, then pull briskly in the direction of the arrow as shown below. Return the starter grip gently. START 1. Move the throttle lever to the MIN. position. STARTER GRIP ???????????? START Some engine applications use a remote-mounted throttle control rather than the engine-mounted throttle lever shown here. OFF THROTTLE LEVER ??????? OFF OFF START OFF MIN. OFF START Direction to pull ?????????????? M M MI I IN N N. . . ?????????????? “MIN” ????????? ?????????????????????????????????????????????????????????????????? OFF Do not allow the starter grip to snap back against the engine. Return it gently to prevent damage to the starter. ?????????????????????????????????????????????? OFF START 2. หมุนสวิทช์เครื่องยนต์ไปที่ตำแหน่งปิด “OFF” OFF OFF ELECTRIC STARTER (applicable types): If the choke lever was moved to the CLOSED position to start the engine, gradually move it to the OPEN position as the engine Turn the engine switch to the OFF position. ยกเว้นประเภทติดเครื่องด้วยไฟฟ้า 2. S S ST T TA A AR R RT T T 6.6. ?????????????????????????? “CLOSED” ??????????????????? ????????? Turn the key to the START position, and hold it there until the engine starts. warms up. ??????????? ??????????????????????????? “OPEN” EXCEPT ELECTRIC STARTER TYPES ELECTRIC STARTER TYPES OFF ENGINE SWITCH สวิทช์เครื่องยนต์ If the engine fails to start within 5 seconds, release the key, and wait at least 10 seconds before operating the starter again. O O OF F FF F F ENGINE SWITCH ปิด C C CH H HO O OK K KE E E L L LE E EV V VE E ER R R ??????? O O OF F FF F F START O O OF F FF F F O O OF F FF F F S S ST T TA A AR R RT T T O O OF F FF F F OFF CHOKE LEVER เปิด “ON” Using the electric starter for more than 5 seconds at a time will overheat the starter motor and can damage it. C C CL L LO O OS S SE E ED D D ??????????? “OPEN” ?????????? “CLOSED” CLOSED O O OP P PE E EN N N ??????????? “OPEN” OFF OFF O O OF F FF F F When the engine starts, release the key, allowing it to return to the ON position. OPEN OFF O O OF F FF F F ENGINE SWITCH (applicable types) 3.3. ???????????????????????????????????????????? “OFF” Move the fuel valve lever to the OFF position. 6. 6. ?????????????????????????? “CLOSED” ??????????????????? ????????? If the choke lever was moved to the CLOSED position to start the engine, gradually move it to the OPEN position as the engine warms up. ??????????? ??????????????????????????? “OPEN” ENGINE SWITCH ??????????????????????? FUEL VALVE LEVER ON O O ON N N ???? “ON” C C CH H HO O OK K KE E E L L LE E EV V VE E ER R R ??????? CHOKE LEVER ??? “OFF” OFF O O OF F FF F F OFF ENGINE SWITCH O O OP P PE E EN N N ??????????? “OPEN” OPEN ??????????? “OPEN” C C CL L LO O OS S SE E ED D D Move the fuel valve lever to the OFF position. 3. ???????????????????????????????????????????? “OFF” 3. CLOSED ?????????? “CLOSED” ??????????????????????? FUEL VALVE LEVER O O ON N N ???? “ON” ??? “OFF” OFF ON 5 5
SETTING ENGINE SPEED การตั้งความเร็วรอบเครื่องยนต์ ปรับตำแหน่งคันเร่งไปยังตำแหน่งความเร็วรอบเครื่องยนต์ที่ต้องการ สำหรับการใช้งานเครื่องยนต์บางประเภทจะใช้ชุดควบคุมการเร่งแบบระยะไกล มากกว่าแบบคันเร่งที่ติดตั้งพร้อมเครื่องยนต์ตามที่แสดงไว้ให้อ้างอิงจากคำ แนะนำของผู้ผลิตอุปกรณ์นั้นๆ สำหรับความเร็วรอบเครื่องยนต์ที่แนะนำให้อ้างอิงจากคำแนะนำจากอุปกรณ์ที่ ได้รับการถ่ายกำลังจากเครื่องยนต์นี้ Position the throttle lever for the desired engine speed. Some engine applications use a remote-mounted throttle control rather than the engine-mounted throttle lever shown here. Refer to the instructions provided by the equipment manufacturer. For engine speed recommendations, refer to the instructions provided with the equipment powered by this engine. คันเร่ง THROTTLE LEVER M M MI I IN N N. . . ตำแหน่งน้อยสุด “MIN” M M MA A AX X X. . . ตำแหน่งมากสุด “MAX” 6 6
SERVICING YOUR ENGINE ???????????????????????? ????????????????????????? ??????????????????????????????????? ?????????????? ??????????????????? MAINTENANCE SCHEDULE ?????????????????? ???????????????????????? (3) ???????????? ? ???????????? ???? ?????????????????????????? THE IMPORTANCE OF MAINTENANCE Good maintenance is essential for safe, economical and trouble- free operation. It will also help reduce pollution. ??????? ??????????? ?????????????????????? ??????? ????????????????????????????????????? ????????????????????? ???????????????????????? ??????????????????????????????????? ?????????????????????????????? ???????????????? ?????????????????????? ????????????????? ?????? ?????????? ?????????????????????????????? REGULAR SERVICE PERIOD (3) Perform at every indicated month or operating hour interval, whichever comes first. ???????????????????????????? ?????? ????????????? Each Use ???????? ?????? First Month or 20 Hrs 20 ??????? Every 3 Months or 50 Hrs 50 ??????? Every 6 Months or 100 Hrs 100 ??????? Every Year or 300 Hrs 300 ??????? Refer to Page ??????? ??????? ???? 3 ????? ???? ???? 6 ????? ???? ?????? ???? ???????? ???? ITEM Engine oil Improper maintenance, or failure to correct a problem before operation, can cause a malfunction in which you can be seriously hurt or killed. ???????????? ??????? ???????????? Check level Change Check level Change ??????? ??????? 9 Reduction case oil ( Air cleaner (?????????) ???????? ????? ???????????????????????? 9 10 - 10 ?????? applicable types ????????????? Always follow the inspection and maintenance recommendations and schedules in this owner’s manual. ) Check Clean Replace Clean Check-adjust Replace Clean ??????????? 10 ??????????? ??????? ??????????? ???????-???????? ??????? (1) (1) 11 12 * - ** ????????????????????????????????? ?????????????????? ?????????????? ?????????????????????? ????????????????????????? ?????????? ???????????????????????????????????????????????? ??????????????????????? ?????????? ????????????????????????? ??????????????????????? ??????????? To help you properly care for your engine, the following pages include a maintenance schedule, routine inspection procedures, and simple maintenance procedures using basic hand tools. Other service tasks that are more difficult, or require special tools, are best handled by professionals and are normally performed by a Honda technician or other qualified mechanic. ????????????????????????????????? ????????????????????????????????????? ????????????????????????????????????????????????? ????????????? ??????????????????????? ???????????????????????????? ??????????????? ????????????????????????? ?????????????????????? ????????????????????? ??????????????? ???????????????????????????????????????????????? ????????? ????????????????????????????????????????????????????????????????? Sediment cup Spark plug ???????? 12 12 Spark arrester ( Idle speed Valve clearance ?????????? ????????????? 13 ?????????????????? applicable types (?????????) ) Check-adjust Check-adjust ???????-???????? ???????-???????? (2) (2) (2) 13 13 Shop manual Shop manual Shop manual Shop manual (2) The maintenance schedule applies to normal operating conditions. If you operate your engine under severe conditions, such as sustained high-load or high-temperature operation, or use in unusually wet or dusty conditions, consult your Honda servicing dealer for recommendations applicable to your individual needs and use. คู่มือการซ่อม 13 Combustion chamber Fuel tank & filter Fuel tube ??????????????????? Clean ??????????? After every 500 Hrs. (2) ??????????? 500 ??????? (2) คู่มือการซ่อม ??????????? ??????????????????? ????????????? Clean ??????????? (2) คู่มือการซ่อม ???? 2 ?? Every 2 years (Replace if necessary) (2) (??????????????????) (2) Check ??????? คู่มือการซ่อม Use only Honda Genuine parts or their equivalent. The use of replacement parts which are not of equivalent quality may damage the engine. ????????????????????????????????????????????? ?????????????????????????? ??????????????????????????????????????????????????????? ??????????????? ???????????????????????????????????? ????????????????????????????? ?????????? ??????????????????????????????????????????????????????????? ??????? Internal vent carburetor with dual element type only. Cyclone type every 6 months or 150 hours. * MAINTENANCE SAFETY Some of the most important safety precautions follow. However, we cannot warn you of every conceivable hazard that can arise in performing maintenance. Only you can decide whether or not you should perform a given task. STANDARD TYPE ????????????? INTERNAL VENT CARBURETOR TYPE BREATHER TUBE ???????? BREATHER TUBE Failure to properly follow maintenance instructions and precautions can cause you to be seriously hurt or killed. ????? ???????????????????????????????? ???????????????? ?????????????????????? ???????????????????????????????????????????? ??????????????????????????????????????????? ????????? Always follow the procedures and precautions in this owner’s manual. TUBE CLIP ?????????????????????????? • ???????????????????????????????????? ?????????????????????????????? SAFETY PRECAUTIONS Make sure the engine is off before you begin any maintenance or repairs. This will eliminate several potential hazards: Replace paper element type only. Cyclone type every 2 years or 600 hours. ** - ?????? ???????????????????????????????????? - ??????????????????????????????? ??????????????????????????????????????????? ???????????????? - ?????????????????????????????? ??????????????????? ????????????????????????????? - ??????????????????????????????? ??????????????????????????????????? • ??????????????????????? ??????????????????????????????? ???????? ??????? • ????????????????????????? ?????????? ??????????????????????????? ??????????????? ???????????????????????????????? ??????????????????? ???????????????????????? ???????????? ???????? ????????????? ???????????????????????????????????????? ?????????????????????????????????????????? ??????????????????????????? ?????????????? ??????????????????????? ?????????? ???????????????? ?????? ????????????????????????????? ???????????????????????????????? ????????????????????????????? ??????????? Carbon monoxide poisoning from engine exhaust. Be sure there is adequate ventilation whenever you operate the engine. (1) Service more frequently when used in dusty areas. (1) ?????????????????????????????????????????????????????????? (2) ??????????????????????????????????????????????????????????? ??????????????????????????????? ??????????????????????????? ????????????????????????????????????????????????????????? (3) ?????????????????????????? ????????????????????????????????????? ??????????????????????????????????? ????????????????????????????? ??????????????????????????????? (2) These items should be serviced by your Honda servicing dealer, unless you have the proper tools and are mechanically proficient. Refer to the Honda shop manual for service procedures. Burns from hot parts. Let the engine and exhaust system cool before touching. - Injury from moving parts. Do not run the engine unless instructed to do so. Read the instructions before you begin, and make sure you have the tools and skills required. To reduce the possibility of fire or explosion, be careful when working around gasoline. Use only a non-flammable solvent, not gasoline, to clean parts. Keep cigarettes, sparks and flames away from all fuel related parts. Remember that an authorized Honda servicing dealer knows your engine best and is fully equipped to maintain and repair it. To ensure the best quality and reliability, use only new Honda Genuine parts or their equivalents for repair and replacement. - (3) For commercial use, log hours of operation to determine proper maintenance intervals. Failure to follow this maintenance schedule could result in non- warrantable failures. 7 7
REFUELING ??????????????????????? ???????????????????????? ???????????????????????? ????????? 91 ??????????? ??????????????????????????????????????????????????????????????????????? ?????? 91 ??????????? ???????????????????????????????????????????????????????? ??????????? ??????????? ?????????????????????????? ???????????????????????????????? ????????????????????????????????????????????????????????? ????????????? ????????????????????????????????????????????????????? 10% (E10) ???? ??????? 5% ?????????? ?????????????????????????????? ????????? ??????????????? ??????????????????????????????????? ?????????????????? ??????????? ???????????????????????????????? ???/??????????????? ??????????? ?????????????????????????????????????? ??? ????????????? ???????????????????? ?????????????????????????????? ??????????????? ??????????? ?????????????????????????????????????????????????????????????? ????????????????????????????? ???????????????????????????? ???????????????????????????????? ????????????????? ?????????????????? ?????????????????? 25 ??. (1 ????) ???????????????????????? ??????? ??????????????????????????????????????????? ????????????????????? ????? Refuel carefully to avoid spilling fuel. Do not fill the fuel tank completely. Fill tank to approximately 25 mm below the top of the fuel tank to allow for fuel expansion. It may be necessary to lower the fuel level depending on operating conditions. After refueling, tighten the fuel filler cap securely. ???????????????????? ?????????????????????????????????????? ??????????????? ?????????????? Recommended Fuel This engine is certified to operate on unleaded gasoline with a research octane rating of 91 or higher. Refuel in a well ventilated area with the engine stopped. If the engine has been running, allow it to cool first. Never refuel the engine inside a building where gasoline fumes may reach flames or sparks. You may use unleaded gasoline containing no more than 10% ethanol (E10) or 5% methanol by volume. In addition, methanol must contain cosolvents and corrosion inhibitors. Use of fuels with content of ethanol or methanol greater than shown above may cause starting and/or performance problems. It may also damage metal, rubber, and plastic parts of the fuel system. Engine damage or performance problems that result from using a fuel with percentages of ethanol or methanol greater than shown above are not covered under warranty. Keep gasoline away from appliance pilot lights, barbecues, electric appliances, power tools, etc. ???????? ????????????????????????????????????????????????????????????????? ??????? ?????????????????????????????????????????? ?????????????????????? ???????? Spilled fuel is not only a fire hazard, it causes environmental damage. Wipe up spills immediately. ENGINE OIL ????????????? ???????????????????????????????????????????????? ??????????????????????????? ??????????????????????? 4 ????????????????????????????? ????????????????????? ???????????????? 4 ?????????????????? API ???? SE ???????????? (?????????????) ??????????????? ???? API ????????????????????????? ????????????????????? SE ???????????? (?????????????) Oil is a major factor affecting performance and service life. Use 4-stroke automotive detergent oil. Recommended Oil Use 4-stroke motor oil that meets or exceeds the requirements for API service category SE or later (or equivalent). Always check the API service label on the oil container to be sure it includes the letters SE or later (or equivalent). Gasoline is highly flammable and explosive, and you can be burned or seriously injured when refueling. Stop the engine and keep heat, sparks, and flame away. Refuel only outdoors. Wipe up spills immediately. ?????????????? ????????????????? ???????? ????????????????? ??????????????????????????????????? ??????????????????????????? ??????? AMBIENT TEMPERATURE อุณหภูมิบรรยากาศ ??????????????????????????????? ???????????? ??????????????? ??????? ?????????????????????????????????????? • • • ???????????????? ????????????????????? SAE 10W-30 ????????????????????? ????????? SAE 10W-30 is recommended for general use. Other viscosities shown in the chart may be used when the average temperature in your area is within the indicated range. ?????????????????????? ?????????????????????????????????????????????? ??????????????? Fuel can damage paint and some types of plastic. Be careful not to spill fuel when filling your fuel tank. Damage caused by spilled fuel is not covered under the Warranty. ??????????????????????????????????????????????????????????????? ?????????????????????????????????????????????????????????????????? ?????????????? ???????????????????????????????? ??????????????????????????????????? ?????????????????????????????????????????????????????? 1. ?????????? ????????????????????????????????? ????????????????????????? ????????????????????? ??????????????????????? 2. ?????????????????????????????????????????????????????? ???????????? ????????????????????????????????????? ????????? Never use stale or contaminated gasoline or an oil/gasoline mixture. Avoid getting dirt or water in the fuel tank. 1. With the engine stopped and on a level surface, remove the fuel filler cap and check the fuel level. Refill the tank if the fuel level is low. 2. Add fuel to the bottom of the maximum fuel level limit of the fuel tank. Do not overfill. Wipe up spilled fuel before starting the engine. FUEL FILLER CAP ????????????????? ฝาถังน้ำมันเชื้อเพลิง (non-strainer type) ????????????????????? 25 mm 25??. MAXIMUM FUEL LEVEL ??????????????????????????? 8 8
Oil Level Check การตรวจสอบระดับน้ำมันเครื่อง ตรวจสอบระดับน้ำมันเครื่องในขณะดับเครื่องยนต์และในตำแหน่งที่ได้ระดับ 1. ถอดฝาปิด/ก้านวัดระดับน้ำมันและเช็ดให้สะอาด 2. สวมฝาปิด/ก้านวัดระดับน้ำมันโดยไม่ต้องขันเกลียวเข้ากับปากที่เติมน้ำมัน ตรวจระดับน้ำมันเครื่องที่ก้านวัดระดับน้ำมัน 3. ถ้าระดับน้ำมันเครื่องอยู่ใกล้หรือต่ำกว่าขีดล่างของก้านวัดระดับน้ำมัน ให้เติมน้ำมันเครื่องที่แนะนำ (ดูหน้า 8) โดยเติมให้ถึงขีดบน (ขอบล่าง ของรูเติมน้ำมันเครื่อง) ห้ามเติมเกิน 4. ประกอบฝาปิด/ก้านวัดระดับน้ำมันกลับ Install the oil filler cap/dipstick and tighten securely. 4. ประกอบฝาปิด/ก้านวัดระดับน้ำมันเครื่องและขันให้แน่น 4. OIL FILLER CAP/ DIPSTICK ฝาปิด/ก้านวัดระดับน้ำมัน Check the engine oil level with the engine stopped and in a level position. 1. Remove the oil filler cap/dipstick and wipe it clean. WASHER แหวนรอง ระดับน้ำมันเครื่อง 2. Insert the oil filler cap/dipstick into the oil filler neck as shown, but do not screw it in, then remove it to check the oil level. OIL LEVEL 3. If the oil level is near or below the lower limit, fill with the recommended oil (see page of the oil fill hole). Do not overfill. 8 ) to the upper limit (bottom edge DRAIN PLUG โบ๊ลท์ถ่ายน้ำมันเครื่อง Wash your hands with soap and water after handling used oil. 4. Reinstall the oil filler cap/dipstick. REDUCTION CASE OIL (applicable types) น้ำมันเสื้อเกียร์ทด(ชนิดเสริม) OIL FILLER CAP/DIPSTICK ฝาปิด/ก้านวัดระดับน้ำมัน UPPER LIMIT ระดับจำกัดบน Recommended Oil น้ำมันที่แนะนำ ใช้น้ำมันชนิดเดียวกับที่แนะนำสำหรับใช้กับเครื่องยนต์ (ดูหน้า 8) การตรวจสอบระดับน้ำมัน Use the same oil that is recommended for the engine (see page 8 ). Oil Level Check ตรวจสอบระดับน้ำมันเสื้อเกียร์ทดในขณะดับเครื่องยนต์และในตำแหน่งแนวราบ 2:1 เสื้อเกียร์ทดพร้อมทั้งคลัทช์แบบแรงเหวี่ยง 1. ถอดฝาปิด/ก้านวัดระดับน้ำมันและเช็ดให้สะอาด Check the reduction case oil level with the engine stopped and in a level position. รูเติมน้ำมันเครื่อง OIL FILL HOLE (bottom edge) (ขอบล่าง) LOWER LIMIT ระดับจำกัดล่าง 2 : 1 Reduction Case With Centrifugal Clutch ข้อสังเกต การเดินเครื่องในขณะที่ระดับน้ำมันเครื่องต่ำอาจเป็นสาเหตุให้เครื่องยนต์เสีย Running the engine with a low oil level can cause engine damage. This type of damage is not covered under the Warranty. หายได้ซึ่งความเสียหายลักษณะนี้การรับประกันไม่ครอบคลุมถึง ระบบเตือนน้ำมันเครื่อง (ชนิดเสริม) จะดับเครื่องยนต์โดยอัตโนมัติก่อนที่ น้ำมันเครื่องจะต่ำกว่าระดับปลอดภัยอย่างไรก็ตามเพื่อหลีกเลี่ยงความไม่ สะดวกจากการดับเครื่องที่ไม่คาดคิดให้ทำการตรวจสอบระดับน้ำมันเครื่อง ทุกครั้งก่อนการติดเครื่อง Remove the oil filler cap/dipstick and wipe it clean. 2. สวมฝาปิด/ก้านวัดระดับน้ำมันโดยไม่ต้องขันเกลียวเข้ากับรูที่เติมน้ำมัน ตรวจระดับน้ำมันที่ก้านวัดระดับน้ำมัน 1. Insert and remove the oil filler cap/dipstick without screwing it into the filler hole. Check the oil level shown on the oil filler cap/ dipstick. 3. ถ้าระดับน้ำมันต่ำให้เติมน้ำมันที่แนะนำให้ถึงขีดบนของก้านวัดระดับน้ำมัน 2. The Oil Alert system (applicable types) will automatically stop the engine before the oil level falls below the safe limit. However, to avoid the inconvenience of an unexpected shutdown, always check the engine oil level before startup. If the oil level is low, add the recommended oil to reach the upper limit mark on the dipstick. 4. ขันฝาปิด/ก้านวัดระดับน้ำมันเครื่องกลับให้แน่น 3. Oil Change การเปลี่ยนถ่ายน้ำมันเครื่อง ถ่ายน้ำมันเครื่องที่ใช้แล้วในขณะที่เครื่องยนต์ยังอุ่นอยู่น้ำมันเครื่องที่อุ่น สามารถถ่ายได้เร็วและหมดจด 1. วางภาชนะบรรจุที่เหมาะสมใต้เครื่องยนต์เพื่อรองรับน้ำมันเครื่องใช้แล้ว หลังจากนั้นให้ถอดฝาปิด/ก้านวัดระดับน้ำมันเครื่องโบ๊ลท์ถ่ายน้ำมัน เครื่องและแหวนรองออก 2. ปล่อยให้น้ำมันเครื่องที่ใช้แล้วไหลออกให้หมดหลังจากนั้นให้ประกอบ โบ๊ลท์ถ่ายน้ำมันเครื่องและแหวนรองวงใหม่กลับและขันโบ๊ลท์ถ่าย น้ำมันเครื่องให้แน่น กรุณากำจัดน้ำมันเครื่องใช้แล้วโดยวิธีที่เป็นมิตรกับสิ่งแวดล้อมเราขอ แนะนำให้คุณนำน้ำมันเครื่องที่ใช้แล้วนี้บรรจุในภาชนะที่ซีลกันรั่วและส่ง ไปที่ศูนย์รีไซเคิลท้องถิ่นหรือสถานีให้บริการสำหรับการนำกลับมาใช้ใหม่ ห้ามทิ้งในถังขยะเททิ้งบนพื้นหรือเทลงท่อระบาย 3. ณตำแหน่งเครื่องยนต์ในแนวราบให้ทำการเติมน้ำมันเครื่องที่แนะนำ (ดูหน้า 8) จนถึงขีดบนของก้านวัดระดับน้ำมัน (ขอบล่างของรูเติมน้ำมันเครื่อง) ข้อสังเกต การเดินเครื่องในขณะที่ระดับน้ำมันเครื่องต่ำอาจเป็นสาเหตุให้เครื่องยนต์ เสียหายได้ซึ่งความเสียหายลักษณะนี้การรับประกันไม่ครอบคลุมถึง ระบบเตือนน้ำมันเครื่อง (ชนิดเสริม) จะดับเครื่องยนต์โดยอัตโนมัติก่อนที่ น้ำมันเครื่องจะต่ำกว่าระดับปลอดภัยอย่างไรก็ตามเพื่อหลีกเลี่ยงความไม่ สะดวกจากการดับเครื่องที่ไม่คาดคิดให้เติมน้ำมันเครื่องจนถึงขีดจำกัดบน และตรวจสอบระดับน้ำมันเครื่องเป็นประจำ 4. Screw in the oil filler cap/dipstick and tighten securely. Drain the used oil when the engine is warm. Warm oil drains quickly and completely. FILLER CAP/DIPSTICK ฝาปิด/ก้านวัดระดับน้ำมันเครื่อง 1. Place a suitable container below the engine to catch the used oil, then remove the oil filler cap/dipstick, oil drain plug and washer. UPPER LIMIT ขีดบน 2. Allow the used oil to drain completely, then reinstall the oil drain plug and new washer, and tighten the oil drain plug securely. Please dispose of used motor oil in a manner that is compatible with the environment. We suggest you take used oil in a sealed container to your local recycling center or service station for reclamation. Do not throw it in the trash, pour it on the ground, or pour it down a drain. LOWER LIMIT ขีดล่าง 3. With the engine in a level position, fill with the recommended oil (see page ) to the upper limit (bottom edge of the oil fill hole). 8 Running the engine with a low oil level can cause engine damage. This type of damage is not covered under the Warranty. The Oil Alert system (applicable types) will automatically stop the engine before the oil level falls below the safe limit. However, to avoid the inconvenience of an unexpected shutdown, fill to the upper limit, and check the oil level regularly. 9 9
6 : 1 Reduction Case 6 : 1 เสื้อเกียร์ทด 1. ถอดโบ๊ลท์ตรวจสอบระดับน้ำมัน และแหวนรองออกและดูว่าระดับน้ำมันอยู่ที่ ขอบของรูโบ๊ลท์หรือไม่ 2. ถ้าระดับน้ำมันอยู่ต่ำกว่ารูโบ๊ลท์ตรวจสอบ ระดับน้ำมันถอดโบ๊ลท์เติมน้ำมัน และแหวนรองออกเติมน้ำมันจน เริ่มล้นออกทางรูตรวจสอบระดับน้ำมัน โดยใช้น้ำมันตามที่แนะนำ (ดูหน้า 9) 3. ใส่โบ๊ลท์ตรวจสอบระดับน้ำมัน โบ๊ลท์เติมน้ำมัน และแหวนรองและขันให้แน่น การเปลี่ยนน้ำมัน 2:1 เสื้อเกียร์ทดพร้อมทั้งคลัทช์แบบแรงเหวี่ยง ถ่ายน้ำมันที่ใช้แล้วในขณะที่เครื่องยนต์ยังอุ่นอยู่น้ำมันที่อุ่นสามารถถ่าย ได้เร็วและหมดจด 1. วางภาชนะบรรจุที่เหมาะสมใต้เสื้อเกียร์ทดเพื่อรองรับน้ำมันใช้แล้วหลัง จากนั้นให้ถอดฝาปิด/ก้านวัดระดับน้ำมันโบ๊ลท์ถ่ายน้ำมันและแหวนรองออก 2. ปล่อยให้น้ำมันที่ใช้แล้วไหลออกให้หมดหลังจากนั้นให้ประกอบโบ๊ลท์ ถ่ายน้ำมันและแหวนรองวงใหม่กลับและขันโบ๊ลท์ถ่ายน้ำมันให้แน่น กรุณากำจัดน้ำมันใช้แล้วโดยวิธีที่เป็นมิตรกับสิ่งแวดล้อมเราขอแนะนำให้ คุณนำน้ำมันที่ใช้แล้วนี้บรรจุในภาชนะที่ซีลกันรั่วและส่งไปที่ศูนย์รีไซ เคิลท้องถิ่นหรือสถานีให้บริการสำหรับการนำกลับมาใช้ใหม่ห้ามทิ้งใน ถังขยะเททิ้งบนพื้นหรือเทลงท่อระบาย 3. ณตำแหน่งเครื่องยนต์ในแนวราบให้ทำการเติมน้ำมันที่แนะนำ (ดูหน้า 9) จนถึงขีดบนของก้านวัดระดับน้ำมันในการตรวจสอบระดับ น้ำมันให้ใส่และถอดก้านวัดระดับน้ำมันโดยไม่ต้องขันเกลียวเข้ากับรู เติมน้ำมัน ความจุน้ำมันเสื้อเกียร์ทด : 0.50 ลิตร ข้อสังเกต 6 : 1 Reduction Case 6 : 1 เสื้อเกียร์ทด ถ่ายน้ำมันที่ใช้แล้วในขณะที่เครื่องยนต์ยังอุ่นอยู่น้ำมันที่อุ่นสามารถถ่ายได้เร็ว และหมดจด 1. วางภาชนะบรรจุที่เหมาะสมใต้เสื้อเกียร์ทดเพื่อรองรับน้ำมันใช้แล้วหลัง จากนั้นให้ถอดโบ๊ลท์เติมน้ำมันโบ๊ลท์ตรวจสอบระดับน้ำมันและแหวนรองออก 2. ปล่อยให้น้ำมันที่ใช้แล้วไหลลงภาชนะรองรับให้หมดโดยเคาะที่ เครื่องยนต์เบาๆตรงรูโบ๊ลท์ตรวจสอบระดับน้ำมัน กรุณากำจัดน้ำมันใช้แล้วโดยวิธีที่เป็นมิตรกับสิ่งแวดล้อมเราขอแนะนำ ให้คุณนำน้ำมันที่ใช้แล้วนี้บรรจุในภาชนะที่ซีลกันรั่วและส่งไปที่ศูนย์รีไซ เคิลท้องถิ่นหรือสถานีให้บริการสำหรับการนำกลับมาใช้ใหม่ห้ามทิ้งใน ถังขยะเททิ้งบนพื้นหรือเทลงท่อระบาย 3. ณตำแหน่งเครื่องยนต์ในแนวราบให้ทำการเติมน้ำมันที่แนะนำจนเริ่ม ล้นออกจากรูโบ๊ลท์ตรวจสอบระดับน้ำมัน (ดูหน้า 9) ข้อสังเกต การเดินเครื่องในขณะที่ระดับน้ำมันเสื้อเกียร์ทดต่ำอาจเป็นสาเหตุให้ เสื้อเกียร์ทดเสียหายได้ 4. ใส่โบ๊ลท์ตรวจสอบระดับน้ำมันโบ๊ลท์เติมน้ำมันและแหวนวงใหม่ และขันกลับให้แน่น FILLER BOLT โบ๊ลท์เติมน้ำมัน OIL LEVEL ระดับน้ำมัน 1. Drain the used oil while the engine is warm. Warm oil drains quickly and completely. Remove the oil-level-check bolt and washer, and see whether the oil level is at the edge of the bolt hole. 1. Place a suitable container below the reduction case to catch the used oil, then remove the filler bolt, oil-level-check bolt and washers. 2. If the oil level is below the check bolt hole, remove the filler bolt and washer. Add oil until it starts to flow out the check bolt hole with the recommended oil (see page ). 9 2. Drain the used oil completely into the container by tipping the engine toward the oil-level-check bolt hole. Please dispose of used motor oil in a manner that is compatible with the environment. We suggest you take used oil in a sealed container to your local recycling center or service station for reclamation. Do not throw it in the trash or pour it on the ground or pour it down a drain. 3. Install the oil-level-check bolt, filler bolt and washers. Tighten them securely. OIL-LEVEL-CHECK BOLT โบ๊ลท์ตรวจสอบระดับน้ำมัน 3. With the engine in a level position, fill with the recommended oil until it starts to flow out the check bolt hole (see page Oil Change 9 ). 2 : 1 Reduction Case With Centrifugal Clutch Drain the used oil while the engine is warm. Warm oil drains quickly and completely. Running the engine with a low reduction case oil level can cause reduction case damage. 1. Place a suitable container below the reduction case to catch the used oil, then remove the oil filler cap/dipstick, the drain plug and washer. 4. Reinstall the oil-level-check bolt, filler bolt and new washers, and tighten them securely. FILLER BOLT โบ๊ลท์เติมน้ำมัน 2. Allow the used oil to drain completely, then reinstall the drain plug and a new washer, and tighten it securely. OIL LEVEL ระดับน้ำมัน Please dispose of used motor oil in a manner that is compatible with the environment. We suggest you take used oil in a sealed container to your local recycling center or service station for reclamation. Do not throw it in the trash or pour it on the ground or pour it down a drain. 3. With the engine in a level position, fill with the recommended oil to the upper limit mark on the dipstick (see page the oil level, insert and remove the dipstick without screwing it into the filler hole. 9 ). To check OIL-LEVEL-CHECK BOLT โบ๊ลท์ตรวจสอบระดับน้ำมัน AIR CLEANER หม้อกรองอากาศ หม้อกรองอากาศที่สกปรกจะจำกัดปริมาณการไหลของอากาศเข้าคาร์บูเรเตอร์ ทำให้ประสิทธิภาพเครื่องยนต์ลดลงถ้าคุณเดินเครื่องในบริเวณที่มีฝุ่นละอองมาก ให้ทำความสะอาดไส้กรองให้ถี่กว่าที่ระบุในตารางการบำรุงรักษา (ดูหน้า 7) Reduction case oil capacity: การเดินเครื่องในขณะที่ระดับน้ำมันเสื้อเกียร์ทดต่ำอาจเป็นสาเหตุให้เสื้อ เกียร์ทดเสียหายได้ 0.50 L A dirty air cleaner will restrict air flow to the carburetor, reducing engine performance. If you operate the engine in very dusty areas, clean the air filter more often than specified in the MAINTENANCE SCHEDULE (see page ). 7 ข้อสังเกต การเดินเครื่องโดยปราศจากไส้กรองอากาศหรือไส้กรองอากาศชำรุดจะทำให้ มีสิ่งสกปรกเข้าสู่เครื่องยนต์และทำให้เครื่องยนต์สึกหรออย่างรวดเร็วความ Running the engine with a low reduction case oil level can cause reduction case damage. 4. ขันฝาปิด/ก้านวัดระดับน้ำมันกลับให้แน่น 4. Screw in the filler cap/dipstick securely. Operating the engine without an air filter, or with a damaged air filter, will allow dirt to enter the engine, causing rapid engine wear. This type of damage is not covered under the Warranty. เสียหายลักษณะนี้การรับประกันจะไม่ครอบคลุมถึง ฝาปิด/ก้านวัดระดับน้ำมัน FILLER CAP/DIPSTICK UPPER LIMIT ขีดบน Inspection การตรวจสอบ ถอดฝาครอบหม้อกรองอากาศและตรวจสภาพไส้กรองทำความสะอาดหรือ เปลี่ยนไส้กรองที่สกปรกให้เปลี่ยนไส้กรองที่ชำรุดทุกครั้งถ้าเป็นหม้อกรอง อากาศชนิดอ่างน้ำมัน (แบบเปียก) ให้ตรวจสอบระดับน้ำมันด้วย อ้างอิงจากคำแนะนำหน้า 11-12 สำหรับหม้อกรองและไส้กรองประเภทต่างๆ Remove the air cleaner cover and inspect the filter elements. Clean or replace dirty filter elements. Always replace damaged filter elements. If equipped with an oil-bath air cleaner, also check the oil level. LOWER LIMIT ขีดล่าง โบ๊ลท์ถ่ายน้ำมันเครื่อง DRAIN PLUG Refer to pages and filter for your engine type. 11 12 for instructions that apply to the air cleaner - Wash your hands with soap and water after handling used oil. 10
7. การทำความสะอาด Wipe dirt from the inside of the air cleaner case and cover using a moist rag. Be careful to prevent dirt from entering the air duct that leads to the carburetor. ชนิดอ่างน้ำมัน (แบบเปียก) 1. ถอดน๊อตหางปลาฝาปิดหม้อกรองอากาศและฝาครอบออก 2. ถอดไส้กรองอากาศจากฝาครอบล้างฝาครอบและไส้กรองด้วยน้ำสบู่อุ่นๆ เขย่าและปล่อยให้แห้งหรือทำความสะอาดด้วยตัวทำละลายที่ไม่ติดไฟ และปล่อยให้แห้ง 3. จุ่มไส้กรองอากาศในน้ำมันเครื่องสะอาดและบีบน้ำมันส่วนเกินออกถ้ามี Cleaning STANDARD DUAL-FILTER- ELEMENT TYPE Dual-Filter Element Types WING NUT Place the foam air filter element over the paper element, and reinstall the assembled air filter. Be sure the gasket is in place beneath the air filter. Tighten the air filter wing nut securely. 1. Remove the wing nut from the air cleaner cover, and remove the cover. 8. AIR CLEANER COVER WING NUT PAPER FILTER ELEMENT 2. Remove the wing nut from the air filter, and remove the filter. 9. Install the air cleaner cover, and tighten the wing nut securely. Oil-Bath Type น้ำมันอยู่ในไส้กรองฟองน้ำมากเกินไปจะทำให้เครื่องยนต์มีควันมาก 4. ถ่ายน้ำมันออกจากตัวหม้อกรองอากาศทำความสะอาดด้วยตัวทำละลาย ที่ไม่ติดไฟและทำให้แห้ง 5. เติมน้ำมันในตัวหม้อกรองอากาศจนถึงเครื่องหมายระดับน้ำมันโดย ใช้น้ำมันชนิดเดียวกับที่แนะนำให้ใช้น้ำมันเครื่อง (ดูหน้า 8) FOAM FILTER ELEMENT 3. Remove the foam filter from the paper filter. 1. Remove the wing nut, and remove the air cleaner cap and cover. Remove the air filter element from the cover. Wash the cover and filter element in warm soapy water, rinse, and allow to dry thoroughly. Or clean in non-flammable solvent and allow to dry. 2. Inspect both air filter elements, and replace them if they are damaged. Always replace the paper air filter element at the scheduled interval (see page 4. GASKET 3. ความจุน้ำมัน : 60 ซ.ม.3 Dip the filter element in clean engine oil, then squeeze out all excess oil. The engine will smoke if too much oil is left in the foam. 6. ประกอบหม้อกรองอากาศกลับและขันน๊อตหางปลาให้แน่น 7 ). Empty the used oil from the air cleaner case, wash out any accumulated dirt with non-flammable solvent, and dry the case. 4. CYCLONE DUAL-FILTER-ELEMENT TYPE PRECLEANER CAP 5. Fill the air cleaner case to the OIL LEVEL mark with the same oil that is recommended for the engine (see page WING NUT SPECIAL PAN SCREW (3) 8 ). AIR CLEANER COVER Oil capacity: 60 cm Reassemble the air cleaner, and tighten the wing nut securely. ฝาครอบหม้อ กรองอากาศ 6. WING NUT GROOVE WING NUT น๊อตหางปลา PAPER FILTER ELEMENT AIR CLEANER COVER AIR GUIDE CAP ฝาปิด FOAM FILTER ELEMENT TAB FILTER ELEMENT ไส้กรอง GASKET ตะแกรง GRID AIR CLEANER CASE ตัวหม้อ กรองอากาศ CYCLONE HOUSING 5. Clean the air filter elements if they are to be reused. OIL LEVEL ระดับน้ำมัน Paper air filter element: Tap the filter element several times on a hard surface to remove dirt, or blow compressed air [not exceeding 207 kPa (2.1 kgf/cm )] through the filter element from the inside. Never try to brush off dirt; brushing will force dirt into the fibers. Foam air filter element: Clean in warm soapy water, rinse, and allow to dry thoroughly. Or clean in non-flammable solvent and allow to dry. Dip the filter element in clean engine oil, then squeeze out all excess oil. The engine will smoke when started if too much oil is left in the foam. CYCLONE TYPE ONLY: Remove the three pan-head screws from the pre-cleaner cap, then remove the cyclone housing and air guide. Wash the parts with water, dry them thoroughly, and reassemble them. 6. Be sure to install the air guide as shown in the illustration. Install the cyclone housing so the air intake tab fits into the groove in the pre-cleaner cap. 11
Low Profile Types แบบกึ่งเปียก 1. ปลดคลิปฝาครอบหม้อกรอง อากาศออก ถอดฝาครอบหม้อกรองอากาศ และถอดไส้กรองอากาศออก 2. ล้างไส้กรองด้วยสารละลายของ ผงซักฟอกที่ใช้ตามบ้านและน้ำอุ่น เขย่าให้ทั่วหรือล้างใน ตัวทำละลายที่ไม่ติดไฟหรือที่มีจุดวาบไฟสูง ปล่อยไฟกรองให้แห้งสนิท 3. จุ่มไส้กรองในน้ำมันเครื่องที่สะอาด และบีบน้ำมันเครื่องส่วนเกินออก เครื่องยนต์จะเกิดควันในการติด เครื่องช่วงแรกๆถ้ามีน้ำมันในไส้ กรองมากเกินไป 4. ประกอบไส้กรองและฝาครอบกลับ ฝาครอบหม้อ 4. 4. เลื่อนคันก๊อกน้ำมันเชื้อเพลิงไปที่ตำแหน่งเปิด “ON” และตรวจสอบการ Move the fuel valve lever to the ON position, and check for leaks. Replace the O-ring if there is any leakage. รั่วซึมเปลี่ยนแหวนยางถ้าพบการรั่วซึม CLIP คลิป AIR CLEANER COVER กรองอากาศ 1. Unsnap the air cleaner cover clips, remove the air cleaner cover, and remove the air filter element. SPARK PLUG หัวเทียน หัวเทียนที่แนะนำ : BPR6ES (NGK) BPR6ES (NGK) Recommended Spark Plugs: W20EPR-U (DENSO) W20EPR-U (DENSO) หัวเทียนที่แนะนำจะมีช่วงความร้อนที่ถูกต้องสำหรับอุณหภูมิเครื่องยนต์ 2. Wash the element in a solution of household detergent and warm water, then rinse thoroughly, or wash in non-flammable or high flash point solvent. Allow the element to dry thoroughly. The recommended spark plug has the correct heat range for normal engine operating temperatures. ทำงานตามปกติ ข้อสังเกต CLIP คลิป An incorrect spark plug can cause engine damage. การใช้หัวเทียนที่ไม่ถูกต้องสามารถทำให้เครื่องยนต์เสียหายได้ สำหรับประสิทธิภาพที่ดีหัวเทียนต้องมีระยะเขี้ยวที่เหมาะสมและปราศจากเขม่า AIR FILTER ELEMENT ไส้กรอง For good performance, the spark plug must be properly gapped and free of deposits. 1. ถอดปลั๊กหัวเทียนออกและทำความสะอาดสิ่งสกปรกรอบๆหัวเทียน 2. ถอดหัวเทียนด้วยประแจถอดหัวเทียน 3. ตรวจสอบหัวเทียนเปลี่ยนใหม่ 3. Soak the air filter element in clean engine oil and squeeze out the excess oil. The engine will smoke during initial startup if too much oil is left in the element. 1. Disconnect the spark plug cap, and remove any dirt from around the spark plug area. ถ้าพบความเสียหายหรือมีการอุดตัน อย่างมากหรือถ้าแหวนซีลมีสภาพไม่ดี หรือถ้าเขี้ยวหัวเทียนสึกหรอ 4. วัดระยะห่างเขี้ยวหัวเทียนโดยใช้ ฟีลเลอร์เกจปรับตั้งระยะห่าง โดยการค่อยๆดัดเขี้ยวหัวเทียน SPARK PLUG WRENCH ประแจถอดหัวเทียน 2. Remove the spark plug with a 21 mm spark plug wrench. 4. Reinstall the air filter element and the cover. 3. Inspect the spark plug. Replace it if damaged or badly fouled, if the sealing washer is in poor condition, or if the electrode is worn. ระยะห่างควรอยู่ที่ : 0.7 – 0.8 มม. 5. ค่อยๆประกอบหัวเทียนด้วยแรงมือ เพื่อป้องกันการปีนเกลียว ELEMENT ไส้กรอง SIDE ELECTRODE 4. Measure the spark plug electrode gap with a wire- type feeler gauge. Correct the gap, if necessary, by carefully bending the side electrode. 6. เมื่อขันจนนั่งบ่าแล้วให้ใช้ประแจขันหัวเทียน ขันอัดแหวนซีล 0.7 0.8 mm - SEDIMENT CUP Cleaning ถ้วยกรองน้ำมันเชื้อเพลิง การทำความสะอาด SEALING WASHER The gap should be: 0.7 0.8 mm เมื่อประกอบหัวเทียนอันใหม่ให้ขันอีก ½ รอบ หลังจากขันหัวเทียนด้วยมือจนนั่งบ่าแล้ว เพื่ออัดแหวนซีล คำเตือน - น้ำมันเบนซินเป็นสารที่ติดไฟง่ายและระเบิดได้คุณอาจถูก ไฟไหม้หรือบาดเจ็บรุนแรงในขณะจัดเก็บน้ำมันเชื้อเพลิงได้ • ดับเครื่องยนต์และอย่านำความร้อนประกายไฟ และเปลวไฟเข้าใกล้ Gasoline is highly flammable and explosive, and you can be burned or seriously injured when handling fuel. Stop the engine and keep heat, sparks, and flame away. Handle fuel only outdoors. • จัดเก็บน้ำมันในพื้นที่เปิดโล่งเท่านั้น • เช็ดคราบน้ำมันที่หกออกทันที 1. เลื่อนคันก๊อกน้ำมันเชื้อเพลิงไปที่ตำแหน่งปิด “OFF” หลังจากนั้นถอด ถ้วยกรองน้ำมันเชื้อเพลิงและแหวนยางออก 2. ล้างถ้วยกรองน้ำมันเชื้อเพลิงด้วยสารทำละลายที่ไม่ติดไฟ และทำให้แห้งสนิท 5. Install the spark plug carefully, by hand, to avoid cross- threading. เมื่อประกอบหัวเทียนอันเดิมให้ขันอีก 1/8 – 1/4 รอบหลังจากขันหัวเทียน ด้วยมือจนนั่งบ่าแล้วเพื่ออัดแหวนซีล 6. After the spark plug is seated, tighten with a 21 mm spark plug wrench to compress the sealing washer. ข้อสังเกต Wipe up spills immediately. When installing a new spark plug, tighten 1/2 turn after the spark plug seats to compress the washer. การขันหัวเทียนไม่แน่นสามารถทำให้เกิดความร้อนสูงเกินและทำให้ เครื่องยนต์เสียหายได้ส่วนการขันอัดแน่นเกินไปก็ทำให้เกลียวที่ฝาสูบ 1. Move the fuel valve lever to the OFF position, then remove the sediment cup and O-ring. When reinstalling the original spark plug, tighten 1/8 after the spark plug seats to compress the washer. เสียหายได้ 1/4 turn - 2. Wash the sediment cup in non-flammable solvent, and dry it thoroughly. 7. ประกอบปลั๊กหัวเทียนเข้ากับหัวเทียน A loose spark plug can overheat and damage the engine. Overtightening the spark plug can damage the threads in the cylinder head. FUEL VALVE LEVER คันก๊อกน้ำมันเชื้อเพลิง O-RING แหวนยาง 7. Attach the spark plug cap to the spark plug. ตำแหน่งปิด “OFF” SEDIMENT CUP ถ้วยกรองน้ำมันเชื้อเพลิง Place the O-ring in the fuel valve, and install the sediment cup. Tighten the sediment cup securely. 1. ใส่แหวนยางที่คันก๊อกน้ำมันเชื้อเพลิงและประกอบถ้วยกรองน้ำมัน เชื้อเพลิงและขันให้แน่น 3. 12 12
SPARK ARRESTER (applicable types) ตัวป้องกันประกายไฟ (ชนิดเสริม) ตัวป้องกันประกายไฟอาจเป็นชิ้นส่วนมาตรฐานหรือเป็นชิ้นส่วนเสริมขึ้นอยู่ กับประเภทเครื่องยนต์ในบางพื้นที่ถ้าเดินเครื่องโดยที่ไม่ใช้ตัวป้องกันประกาย ไฟจะเป็นการผิดกฎหมายให้ตรวจสอบกฎหมายและข้อบังคับของท้องถิ่น ตัวป้องกันประกายไฟสามารถหาซื้อได้จากตัวแทนการให้บริการของฮอนด้า ตัวป้องกันประกายไฟต้องได้รับการบริการทุกๆ 100 ชม. เพื่อให้สามารถ ใช้งานได้ตามที่ออกแบบไว้ ถ้าเพิ่งดับเครื่องท่อไอเสียจะยังร้อนอยู่ปล่อยให้เย็นลงก่อนจะดำเนินการกับ ตัวป้องกันประกายไฟ การถอดตัวป้องกันประกายไฟ 1. ถอดสกรูขนาด 4 มม. จำนวน 2 ตัวออกจากตัวหักเลี้ยวท่อไอเสีย และถอดตัวหักเลี้ยว (ชนิดเสริม) ออก 2. ถอดสกรูขนาด 5 มม. จำนวน 4 ตัวออกจากตัวป้องกันท่อไอเสีย และถอดตัวป้องกันท่อไอเสียออก 3. ถอดสกรูขนาด 4 มม. ออกจากตัวป้องกันประกายไฟและถอดตัวป้องกัน ประกายไฟออกจากท่อไอเสีย HELPFUL TIPS & SUGGESTIONS คำแนะนำและเคล็ดลับที่มีประโยชน์ การเก็บเครื่องยนต์ การเตรียมจัดเก็บ การเตรียมจัดเก็บที่เหมาะสมมีความจำเป็นมากสำหรับการเก็บเครื่องยนต์ ของคุณให้ไร้ปัญหาและคงสภาพดีขั้นตอนต่อไปนี้จะช่วยมิให้สนิมและการ กัดกร่อนมาทำให้เครื่องยนต์ของคุณเสื่อมสภาพและการทำงานยังจะทำ ให้ติดเครื่องยนต์อย่างง่ายดายเมื่อต้องการใช้อีกครั้ง การทำความสะอาด ถ้าเพิ่งดับเครื่องปล่อยให้เย็นลงก่อนอย่างน้อยครึ่งชั่วโมงก่อนทำความสะอาด ฉีดล้างทำความสะอาดภายนอกเครื่องยนต์ด้วยน้ำสะอาดให้ทั่วซ่อมแซมสีที่ เสียหายและทาเคลือบบริเวณที่อาจจะขึ้นสนิมด้วยน้ำมันบางๆ ข้อสังเกต การใช้งานก๊อกสนามหรืออุปกรณ์ล้างด้วยแรงดันอาจฉีดน้ำเข้าในหม้อกรอง อากาศหรือช่องเปิดของท่อไอเสียได้น้ำในหม้อกรองอากาศจะทำให้ไส้กรอง เปียกชุ่มและน้ำในไส้กรองอากาศและท่อไอเสียอาจผ่านเข้าไปในกระบอกสูบ และทำความเสียหายได้ The spark arrester may be standard or an optional part, depending on the engine type. In some areas, it is illegal to operate an engine without a spark arrester. Check local laws and regulations. A spark arrester is available from authorized Honda servicing dealers. STORING YOUR ENGINE Storage Preparation Proper storage preparation is essential for keeping your engine trouble-free and looking good. The following steps will help to keep rust and corrosion from impairing your engine’s function and appearance, and will make the engine easier to start when you use it again. The spark arrester must be serviced every 100 hours to keep it functioning as designed. If the engine has been running, the muffler will be hot. Allow it to cool before servicing the spark arrester. Cleaning If the engine has been running, allow it to cool for at least half an hour before cleaning. Clean all exterior surfaces, touch up any damaged paint, and coat other areas that may rust with a light film of oil. Spark Arrester Removal 1. Remove the two 4 mm screws from the exhaust deflector, and remove the deflector (applicable types). 2. Remove the four 5 mm screws from the muffler protector and remove the muffler protector. Using a garden hose or pressure washing equipment can force water into the air cleaner or muffler opening. Water in the air cleaner will soak the air filter, and water that passes through the air filter or muffler can enter the cylinder, causing damage. 3. Remove the 4 mm screw from the spark arrester, and remove the spark arrester from the muffler. น้ำมันเชื้อเพลิง น้ำมันเบนซินจะเสื่อมสภาพหรือเกิดออกไซด์ได้จากการจัดเก็บน้ำมันเบนซิน ที่เสื่อมสภาพจะทำให้ติดเครื่องยากและจะตกตะกอนเหนียวทำให้เกิดการอุดตัน ในระบบน้ำมันเชื้อเพลิงถ้าน้ำมันเบนซินในเครื่องยนต์ของคุณเสื่อมสภาพ Fuel Gasoline will oxidize and deteriorate in storage. Deteriorated gasoline will cause hard starting, and it leaves gum deposits that clog the fuel system. If the gasoline in your engine deteriorates during storage, you may need to have the carburetor and other fuel system components serviced or replaced. ระหว่างการจัดเก็บคุณอาจจะต้องมีการดำเนินการหรือเปลี่ยนคาร์บูเรเตอร์ และอุปกรณ์อื่นๆในระบบน้ำมันเชื้อเพลิง ความยาวของระยะเวลาที่สามารถจัดเก็บน้ำมันเบนซินไว้ในถังน้ำมันและ คาร์บูเรเตอร์โดยไม่ทำให้เกิดปัญหาการทำงานขึ้นอยู่กับหลายๆปัจจัยเช่น ส่วนประกอบในน้ำมันเบนซินอุณหภูมิในการจัดเก็บและการเก็บน้ำมันไว้เต็มถัง หรือไม่เต็มถังเนื่องจากอากาศในกรณีที่เติมไม่เต็มถังจะทำให้เกิดการเสื่อมสภาพ อุณหภูมิการจัดเก็บที่อุ่นมากๆก็เร่งการเสื่อมสภาพของน้ำมันปัญหาการเสื่อม สภาพอาจเกิดขึ้นภายหลัง 30 วันหรือน้อยกว่าถ้าน้ำมันเบนซินนั้นไม่บริสุทธิ์ ในขณะที่คุณเติมลงในถังน้ำมัน ความเสียหายของระบบน้ำมันเชื้อเพลิงหรือปัญหาประสิทธิภาพเครื่องยนต์ อันเนื่องมาจากการไม่เตรียมการจัดเก็บการรับประกันจะไม่ครอบคลุมถึง 5 mm SCREWS สกรูขนาด 5 มม. ตัวป้องกันท่อไอเสีย MUFFLER PROTECTOR ตัวหักเลี้ยวท่อไอเสีย EXHAUST DEFLECTOR สกรูขนาด 4 มม. The length of time that gasoline can be left in your fuel tank and carburetor without causing functional problems will vary with such factors as gasoline blend, your storage temperatures, and whether the fuel tank is partially or completely filled. The air in a partially filled fuel tank promotes fuel deterioration. Very warm storage temperatures accelerate fuel deterioration. Fuel deterioration problems may occur within 30 days from keeping the fuel in the fuel tank, or even less if the gasoline was not fresh when you filled the fuel tank. 4 mm SCREWS 4 mm SCREW สกรูขนาด 4 มม. SPARK ARRESTER ตัวป้องกันประกายไฟ การทำความสะอาดและตรวจสอบตัวป้องกันประกายไฟ Fuel system damage or engine performance problems resulting from neglected storage preparation are not covered under the Warranty. Spark Arrester Cleaning & Inspection 1. ใช้แปรงขัดคราบเขม่าคาร์บอน ออกจากตะแกรงตัวป้องกันประกายไฟระวัง อย่าทำให้ตะแกรงชำรุดเปลี่ยนตัวป้องกัน ประกายไฟถ้ามีการแตกหักหรือทะลุ 2. ประกอบตัวป้องกันประกายไฟตัวป้องกัน ท่อพักไอเสียตัวหักเลี้ยวท่อ ไอเสียและท่อพักไอเสียโดยใช้ขั้นตอนย้อนกลับจากการถอด การตั้งรอบเดินเบา การปรับตั้ง 1. ทำการสตาร์ทเครื่องยนต์ที่พื้นที่ด้านนอกและปล่อย ให้เครื่องยนต์เดินจนถึงระดับอุณหภูมิ 2. ทำการดันคันเร่งไปที่ตำแหน่ง ความเร็วต่ำสุด 3. หมุนสกรูตั้งรอบเพื่อทำการตั้ง รอบเดินเบา ความเร็วรอบเดินเบามาตรฐาน 1,400 ±200 150 รอบต่อนาที 1. Use a brush to remove carbon deposits from the spark arrester screen. Be careful not to damage the screen. Replace the spark arrester if it has breaks or holes. SCREEN ตะแกรง 2. Install the spark arrester, muffler protector, and exhaust deflector in the reverse order of removal. IDLE SPEED Adjustment THROTTLE STOP SCREW สกรูตั้งรอบ 1. Start the engine outdoors, and allow it to warm up to operating temperature. 2. Move the throttle lever to its minimum position. 3. Turn the throttle stop screw to obtain the standard idle speed. Standard idle speed: 1,400 rpm 200 150 + - 13
ข้อควรระวังในการจัดเก็บข้อควรระวังในการจัดเก็บ ถ้าเครื่องยนต์ของคุณจะต้องจัดเก็บในขณะที่มีน้ำมันเบนซินอยู่ในถังน้ำมัน และคาร์บูเรเตอร์มีความสำคัญอย่างมากที่ต้องลดอันตรายจากการจุดติดของ ไอน้ำมันเบนซินเลือกสถานที่จัดเก็บที่อากาศถ่ายเทได้ดีและอยู่ห่างจาก Draining the Fuel Tank and Carburetor - การถ่ายน้ำมันออกจากถังน้ำมันเชื้อเพลิงและคาร์บูเรเตอร์ Storage Precautions If your engine will be stored with gasoline in the fuel tank and carburetor, it is important to reduce the hazard of gasoline vapor ignition. Select a well ventilated storage area away from any appliance that operates with a flame, such as a furnace, water heater, or clothes dryer. Also avoid any area with a spark- producing electric motor, or where power tools are operated. อุปกรณ์ที่มีเปลวไฟเช่นเตาเครื่องอุ่นน้ำหรือเศษผ้าแห้งหรือบริเวณที่มี ประกายไฟเช่นเครื่องไฟฟ้าหรือเครื่องมือยนต์ทำงานอยู่ คำเตือน น้ำมันเบนซินเป็นสารที่ติดไฟง่ายและระเบิดได้คุณอาจถูกไฟไหม้ หรือบาดเจ็บรุนแรงในขณะจัดเก็บน้ำมันเชื้อเพลิงได้ • ดับเครื่องยนต์และอย่านำความร้อนประกายไฟ และเปลวไฟเข้าใกล้ Gasoline is highly flammable and explosive, and you can be burned or seriously injured when handling fuel. Stop the engine and keep heat, sparks, and flame away. Handle fuel only outdoors. • จัดเก็บน้ำมันในพื้นที่เปิดโล่งเท่านั้น • เช็ดคราบน้ำมันที่หกออกทันที If possible, avoid storage areas with high humidity, because that promotes rust and corrosion. ถ้าเป็นไปได้ให้หลีกเลี่ยงบริเวณที่มีความชื้นสูงเพราะจะทำให้เกิดสนิม และการกัดกร่อนเร็วขึ้น Wipe up spills immediately. Keep the engine level in storage. Tilting can cause fuel or oil leakage. Move the fuel valve lever to the OFF position. 1. วางภาชนะบรรจุน้ำมันเบนซินที่ได้รับการตรวจสอบแล้วด้านใต้ คาร์บูเรเตอร์และใช้กรวยรองเพื่อมิให้น้ำมันหก 1. 2. Place an approved gasoline container below the carburetor, and use a funnel to avoid spilling fuel. 2. ถอดโบ๊ลท์ถ่ายน้ำมันและปะเก็นของคาร์บูเรเตอร์และถอดถ้วยกรอง น้ำมันเชื้อเพลิงและแหวนยางออกหลังจากนั้นเลื่อนคันก๊อกน้ำมัน เชื้อเพลิงไปที่ตำแหน่งเปิด “ON” With the engine and exhaust system cool, cover the engine to keep out dust. A hot engine and exhaust system can ignite or melt some materials. Do not use sheet plastic as a dust cover. A nonporous cover will trap moisture around the engine, promoting rust and corrosion. ในขณะที่เครื่องยนต์และระบบไอเสียเย็นแล้วให้ทำการคลุมเครื่องยนต์เพื่อ ป้องกันฝุ่นเครื่องยนต์และระบบไอเสียที่ร้อนจะทำให้วัสดุบางประเภทติดไฟ หรือหลอมละลายอย่าใช้แผ่นพลาสติกมาคลุมกันฝุ่นที่คลุมแบบไม่มีรูระบาย จะกักความชื้นรอบๆเครื่องยนต์ไว้และยิ่งทำให้เกิดสนิมและการกัดกร่อนเร็วขึ้น จัดเก็บเครื่องยนต์ให้อยู่ในแนวราบการเอียงเครื่องยนต์จะทำให้น้ำมันเชื้อเพลิง หรือน้ำมันเครื่องรั่วไหลได้ 3. Remove the carburetor drain bolt and gasket. Remove the sediment cup and O-ring, then move the fuel valve lever to the ON position. FUEL VALVE LEVER คันก๊อกน้ำมันเชื้อเพลิง If equipped with a battery for electric starter types, recharge the battery once a month while the engine is in storage. This will help to extend the service life of the battery. O-RING แหวนยาง Removal from Storage Check your engine as described in the BEFORE OPERATION CHECKS section of this manual (see page ในกรณีที่มีแบตเตอรี่สำหรับรุ่นติดเครื่องด้วยไฟฟ้าให้ชาร์จไฟแบตเตอรี่เดือน ละครั้งในระหว่างการจัดเก็บเครื่องยนต์ เป็นการช่วยยืดอายุการใช้งานของแบตเตอรี่ 3 ). GASKET ตำแหน่งเปิด “ON” If the fuel was drained during storage preparation, fill the tank with fresh gasoline. If you keep a container of gasoline for refueling, be sure it contains only fresh gasoline. Gasoline oxidizes and deteriorates over time, causing hard starting. การนำออกจากการจัดเก็บ ตรวจสอบเครื่องยนต์ของคุณตามที่ได้อธิบายไว้ในหัวข้อการตรวจสอบก่อน DRAIN BOLT ปะเก็น SEDIMENT CUP ถ้วยกรองน้ำมันเชื้อเพลิง โบ๊ลท์ถ่ายน้ำมัน 4. After all the fuel has drained into the container, reinstall the drain bolt, gasket, sediment cup and O-ring. Tighten the drain bolt and sediment cup securely. โบ๊ลท์ถ่ายน้ำมันปะเก็นถ้วยกรองน้ำมันเชื้อเพลิงและแหวนยางกลับ ขันโบ๊ลท์ถ่ายน้ำมันและถ้วยกรองน้ำมันเชื้อเพลิงให้แน่นน้ำมันเครื่อง If the cylinder was coated with oil during storage preparation, the engine will smoke briefly at startup. This is normal. การเดินเครื่องในคู่มือเล่มนี้ (ดูหน้า 3) 1. หลังจากน้ำมันเชื้อเพลิงไหลลงไปที่ภาชนะบรรจุทั้งหมดแล้วประกอบ Engine Oil 1. เปลี่ยนน้ำมันเครื่อง (ดูหน้า 9) 2. ถอดหัวเทียน (ดูหน้า 12) 3. เทน้ำมันเครื่องสะอาด 1 ช้อนโต๊ะ 5-10 ซม.3 (5-10 ซีซี) ลงไปในกระบอกสูบ 4. ดึงเชือกสตาร์ทหลายๆครั้งเพื่อให้น้ำมันเครื่องในกระบอกสูบกระจายตัวทั่วๆ 5. ประกอบหัวเทียนกลับ 6. ดึงเชือกสตาร์ทช้าๆจนมีความรู้สึกถึงแรงต้านและให้ตำแหน่งของเครื่อง หมายบนพูเลย์ตรงกับตำแหน่งรูที่ด้านบนของฝาครอบชุดรีคอยล์สตาร์ท จะเป็นการปิดวาล์วเพื่อกันมิให้ความชื้นเข้าไปในกระบอกสูบค่อยๆ ปล่อยเชือกสตาร์ท TRANSPORTING ถ้ามีการถ่ายน้ำมันเชื้อเพลิงออกในขั้นตอนเตรียมการจัดเก็บให้เติมน้ำมันเบน ซินใหม่ลงในถังน้ำมันถ้าคุณเก็บน้ำมันเบนซินไว้ในภาชนะบรรจุเพื่อเติมใหม่ ตรวจสอบให้แน่ใจว่าบรรจุเฉพาะน้ำมันเบนซินบริสุทธิ์น้ำมันเบนซินที่เสื่อมสภาพ และเกิดออกไซด์จะทำให้ติดเครื่องยาก 1. Change the engine oil (see page 9 ). If the engine has been running, allow it to cool for at least 15 minutes before loading the engine-powered equipment on the transport vehicle. A hot engine and exhaust system can burn you and can ignite some materials. 2. 12 Remove the spark plug (see page ). 3. Pour a teaspoon 5 cylinder. 10 cm (5 10 cc) of clean engine oil into the - - Keep the engine level when transporting to reduce the possibility of fuel leakage. Move the fuel valve lever to the OFF position (see page ). 5 จะมีควันช่วงสั้นๆอันนี้ถือเป็นเรื่องปกติ ถ้าเคลือบกระบอกสูบด้วยน้ำมันระหว่างการเตรียมการจัดเก็บในขณะติดเครื่อง 4. Pull the starter grip several times to distribute the oil in the cylinder. 5. Reinstall the spark plug. การขนย้าย ถ้าเพิ่งดับเครื่องยนต์ปล่อยให้เย็นลงก่อนอย่างน้อย 15 นาทีก่อนทำการบรรทุก เครื่องยนต์พร้อมอุปกรณ์บนยานพาหนะขนส่งเครื่องยนต์และระบบไอเสียที่ ร้อนอยู่อาจทำให้คุณถูกไฟลวกและอาจจะทำให้วัสดุบางประเภทลุกติดไฟได้ 6. Pull the starter grip slowly until resistance is felt and the notch on the starter pulley aligns with the hole at the top of the recoil starter cover. This will close the valves so moisture cannot enter the engine cylinder. Return the starter grip gently. จัดตำแหน่งของเครื่องหมายบนพูเลย์ Align notch on pulley with hole at top of cover. ตรงกับตำแหน่งรูที่ด้านบนของฝาครอบ วางเครื่องยนต์ให้ได้แนวราบในขณะขนส่งเพื่อลดโอกาสการรั่วไหลของน้ำมัน เชื้อเพลิงเลื่อนคันก๊อกน้ำมันเชื้อเพลิงไปที่ตำแหน่งปิด “OFF” (ดูหน้า 5) 14
TAKING CARE OF UNEXPECTED PROBLEMS ??????????????????????????????? FUSE REPLACEMENT (applicable types) The electric starter relay circuit and battery charging circuit are protected by a fuse. If the fuse burns out, the electric starter will not operate. The engine can be started manually if the fuse burns out, but running the engine will not charge the battery. ENGINE WILL NOT START Electric starting (applicable types): Check battery and fuse. Check control positions. Possible Cause Correction Recharge battery. ?????????????????????? ???? "ON" ????????????????????????? ??? "CLOSED" ??????? ??????????????????? 1. 1. ?????????????? ?????? Battery discharged. "OFF" ???????? "OPEN" ??????????????????????? Replace fuse (p. 15). Fuse burnt out. Remove the 6 switch box. 12 mm screw from the rear cover of the engine 1. × Move lever to ON position. Move lever to CLOSED position unless the engine is warm. Turn engine switch to ON position. Fill with the recommended oil to the proper level (p. 9). Refuel (p. 8). Drain fuel tank and carburetor (p. 14). Refuel with fresh gasoline(p. 8). ??????????????????????????? ?????? "MAX" Remove the fuse cover, then pull out and inspect the fuse. 2. Fuel valve OFF. ???????????????????? "OFF" ?????????????????????????? 2. If the fuse is burnt out, discard the burnt-out fuse. Install a new fuse with the same rating as the one that was removed, and reinstall the cover. If you have questions regarding the rating of the original fuse, contact your servicing Honda engine dealer. Choke OPEN. ??????????? "ON" ?????????? (???? 8) 2. ??????????????????????? ????????? ????????????????????? ??????? ????????????????? ??????????????????? ???? ????????????????????? ??? ?????????????????? (???? 14) ???????????????????????? Engine switch OFF. Engine oil level low (Oil Alert models). ???????????????????????????? (???? 8) ????????????????? ?????? ???? ????????????????????? ???? ????????????????? ?????? ???? ???????????????????????????? ??????????????????????? ?????????????????? (?????????????????????) Check engine oil level. 3. Never use a fuse with a rating greater than the one originally equipped with the engine. Serious damage to the electrical system or a fire could result. ????????????????????? ???? 4. ??? ????????????? Check fuel. ????? 4. Out of fuel. Bad fuel; engine stored without draining gasoline or refueled with bad gasoline. Spark plug faulty, fouled, or improperly gapped. Spark plug wet with fuel (flooded engine). ????????? ????? malfunction, ignition malfunction, valves stuck, etc. ??????????????????? (???? 12) ??????????????????? (????12) ?????????????????????????? ?????????? ????????????????? ??????????????????????????????????? Reinstall the rear cover. Install the 6 it securely. 12 mm screw and tighten 3. × ?????????????????????????????????? (?????????????????????) ????????? ????????????????? ?????????? ????????????????? ??????????????????????????? ????????? “MAX” ENGINE SWITCH REAR COVER FUSE COVER Gap or replace spark plug (p. 12). ??????????????????????? Remove and inspect spark plug. ?????????????????? ????????? ??????????? ?????????????? 5. 5. ?????????????????? ?????????????????????????? ??????? ??????????????????? ?????? ????????????????????????? ????????????????????????? 6 SPECIAL SCREW 12 mm × FUSE Dry and reinstall spark plug. Start engine with throttle lever in MAX. position. Replace or repair faulty components as necessary. ???????? Clean or replace filter element(s) (p. 11 12). Drain fuel tank and carburetor (p. 14). Refuel with fresh gasoline (p. 8). ??????????????????????? 3. ???????????? ????????????? dealer, or refer to shop manual. servicing ????????????????????? ?????????????????? ???????? ????????????????????? ?????????????????? ???????????????????????????? ???????????????? ?????????????????????? ???????????? (???? 11-12) Take engine to an authorized Honda servicing dealer, or refer to shop manual. Fuel filter restricted, carburetor malfunction, ignition malfunction, valves stuck, etc. restricted. ??????????????????? ???? ???????????????????????????? 6. 1. ??????????????????? Frequent fuse failure usually indicates a short circuit or an overload in the electrical system. If the fuse burns out frequently, take the engine to a servicing Honda dealer for repair. ENGINE LACKS 2. ????????????? Possible Cause ????????????????????? ??????? Correction ????????????????????? ??? ?????????????????? (???? 14) ???????????????????????? ????????????????????? POWER Check air filter. 1. ?????????? ?????????????????? Filter element(s) ????????????????? 1. ??????????????????? ?????????????????? ?????????????????????? ???????????? (???? 11-12) - (???? 8) ENGINE LACKS POWER Check air filter. 1. ?????????? Possible Cause ????????????????????? ??????? ????????????????? ??????????????????? ???? ???????????????????????????? refueled with bad gasoline. Fuel filter restricted, carburetor Correction ????????????????????? ??? ?????????????????? (???? 14) ???????????????????????? (???? 8) 2. ????????????? Check fuel. 2. 3. ?????????????????? Bad fuel; engine stored without draining ?????????????????? ?????????????????????????? ??????? ??????????????????? Filter element(s) restricted. gasoline or ?????? ????????????????????????? ????????????????????????? ????????? ????? Clean or replace filter element(s) (p. 11 12). Drain fuel tank and carburetor (p. 14). Refuel with fresh gasoline (p. 8). ??????????????????????? as necessary. ????????? ????????????????????????? - Check fuel. 3. ?????????????????? Take engine to an authorized Honda Bad fuel; engine stored without draining gasoline or refueled with bad gasoline. Fuel filter restricted, carburetor malfunction, ignition malfunction, valves stuck, etc. 2. 3. ?????????????????? ?????????????????????????? ??????? ??????????????????? faulty components Replace or repair ????????? ????????????????????????? ?????? ????????????????????????? ????????????????????????? ????????? ????? Take engine to an authorized Honda servicing dealer, or refer to shop manual. Replace or repair faulty components as necessary. 3. 15
TECHNICAL INFORMATION ??????????????? ????????????????????????? Remote Control Linkage ??????????????????????? ??????? ????????????????????????????????????????????????????? ????????? ??????????????????????????????????????????? ????????????? ????????? ??????? ???????????????????? ?????? ????????????????????????????????????????? ?????????????????????? ??????????????? The throttle and choke control levers are provided with holes for optional cable attachment. The following illustrations show installation examples for a solid wire cable and for a flexible, braided wire cable. If using a flexible, braided wire cable, add a return spring as shown. Serial Number Location ????????????????????????????? ?????? ???????????????? ???????????????????? ???????????????????????????????????? ???????????????????? ???????? ??????????????? ??????????????? Record the engine serial number, type and purchase date in the spaces below. You will need this information when ordering parts and when making technical or warranty inquiries. It is necessary to loosen the throttle lever friction nut when operating the throttle with a remote-mounted control. ELECTRIC STARTER (applicable types) DZ1C-A REMOTE THROTTLE LINKAGE ?????????????????? SERIAL NUMBER & ENGINE TYPE LOCATION ???????????? RETURN SPRING ?????????????? Engine serial number: __ __ __ __ ?????????????????? : _____________________________________ ????????????????? : ______________________________________ ????????????? : ____________________________________________ __ __ __ __ __ __ __ - THROTTLE LEVER FRICTION NUT ?????????? Engine type: ___ ___ ___ ___ Date Purchased: ______ / ______ / ______ Flexible wire core mounting ??????????????????????? Battery Connections for Electric Starter (applicable types) 4 mm SCREW ???????? 4??. ????????? Recommended Battery GX120 GX160 GX200 OPTIONAL ????????? WIRE HOLDER WIRE ??? ???????? ???? 5 ??. 12 V 18 Ah - ??????? THROTTLE LEVER 5 mm CIRCLIP Be careful not to connect the battery in reverse polarity, as this will short circuit the battery charging system. Always connect the positive ( ) battery cable to the battery terminal before connecting the negative ( ) battery cable, so your tools cannot cause a short circuit if they touch a grounded part while tightening the positive ( ) battery cable end. Solid wire core mounting ????????????????? + - ????????????????? REMOTE CHOKE LINKAGE + WIRE HOLDER ????????? A battery can explode if you do not follow the correct procedure, seriously injuring anyone nearby. ??????????? ?????????? CHOKE LEVER ??????? Keep all sparks, open flames, and smoking materials away from the battery. Battery posts, terminals, and related accessories contain lead and lead compounds. Wash hands after handling. 1. Connect the battery positive ( terminal as shown. ) cable to the starter solenoid + 2. Connect the battery negative ( bolt, frame bolt, or other good engine ground connection. ) cable to an engine mounting - 3. Connect the battery positive ( terminal as shown. ) cable to the battery positive ( ) + + 4. Connect the battery negative ( ( ) terminal as shown. ) cable to the battery negative - - Coat the terminals and cable ends with grease. 5. NEGATIVE ( BATTERY CABLE ) - STARTER SOLENOID POSITIVE ( ) BATTERY CABLE + 16
Carburetor Modifications for High Altitude Operation ????????????????????????????????????????????????????? ?????????????????? ????????????-???????????????????????????????????? ????????????????? ???????????????????????? ????????????????????? ????????????????? ????????????????? ???????????????????????????? ??????????????????????????????? ????????????????????????????????????? ????????????????????????? ??????????? ???????????????????????? ????????????????????????????? ?????????????????????????????? ?????????????????????????????? ?????????????????????????????????????? ??????? 1,500 ???? (5,000 ???) ???????? ???????????????????????? ????????????????????????????? ???????????????????????????????????????? ????????????????????????? ?????? 3.5% ????????????????????????????? 300 ???? (1,000 ???) ?????????????????????????????????????? ??????????????????????????????? ????????????? ????????? ??????????????????????????????????????????????????????????????????? ????????????-?????????????????????????????????????????????????? ???????????????????????????????????????????????????????????? 1,500 ???? (5,000???)???????????????????????????????????????????????????? ?????????????????????????????????????????????????????????????????? ???????????????????????????????????????????????????????????????????? ?????? Specifications ????????????? GX120 (???? PTO ???? S) At high altitude, the standard carburetor air-fuel mixture will be too rich. Performance will decrease, and fuel consumption will increase. A very rich mixture will also foul the spark plug and cause hard starting. Operation at an altitude that differs from that at which this engine was certified, for extended periods of time, may increase emissions. GX120 Length ??????? X ????????? X ??????? ????????????? ????????????????? (PTO shaft type S) Width 297 341 297 x 341 x 318 ??. 12.9 ??. 4 ?????? ???????????? ??????????????? 318 mm Height × × × × Dry mass [Dry weight] Engine type Displacement [Bore Stroke] Net power (in accordance with SAE J1349 ) (????????? x ???????) ??????????? (?????????? SAE J1349*) ????????????????? (?????????? SAE J1349*) ???????????????????? 12.9 kg 4-stroke, overhead valve, single cylinder 118 cm [60.0 42.0 mm] 118 ??3 × × ???????????????? 2.5 kW (3.4 PS) at 3,600 rpm [60.0 x 42.0 ??.] 2.5 ????????? (3.4 PS) QT : QTN : 2.6 kw (3.5 PS) 2.6 กิโลวัตต์ (3.5 PS) High altitude performance can be improved by specific modifications to the carburetor. If you always operate your engine at altitudes above 1,500 meters, have your servicing dealer perform this carburetor modification. * Max. Net torque (in accordance with SAE J1349 ) 7.0 N·m (0.71 kgf·m) at 2,500 rpm * Engine oil capacity Fuel tank capacity Cooling system Ignition system PTO shaft rotation 0.56 L 2.0 L ??? 3,600 ?????????? QT : Even with carburetor modification, engine horsepower will decrease about 3.5% for each 300 meters increase in altitude. The effect of altitude on horsepower will be greater than this if no carburetor modification is made. Forced air 7.0 ??????.???? (0.71 kgf.m) Transistor magneto QTN : 7.3 ??????.???? (0.74 kgf.m) Counterclockwise ??? 2,500 ?????????? 0.56 ???? GX160 Length (PTO shaft type S) Width Height 304 362 15.0 kg 335 mm × ?????????????????????????? ????????????????? ????????????? ???????????????????? PTO ???????????????????? GX160 (???? PTO ???? S) ??????? X ????????? X ??????? ??????? (????????) ????????????????? × × × 2.0 ???? ????? Dry mass [Dry weight] Engine type Displacement [Bore Stroke] Net power (in accordance with SAE J1349 ) When the carburetor has been modified for high altitude operation, the air-fuel mixture will be too lean for low altitude use. Operation at altitudes below 1,500 meters with a modified carburetor may cause the engine to overheat and result in serious engine damage. For use at low altitudes, have your servicing dealer return the carburetor to original factory specifications. 4-stroke, overhead valve, single cylinder ???????????????????? 163 cm 45.0 mm] ????????????? 6,533 [68.0 × × 3.5 kW (4.8 PS) at 3,600 rpm * Max. Net torque (in accordance with SAE J1349 ) 10.0 N·m (1.02 kgf·m) at 2,500 rpm 0.58 L 3.1 L Forced air Transistor magneto Counterclockwise [68.0 x 45.0 ??.] 3.5 ????????? (4.8 PS) QT : QTN : 3.6 kw (4.9 PS) 3.6 กิโลวัตต์ (4.9 PS) 304 x 362 x 335 ??. 15.0 ??. 4 ?????? ???????????? ??????????????? 163 ??3 * Engine oil capacity Fuel tank capacity Cooling system Ignition system PTO shaft rotation (????????? x ???????) ??????????? (?????????? SAE J1349*) ????????????????? (?????????? SAE J1349*) ???????????????? The power rating of the engine indicated in this document is the net power output tested on a production engine for the engine model and measured in accordance with SAE J1349 at 3,600 rpm (Net Power) and at 2,500 rpm (Max. Net Torque). Mass production engines may vary from this value. Actual power output for the engine installed in the final machine will vary depending on numerous factors, including the operating speed of the engine in application, environmental conditions, maintenance, and other variables. ???????????????????? ?????????????????????????? ????????????????? ????????????? ???????????????????? PTO ???????????????????? ‘* ???????????????????????????????????????? ?????????????????????????????????? ????????????????????????? ???????????????????????????? ??????????????????? SAE J1349 ??? 3,600 ?????????? (???????????) ?????? 2,500 ?????????? (?????? ???????????) ???????????????????????????????? ?????????????????????????? ?????????????????????????????????????????????????????????????????? ???????????? ?????????????????????????? ??????????????????????????????????????????? ??????????? ?????????????? ?????????????? * ??? 3,600 ?????????? 10.0 ??????.???? (1.02 kgf.m) QTN : 10.3 ??????.???? (1.05 kgf.m) QT : ??? 2,500 ?????????? 0.58 ???? 3.1 ???? ????? ???????????????????? ????????????? 7,298 17
????????????? GX200 (PTO shaft type S) Length Width GX200 (???? PTO ???? S) ??????? X ????????? X ??????? ????????????? ????????????????? Wiring Diagrams Height 313 376 16.0 kg 313 x 376 x 335 ??. 16.0 ??. 4 ?????? ???????????? ??????????????? 196 ??3 [68.0 x 54.0 ??.] 3.9 ????????? (5.3 PS) QT : QTN : 4.1 ???????? (5.6 PS) 335 mm × × × × Dry mass [Dry weight] Engine type Displacement [Bore Stroke] Net power (in accordance with SAE J1349 ) ? ???????????????? (????????? x ???????) ??????????? (?????????? SAE J1349*) ????????????????? (?????????? SAE J1349*) ???????????????????? ?????????????????????????? ????????????????? ????????????? ???????????????????? PTO ???????????????????? With Oil Alert and Electric Starter ??????????? ?????? ????????? ?????????????? ????? 410 ??????????????????????? ??????????? ??????????? ???????????? ????????????? 10520 4-stroke, overhead valve, single cylinder 196 cm 54.0 mm] ? [68.0 × × 3.9 kW (5.3 PS) at 3,600 rpm * Max. Net torque (in accordance with SAE J1349 ) 11.9 N·m (1.21 kgf·m) at 2,500 rpm 0.6 L 3.1 L Forced air Transistor magneto Counterclockwise 11.9 ??????.???? (1.21 kgf.m) QT : QTN : 12.4 ??????.???? (1.26 kgf.m) ? ????????????? ?????? ???????? ?????? ??????? ????? 14 ??????????? ???????????? ???????? ????????? ????????????? 10500 02-6352600 ??? 5525 * Engine oil capacity Fuel tank capacity Cooling system Ignition system PTO shaft rotation เอเชี่ยน ??? 3,600 ?????????? OFF ??? 2,500 ?????????? 0.6 ???? 3.1 ???? ????? ???????????????????? ????????????? 7,886 ON The power rating of the engine indicated in this document is the net power output tested on a production engine for the engine model and measured in accordance with SAE J1349 at 3,600 rpm (Net Power) and at 2,500 rpm (Max. Net Torque). Mass production engines may vary from this value. Actual power output for the engine installed in the final machine will vary depending on numerous factors, including the operating speed of the engine in application, environmental conditions, maintenance, and other variables. * START With Oil Alert and Without Electric Starter ‘* ???????????????????????????????????????? ?????????????????????????????????? ????????????????????????? ???????????????????????????? ??????????????????? SAE J1349 ??? 3,600 ?????????? (???????????) ?????? 2,500 ?????????? (?????? ???????????) ???????????????????????????????? ?????????????????????????? ?????????????????????????????????????????????????????????????????? ???????????? ?????????????????????????? ??????????????????????????????????????????? ??????????? ?????????????? ?????????????? OFF ON (1) (2) (3) (4) (5) (6) (7) CONTROL BOX RECTIFIER FUSE (8) (9) (10) (11) (12) (13) (14) OIL LEVEL SWITCH CHARGING COIL IGNITION COIL SPARK PLUG STARTER MOTOR STARTER SOLENOID BATTERY (12 V) CIRCUIT BREAKER ENGINE SWITCH OIL ALERT UNIT Type with Oil Alert unit ???????????????????????????? GX120/160/200 ?????? ?????????? 0.7 - 0.8 ??. ?????????????? ??????????? 12 ?????????????????????? ?????????????????? Bl Y Bu G R W Br O Lb Lg P Gr Black Yellow Blue Green Red White Brown Orange Light blue Light green Pink Gray +200? -150? 1400 ?????????? ??????????? 13 ???? : 0.15 + 0.02 ??. ?????? : 0.20 + 0.02 ??. ?????????????????????????????????????????? ????????????????????? ?????????????? ????????????????? ???????????????? ??????????????? ???????? : ??? ????? ?? ??????? ???????????????????????????? 18