Download
1 / 22

E N D
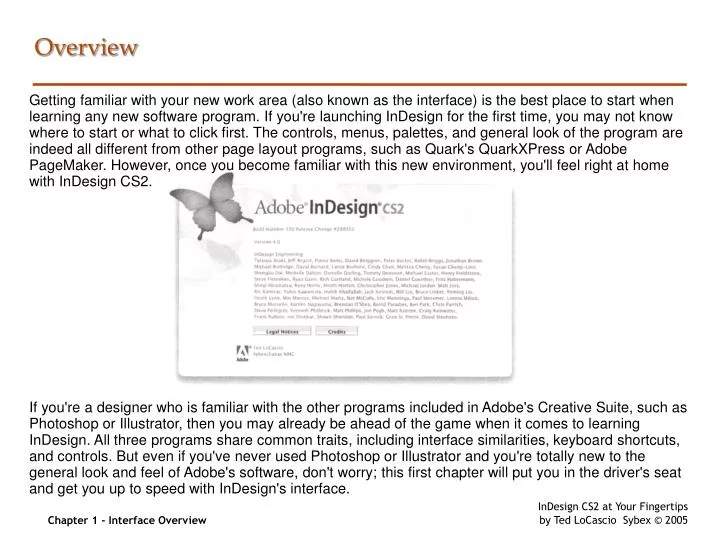
Chapter 1 - Interface Overview Overview Getting familiar with your new work area (also known as the interface) is the best place to start when learning any new software program. If you're launching InDesign for the first time, you may not know where to start or what to click first. The controls, menus, palettes, and general look of the program are indeed all different from other page layout programs, such as Quark's QuarkXPress or Adobe PageMaker. However, once you become familiar with this new environment, you'll feel right at home with InDesign CS2. If you're a designer who is familiar with the other programs included in Adobe's Creative Suite, such as Photoshop or Illustrator, then you may already be ahead of the game when it comes to learning InDesign. All three programs share common traits, including interface similarities, keyboard shortcuts, and controls. But even if you've never used Photoshop or Illustrator and you're totally new to the general look and feel of Adobe's software, don't worry; this first chapter will put you in the driver's seat and get you up to speed with InDesign's interface.
Chapter 1 - Interface Overview 1.1 The Macintosh Interface System requirements: Mac OS X version 10.2 or higher; G3 or higher processor; 128 MB of RAM; 1024×768 monitor resolution at 256 colors; 350 MB of free hard drive space; and a CD-ROM drive for installation. You must install QuickTime 6 separately to use InDesign's multimedia features. For Adobe PostScript printing, a PostScript Level 2 or PostScript Language Level 3 printer is required. (A) Title bar The filename and view magnification are always displayed here. (B) Page This is the work area for creating page layouts and designs. It is always surrounded by a thin rule and a hard drop shadow. The white area outside of the page is called the Pasteboard and is not printable. Control-click (Mac) or right-click (Windows) in the Page area to access various control options depending on which tool you currently have selected. (C) Rulers When made visible, the rulers always surround the top and left sides of your layout in the document window. Units can be chosen in the Preferences dialog. Control-clicking (Mac) or right-clicking (Windows) in the ruler areas allows you to change units and ruler display options. You can also click and drag a guideline from the ruler area to the Page. (D) Adjust ruler origin Click and drag to change the "zero point" in your document (the point of origin for your rulers). Double-clicking this area resets the zero point to the top-left corner. (E) Document magnification This number indicates the percentage that your layout is currently being displayed at within the document window. Click the arrow to the right of the number to choose a different percentage preset from the footer menu, or double-click in the text field to type in a value. (F) Page number access This number indicates which page you are currently viewing in the document window. Click the arrow to the right of it to select a different page from the footer menu, or double-click in the text field to type in the number of the page you'd like to view. A group of arrow buttons for accessing the next, previous, and first or last page of the document is also available.
Chapter 1 - Interface Overview Shortcuts Minimize windowMac: Command+M Show/hide all controls Mac: Tab Show/hide all controls except Toolbox and Control bar Mac: Shift+Tab Tip Option-clicking the desktop behind your open document window hides InDesign.
Chapter 1 - Interface Overview 1.2 The Windows Interface System requirements: Windows 2000 with Service Pack 2, or Windows XP Home or Professional Edition; Intel Pentium II or higher processor; 128 MB of RAM; a video card that supports 1024×768 monitor resolution at 256 colors; 312 MB of free hard drive space; and a CD-ROM drive for installation. You must install QuickTime 6 separately to use InDesign's multimedia features. For Adobe PostScript printing, a PostScript Level 2 or PostScript Language Level 3 printer is required. (A) Menu bar You can access any of the menu list options by simply clicking any of the word headings in the menu bar. (B) Control bar Options for the tool you currently have selected in the Toolbox always appear here. (C) Toolbox You can access any of the InDesign tools by clicking one of the icons shown in the Toolbox. (D) Palettes All the palettes can be accessed under the Window menu in the menu bar. They are listed alphabetically in the main pull-down, but note that some are grouped into submenus within the list. Once accessed, palettes appear free-floating on your screen, but can also be grouped with other palettes and docked into one of the side tabs. (E) Document window This window displays the page layout(s) you are currently working on. You can have more than one document window open at a time, but the one you are currently working on always appears in front.
Chapter 1 - Interface Overview Shortcuts Minimize all windowsWin: Windows key+M Show/hide all controlsWin: Tab Show/hide all controls except Toolbox and Control barWin: Shift+Tab Tip You can open or close all of the side tabs at once by Alt-clicking any one of the palette names.
Chapter 1 - Interface Overview 1.3 The Document Window Any time you open or start a new document in InDesign, it is placed in its own document window. You can view all of the pages in your document within this window. In both Mac OS X and Windows, controls for view magnification and page access are built right into the document window, located in the bottom-left corner. (A) Title bar The filename and view magnification are always displayed here. (B) Page This is the work area for creating page layouts and designs. It is always surrounded by a thin rule and a hard drop shadow. The white area outside of the page is called the Pasteboard and is not printable. Control-click (Mac) or right-click (Windows) in the Page area to access various control options depending on which tool you currently have selected. (C) Rulers When made visible, the rulers always surround the top and left sides of your layout in the document window. Units can be chosen in the Preferences dialog. Control-clicking (Mac) or right-clicking (Windows) in the ruler areas allows you to change units and ruler display options. You can also click and drag a guideline from the ruler area to the Page. (D) Adjust ruler origin Click and drag to change the "zero point" in your document (the point of origin for your rulers). Double-clicking this area resets the zero point to the top-left corner. (E) Document magnification This number indicates the percentage that your layout is currently being displayed at within the document window. Click the arrow to the right of the number to choose a different percentage preset from the footer menu, or double-click in the text field to type in a value. (F) Page number access This number indicates which page you are currently viewing in the document window. Click the arrow to the right of it to select a different page from the footer menu, or double-click in the text field to type in the number of the page you'd like to view. A group of arrow buttons for accessing the next, previous, and first or last page of the document is also available.
Chapter 1 - Interface Overview Shortcuts Close front document window Mac: Command+WWin: Ctrl+W Close all document windows Mac: Opt+Shift+Cmd+WWin: Shift+Ctrl+Alt+W New document Mac: Command+NWin: Ctrl+N Open document Mac: Command+OWin: Ctrl+O Browse for document using Adobe Bridge Mac: Opt+Cmd+OWin: Ctrl+Alt+O Tip Double-click in the ruler area to add a guide at that exact measurement point on the page.
Chapter 1 - Interface Overview 1.4 Interface Objects Although they may look slightly different from Mac OS X to Windows, the InDesign interface controls work the same on either platform. All of the controls are labeled with an icon so that you always know what you're adjusting. However, if you're still not sure what a certain control does just by viewing its icon, you can always use tooltips for a brief description. Related Task 5.1 General Preferences Label icons and data fields Identifying label icons appear next to their accompanying data fields. The visual markers indicate the control's function. Click the label icon to select the text in the field. Tooltips These little guys can be really helpful if you're new to InDesign. Some of the visual label icons may be hard to decipher if you're new to the interface, in which case it's tooltips to the rescue! Just hover your mouse over any tool, control, or palette name and in a few seconds, a little yellow box appears with a description. A few seconds not fast enough for you? Then open the InDesign General Preferences (Command+K on a Mac, Ctrl+K on Windows) and under Tool Tips, choose Fast.
Chapter 1 - Interface Overview Shortcuts Show/hide all controlsMac and Win: Tab Show/hide all controls except Toolbox and Control barMac and Win: Shift+Tab Move to next data field (when cursor is in data field) Mac and Win: Tab Access contextual menu Mac: Control-clickWin: Right-click Open/close side tab Mac and Win: Click palette name Show/hide all controls except Toolbox and Control bar Mac and Win: Shift+Tab Tip Clicking a control's label icon selects the content of its accompanying data field.
Chapter 1 - Interface Overview Interface Menus In addition to the ones found in the menu bar, a series of menus can be accessed at various places within the InDesign interface. Much like Adobe's Photoshop and Illustrator, they are broken down into five categories: palette menus, footer menus, contextual menus, select menus, and drop-downs. Palette menu Clicking the circular arrow button opens a palette's flyout menu, where you can choose from several palette-specific options. (See the graphic at the bottom of the previous page.) Shown there are the menu options for the Swatches palette. As you can see, there is quite a bit to choose from. It's always a good idea to click these if you can't find what you're looking for. You might be surprised what you'll find!
Chapter 1 - Interface Overview Footer menu These work exactly like palette menus but are found at the bottom of the window rather than at the top. Although there aren't many of these in InDesign, footer menus can be particularly useful. The document window footer menu shown here is a quick and easy way to change view magnification. Tip To show palette menu options in alphabetical order, hold down Shift+Opt+Cmd (Mac) or Shift+Alt+Ctrl (Windows) when you click the arrow. Contextual menu Right-clicking (Windows) or Control-clicking (Mac) in the document window, as well as in certain palettes and dialog windows, gives you quick access to certain item-specific options. These options are determined by which tool you have selected and where you click in the interface. Shown here is the default contextual menu for the Page, accessed by right/Control-clicking with any tool.
Chapter 1 - Interface Overview Contextual menu Right-clicking (Windows) or Control-clicking (Mac) in the document window, as well as in certain palettes and dialog windows, gives you quick access to certain item-specific options. These options are determined by which tool you have selected and where you click in the interface. Shown here is the default contextual menu for the Page, accessed by right/Control-clicking with any tool. Shortcuts Access Hand tool Mac and Win: Hold down Spacebar Access Zoom toolMac: Hold down Cmd+SpacebarWin: Hold down Ctrl+Spacebar
Chapter 1 - Interface Overview Select menuSome of the dialogs in InDesign contain additional menus embedded within them. From these menus, you can access additional options by clicking the arrow icon. Tip To access type options quickly, press T to access the Type tool, insert it in a text frame, then right-click (Windows) or Control-click (Mac). Drop-down The Control bar contains several drop-down menus that provide additional options for specific tools. Shown here are the stroke options available for the Line tool. Click the up/down arrow icon (Mac) or the down arrow icon (Windows) to access these menus.
Chapter 1 - Interface Overview Simple On/Off Controls Some controls in InDesign simply need to be turned on or off. Three simple ways to "hit the switch" for these controls are check boxes, radio buttons, and toggle buttons. Check box Certain controls in InDesign are turned on and off by checking boxes. A checked box indicates that the control is on, and an unchecked box indicates that it is off. To place a check in an empty box, click it with your mouse or click once on its accompanying text-field description. Radio button Some other controls in InDesign (but not very many) are activated by clicking a radio button. You only encounter these when a control offers multiple choices, in which case you can choose one but never more than one at the same time. Clicking either the empty circle or its accompanying text-field description activates your selection. Toggle button Clicking a toggle button performs a simple, specific task. For instance, clicking the icon shown here in the Control bar launches the Adobe Bridge application. Once Bridge is launched, clicking the toggle button brings Bridge to the front of your open applications.
Chapter 1 - Interface Overview Shortcuts Access Hand tool Mac and Win: Hold down Spacebar Access Zoom tool Mac: Hold down Command+SpacebarWin: Hold down Ctrl+Spacebar Tip Want to open or close all of the palettes related to the tool you currently have selected? Try clicking the Toggle button on the far right of the Control bar. But keep in mind that having something selected in your document window may change which palettes are toggled.
Chapter 1 - Interface Overview Data Fields Data fields are controlled by numerical values that can be typed in. Simply click the label icon or control name to the left of the data field and enter a value. Or click directly in the data field, highlight the current value, and then type. Certain data fields allow you to adjust values in increments by clicking the up/down arrows to the left of the number. Some fields are accompanied by drop-down menus, which contain preset values. By clicking the arrow to the right of the data field number, you can access the preset menu.
Chapter 1 - Interface Overview Also, some data fields contain sliders: Drop-down slider In addition to letting you select or enter a number, these data fields allow you to adjust a value by using a drop-down slider. Click the arrow to the right of the number to make it visible, and then click and drag the slider arrow to the left or right. You can watch the number change as you click and drag. Lower values are to the left and higher values to the right. You can also click anywhere on the slider line to place the arrow at that exact value. Visible slider Some data fields have a slider control right next to them rather than in a drop-down. These work the same way as drop-down sliders; the only difference is that they are always visible within the palette. Shown here is the slider control for the Color palette. Action button These buttons appear at the bottom of certain palettes. Clicking one performs an action specific to the palette you are working with. Shown here is the New Swatch button for the Swatches palette.
Chapter 1 - Interface Overview Shortcuts Move to next data field (when cursor is in data field) Mac and Win: Tab Show/hide all controlsMac and Win: Tab Show/hide all controls except Toolbox and Control bar Mac and Win: Shift+Tab Tip To highlight a data field quickly, click its label icon or text description.
Chapter 1 - Interface Overview Buttons Several types of button controls appear throughout the InDesign interface: action buttons, text buttons, and select buttons. Although they are not labeled, hovering over them with your mouse launches a tooltip description explaining the button's function. To repeat the action, click again
Chapter 1 - Interface Overview Related Tasks 2 Menus 4.1 Organizing Palette Text button You can find these buttons in specific dialogs (e.g., Print dialog, Package dialog). The button's function is labeled with text rather than an icon. Click the button to perform its specific action. The shaded (Mac OS X) or outlined (Windows) button is InDesign's current choice, which you can also select by pressing Return (Mac OS X) or Enter (Windows). Select button These buttons are always arranged in related groups, like the text justification buttons shown here in the Paragraph palette. Much like the radio buttons described earlier, you can only select one button at a time from the group. Each button's function is labeled with a descriptive icon, but if you're still not sure what it does, you can always refer to tooltips by hovering over the button with your mouse.
Chapter 1 - Interface Overview Shortcuts Open/close side tabMac and Win: Click palette name Show/hide all controls Mac and Win: Tab Show/hide all controls except Toolbox and Control barMac and Win: Shift+Tab Move to next data field (when cursor is in data field) Mac and Win: Tab Access contextual menuMac: Control-clickWin: Right-click
Chapter 1 - Interface Overview Toggles Much like Photoshop and Illustrator, InDesign also features toggle controls. An icon appears whenever a toggle control is activated; an empty box appears when it is not. As shown here in the Layers palette, the columns to the left of each layer are used for "toggling" options on or off. The left column toggles the layer's visibility; the right column toggles the layer's lock function. Tip Not sure what a certain button does? Try hovering your mouse over it until a tooltip description appears. If your document contains so many layers that you can't see them all in the Layers palette, try selecting Small Palette Rows from the palette's menu.