Download
1 / 81
810 likes | 1.05k Views
CC467 Biologically inspired robotics Introduction to Lego Mindstorms Owen Holland Computer Science University of Essex. Why Lego is different. In most robotics work, you are given a task, and a robot that must perform it, and you program the robot. Easy. Why Lego is different.

E N D
CC467 Biologically inspired robotics Introduction to Lego Mindstorms Owen Holland Computer Science University of Essex
Why Lego is different In most robotics work, you are given a task, and a robot that must perform it, and you program the robot. Easy.
Why Lego is different In the old days, there were hardly any robots. If you wanted a task to be done by a robot, you first had to build your robot, and then you would be able to program it. Not easy… - mechanical design and manufacture - electronics design and manufacture - system integration - and then you could program the robot, often in assembly language
Why Lego is different Now, with Lego, most of the hard bits disappear: you just stick Lego bits together to make the robot you want - NO mechanical design and manufacture - NO electronics design and manufacture - NO system integration - and you can program the robot in almost any language you want: C, Java, Lisp, Ada, Prolog, Logo, and even assembler. - easy.
Isn’t Lego just a toy? Let’s look at the history of Lego robotics. It goes back a long way… At MIT in the 1980s, the Mechanical Engineering Department started a course called 2.70: “Introduction to Design”. Students used scrap parts to build joystick-controlled machines that competed against each other at the end of the course.
The birth of 6.270 In 1987, an Electrical Engineering and Computer Science (Course 6) student wanted a similar course in his department, and invented the 6.270 competition: Students programmed simulated autonomous robots that competed against one another at the end of the course.
LEGO/Logo At about the same time, a group of people at MIT Media Lab were sponsored by Lego to develop a system to enable children to build robots using Lego, and to control them using Logo, a simple programming language fashionable at the time. One of these people, Fred Martin, began helping with 6.270, and developed some Lego-based kit to help.
Back to Fred Martin One of the outputs of Fred’s Lego sponsored project was the MIT Programmable Brick Note the 6 sensor inputs and 4 motor outputs
And finally… An in-house Lego design team, obviously inspired by the MIT work, developed the Lego RCX brick. Note the 3 sensor inputs and the 3 motor outputs
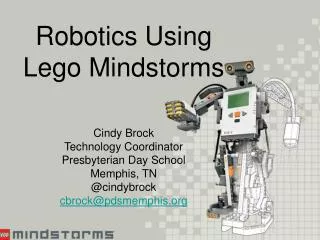
Lego Mindstorms • Released in 1998 in various kits. • Little changed since. • Aimed at children. • All kits contain: • - an RCX brick • 2-way IR communication between RCX and PC • Lego and Lego Technic parts • sensors and motors
Lego sensors Lego light sensor Lego touch sensor Lego temperature sensor Lego rotation sensor
The Lego light sensor • This measures the intensity of the light coming in through the lens in the front of the sensor. • It’s quite directional. • The light coming in through the lens can come from two sources: • The environment – we call it ‘ambient light’. • Light coming from the red LED on the front of the sensor that has been reflected off objects in the environment. The amount reflected depends on the colour of the object.
Lego Mindstorms: the Good • Interfaces with all Lego and Technics parts • Practically bomb-proof • 4 types of sensors available (touch, light, rotation, temperature) • Good battery life • Not very expensive for whole kits • Good support for schools
Lego Mindstorms: the Bad • Motor control is awful • Limited sensor inputs and motor outputs • Individual parts are very expensive
Lego Mindstorms: the Ugly • Dumbed down programming environments Visual programming (RCX code)
Is there any hope? The RCX brick contains a very capable and fully featured microcontroller, the Hitachi H8/3292, running at the maximum clock speed of 16MHz. It has 16kB of on-chip ROM (Read Only Memory) containing routines for communication with the IR channel, sensor and motor interfacing, LCD drivers, some test programs, and so on. It imposes some limitations, but nothing too serious, which is just as well because nothing can be done about it.
Is there any hope? • The RCX brick also contains 32kB of external RAM (Random Access Memory). This holds information as long as the battery is connected. It is used for two things: • The ‘firmware’ that forms a kind of operating system. It is uploaded to the RAM via the IR link. The firmware supplied by Lego has some limitations (no floating point, only 32 variables). • The user programs, compiled on the PC and uploaded via the IR link. Only 6kB is available for these!
Yes, there is hope. Here is what happens: - you produce a program on your PC - the program is transformed into low-level instructions (bytecodes) - the bytecodes are transmitted via the IR link to the RCX RAM - the firmware interprets the bytecode and converts it into machine code using the ROM - the processor executes the machine code
Yes, there is hope. If we only knew what the bytecodes actually caused the microcontroller to do, we might be able write a program to generate more interesting sequences of bytecodes than we can using the Lego software. In 1998, Kekoa Proudfoot was a student at Stanford University…
Respect to Kekoa Proudfoot He reverse engineered the RCX, discovering and cataloguing all the bytecodes for the interpreter, and much else besides.
Enter Dave Baum Following on from Kekoa Proudfoot’s work, Dave Baum was able to write NQC – Not Quite C. This allows you to write a program for the RCX in a language very similar to C, and to upload it to the RCX, where you can run it as normal. NQC is text-based. Now other people have written pretty front ends so it’s just like normal programming in a typical IDE – you’ll be using John Binder’s Bricx Command Center.
More hope… NQC uses the original Lego firmware. If we used Kekoa Proudfoot’s discoveries, could we devise new firmware that would enable us to do even more? YES. In 1999 Marcus Noga began the LegOS project, designed to replace the Lego firmware with a new version allowing more or less direct control of the Hitachi processor. Smaller firmware, bigger programs (in C), and much faster execution – but for experts only.
And now… The newest firmware replacement is part of the LeJos system. It permits a Java Virtual machine (JVM) to run on the RCX. You can now program your robots in Java (in fact a subset of Java). Why is this nice? Because it gives you access to lots of the neat stuff associated with Java. The LeJos package comes with classes for handling all the Lego hardware – you don’t have to build everything from scratch, which is just as well because Java is really too high level for robotics.
Hardware developments From the early days, enthusiasts began designing and building their own sensors. Some of these are excellent. Some are on sale. Some third-party sensors are even supported by Lego.
Hardware developments From the early days, enthusiasts began designing and building their own sensors. Some of these are excellent. Some are on sale. Some third-party sensors are even supported by Lego. If you wanted to build a complex Lego robot now, you could probably find designs for the sensors you need on the Web. Some will be accompanied by the Java classes for dealing with them. The range of hardware and software now available for Lego has transformed it from a toy into a serious educational and investigative tool.
So who uses it? Dozens of universities in many countries, including top engineering colleges in the USA, Switzerland, Denmark, Germany, and Sweden. What do they use it for? Teaching programming Teaching control Teaching robotics Individual projects Student competitions etc. etc.
How can I find out more? Books: Core Lego Mindstorms Programming by Brian Bagnold Good intro to Mindstorms and to LeJos Web: Too many sites to list. Just Google any mixture of mindstorms, lego, robot, sensors, java, nqc, rcx. Lots of good stuff, and most sites have links to lots of others.
A simple robot Some of the simplest robots are called Braitenberg machines. In two weeks you’re going to build and program the one known as Vehicle 2.
We have a problem In the space of 2 hours, working in pairs, and starting from scratch, you have to build, program, and run such a vehicle. It’s not realistic. So we’ll give you some strong guidance, in the form of the instructions to build a suitable vehicle… …and in the form of a suitable program tailored to the vehicle
Back to basics A suitable vehicle needs the following: - a left motor (LM) - a right motor (RM) - a left sensor (LS) - a right sensor (LR)
Back to basics A suitable program needs the following: - a way of driving each motor as a function of the reading on the sensor on the opposite side
Back to basics And the environment needs to ensure that the change in sensory inputs produced by the movement of the vehicle leads to some interesting and obviously useful behaviour… …with a simple performance measure so that we can have a competition
Constraints All vehicles will have to be run in exactly the same environment The only suitable sensors are light sensors
How termites work Termites (and many other trail-following insects) follow trails by sensing concentrations of special chemicals (pheromones) using their antennae.
How termites work They use a technique called osmotropotaxis. Roughly speaking, their left legs go at a speed controlled by the strength of the sensory input to their right antenna, and their right legs go at a speed controlled by the strength of the input to their left antenna… In other words, they operate just like little Braitenberg vehicles, and this enables them to follow trails.
Could we make visible trails on the ground, and sense them with light sensors? Yes…there are some trails on the floor of the arena…
But surely… …if the trail is either black or white, won’t the sensors only ever give maximum or minimum readings? No, because the sensor takes in reflected light from an area, not a point. If the area is wholly inside the black region, you’ll get the minimum reading (with some noise) And if it’s wholly inside the white region, you’ll get the maximum reading (with some noise)
But surely… …if the trail is either black or white, won’t the sensors only ever give maximum or minimum readings? No, because the sensor takes in reflected light from an area, not a point. If the area contains both black and white regions – if the sensor is somewhere on the borderline – then the reading will be somewhere in between the minimum and maximum (again, with some noise)
A basic strategy If we space the sensors so that they are separated by just less than the width of the trail, then when both sensors read the minimum, we know we must be on the trail… …and so moving forwards is a good idea
A basic strategy If the sensor on the left reads the maximum, and the sensor on the right reads the minimum, we know we’re moving off the trail to the left… …so turning right is a good idea
A basic strategy If the sensor on the right reads the maximum, and the sensor on the left reads the minimum, we know we’re moving off the trail to the right… …so turning left is a good idea
A basic strategy And if both sensors read the maximum, you know you’ve completely lost it Of course, you could devise some cunning way to get back on the trail (termites do)…
But… What if one or both sensors give a reading somewhere in between? The quick and dirty solution: keep on doing whatever you were doing – it won’t last The elegant solution: you can produce one if you want, but it won’t make any difference…
The performance measure We can break this into two stages: (1) How far down the trail you get (2) If you make it to the end, how long it took
First, catch your robot You can make whatever you like, but since time is so short I recommend that you use a version of the Trusty robot described in Jonathan Knudsen’s “The Unofficial Guide to Lego Mindstorms Robots” Instruction sheets and pictures will be in the lab.
And finally…the program You’ll be programming your robot in NQC (Not Quite C). You’ll use the BricxCC (Bricx Control Centre) as your development environment. When you first fire up BricxCC (by double clicking on the BricxCC icon) it looks for the RCX brick. It will find it, because you will have switched it on (using the red On-Off button) and placed it with its infra-red windows facing the IR tower and a few centimetres away from it.