Download
1 / 25
250 likes | 379 Views
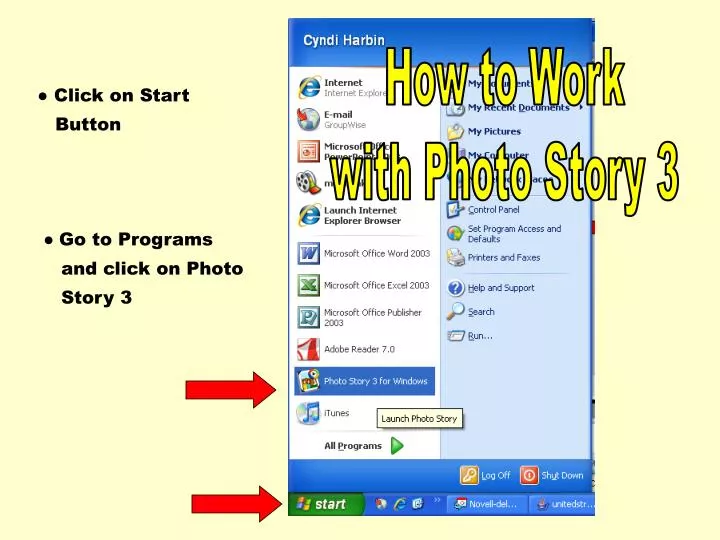
How to Work with Photo Story 3. ● Click on Start Button. ● Go to Programs and click on Photo Story 3. Import Photos. Don’t forget to resize your photos before you Import them. PicSizer is a very easy software and it is a free download (www.axiomx.com/picsizer.htm).

E N D
How to Work with Photo Story 3 • ● Click on Start • Button ● Go to Programs and click on Photo Story 3
Import Photos Don’t forget to resize your photos before you Import them. PicSizer is a very easy software and it is a free download (www.axiomx.com/picsizer.htm)
You can rotate and crop, Auto Fix the color or add Effects to the photo You can then save your changes, reset to the original or close to get back to storyboard
All of your photos are placed in a storyboard format. When you are done editing, click next. Click Next
Now you can add a title or copy points to your photos. I would also Save Your Project to avoid any lost work. (choose a folder and a name)
Once you add your Title or Copy - you have one more chance to add an effect to each photo When you are done - click Next
Record Your Voice Here
You can customize the duration of each slide here – for the web – I use 3.4. Either set it automatically or mark the amount of time you want for each slide After each picture - you must click save and then click on the arrow to go to the next picture. When finished - click close.
After you are done with Motion and Duration - click on the next Tab called Transition. This gives you different transitions for some or all slides. You can also set the number of seconds that each transition will take. After each picture - you must click save and then click on the arrow to go to the next picture. When finished - click close.
Now you can either Rip your own music or create your own music.
Select Your Music: MP3, WAV, WMA or WMV Find your Ripped music and select it. Do this for each song you want to add to your storyboard
Photo story automatically adjusts the amount of time a piece of music will play in your story when any of the following occurs: A picture is added to a group of pictures. A picture is deleted from a group of pictures. A picture is moved to a different place in the story. Another piece of music is added to the story. The story ends. The music symbol indicates that the picture is the anchor for the music
You can create your own sound by clicking Genre, Style, Bands, and Moods. Then Play it to see if you like it. Then Click OK
Now decide how to save your story (WMP). Save it for Playback on your computer (make sure you browse and select a place where YOU want it saved – or Photo Story will place it in My Videos.
Be sure to give your Photo Story file a name. Or it will name it something for you. Click SAVE.
Once Saved – it will ask you if you want to view or create another story.
Your WMP file has been created – now you need to Save the Project.
If you made any changes after you saved (or if you forgot to save)– it will warn you to save again – before you exit. Be sure to SAVE or your working file will be lost.
You will have TWO Files a Windows Media Audio Video File and a PhotoStory 3.Doc. THE Window Media File is the one you upload to the web, etc. The Photostory3.Doc is your actual working file.