Download
1 / 31

E N D
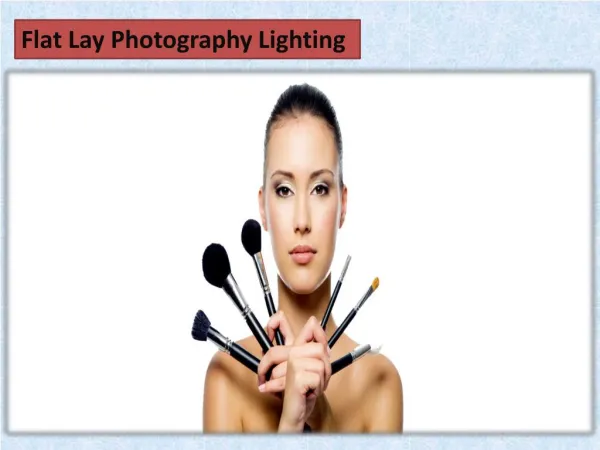
Photography lighting techniques One of the hardest things to get right in a photograph is the lighting. Too much light, too little light, or a combination of the two can ruin an otherwise perfect photo. But, luckily this problem can be solved if you understand the types of lighting, how they affect your camera and what you can do to use these effects to your full advantage.
Backlighting • Backlighting is just as it sounds: light that comes from behind your subject. This can make a beautiful photo, or turn a beautiful photo into a disaster. Backlighting is what turns a palm tree into a silhouette against the sunset. In this case, that is a good thing that adds to the photograph. But, the same thing can happen if you want to take a photograph of a person who has a strong backlight behind them, such as the sun, sky, or bright lights. The camera reads the brightness behind the main subject and sets its internal meter to expose properly for the extra light. This underexposes your subject and will usually turn them into a silhouette. You can avoid this by using a fill-flash. A fill-flash will “fill” in the needed light, chasing away the shadows from your subject caused from the bright light behind.
Side lighting • Side lighting can have a very drastic effect on your photos, also. But, unlike backlighting, its brightness comes from the right or left of your subject. This tends to cast one side in total darkness, while putting the other in the spot light. This is a wonderful way to get a mysterious, dramatic portrait photo. Pose your subject in front of a window, with one of their shoulders close to the window. Your camera will expose properly for the bright side and will usually cast the other side of the face in complete darkness. If, on the other hand, you want a natural portrait you can use something to reflect light onto the darkened side of the face. A white poster board or other light reflecting surface can bounce enough light back onto your subject to soften the effect of side lighting. • Side lighting is wonderful for showing texture and adding depth to a photo
Diffused Lighting • Sometimes lighting from any direction is just too harsh. This is when you want to soften the incoming light, to take away some of the contrast for a more pleasing photograph. Bright sunlight at midday is the worst kind of light for photography. The light colors are washed out and the contrasting shadows are too dark. To avoid this, wait for the sun to go behind a cloud or if your subject is moveable, put them in the shade of a tree or building and take the photo there. The light will be much more natural here and will result in a better photo. If it is not possible to move your subject, and there is not a cloud in sight, you can sometimes make your own shade with an umbrella or some similar object. Or, come back in the morning or evening when the sun is lower in the sky.
Artificial Lighting • Artificial lighting comes in all shapes and sizes. From a built in flash on your camera to expensive lights in the studio, they all have their strengths and weaknesses. • On camera flashes are simple and easy to use, but sometimes cause the awful red eye so common in snapshots. The farther the flash is away from the lens, the less likely this is to happen. Another problem with on camera flash • is the harsh light they cast onto the subject. If you have an off camera flash, you can bounce the light for a softer effect. • One last thing to remember about artificial light, unless you are using black and white film, regular indoor lights will give your photos a yellow cast. These lights are not the equivalent of flash bulb lights, and therefore will not give you the same results. • Knowing these simple tips about lighting will help you go out and make the most of all your photo opportunities. And, with practice, your photography will open up new opportunities for you!
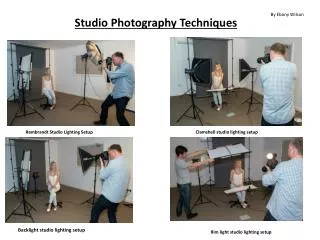
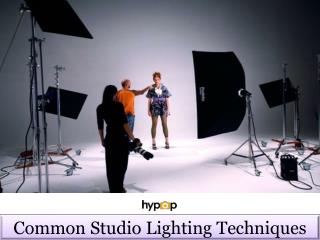
Three Point Lighting • Three-point lighting is a standard method used in visual media such as video, film, still photography and computer-generated imagery. By using three separate positions, the photographer can illuminate the shot's subject (such as a person) however desired, while also controlling (or eliminating entirely) the shading and shadows produced by direct lighting.
Key Light • The key light, as the name suggests, shines directly upon the subject and serves as its principal illuminator; more than anything else, the strength, color and angle of the key determines the shot's overall lighting design.
Fill Light • The fill light also shines on the subject, but from a side angle relative to the key and is often placed at a lower position than the key (about at the level of the subject's face). It balances the key by illuminating shaded surfaces, and lessening or eliminating chiaroscuro effects, such as the shadow cast by a person's nose upon the rest of the face.
Back Light • The back light (a.k.a. the rim, hair, or shoulder light) shines on the subject from behind, often (but not necessarily) to one side or the other. It gives the subject a rim of light, serving to separate the subject from the background and highlighting contours.