Download
1 / 18
180 likes | 308 Views
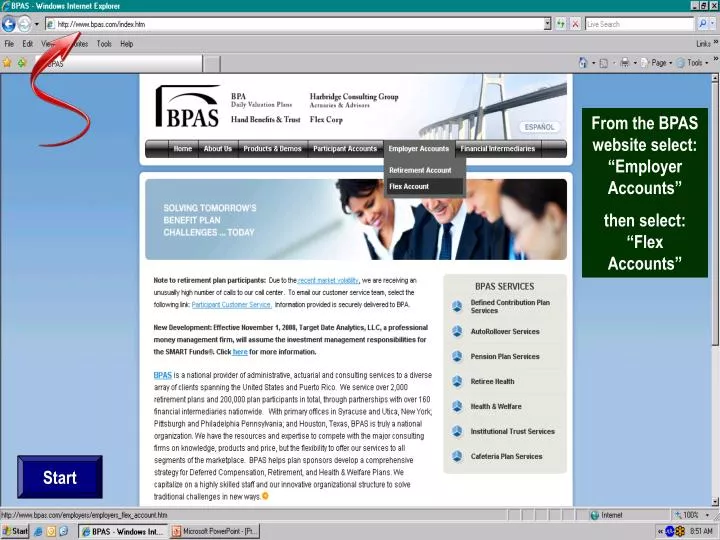
Next. Start. From the BPAS website select: “Employer Accounts” then select: “Flex Accounts”. Next. Click on the “Login In” button. Next. Enter your “Username” and “Password”. Next. If your plan has groups – select the company name. Please Note:

E N D
Next Start From the BPAS website select: “Employer Accounts” then select: “Flex Accounts”
Next Click on the “Login In” button
Next Enter your “Username” and “Password”
Next If your plan has groups – select the company name Please Note: Invoices are only listed at the Company level and not available at the group level
Next Once you have selected the company name move your cursor to the “My Accounts” tab and select “Invoice”
Next Click on the invoice number to access the invoice You have two sections under the Invoice History Under “Pending Invoices”, you have your interactive contribution invoices CLICK Under “Posted Invoices”, you have previous month’s contribution invoices and your monthly fee invoices
Next You can hide sections by clicking in the boxes below You can also edit/change a contribution amount by clicking on the pencil
Next Once the change has been made – click on the “OK” button Click on the amount you wish to change
Next You can see that the contribution amount has been adjusted along with the totals
Next If you need to sort by group or subtotal the groups, you can download the invoice to Excel
Next You can then click on the “Open” or “Save” button Once you click on the “Send To Excel” button
Next Once you have verified the invoice and clicked on the “Submit” button You will then receive the “Authorize Invoice Payment” box For clients that have authorized ACH Debit, you will no longer need to sign and return the invoice. Once you click on the “Approve” button, an ACH debit will be generated. For clients that wire their funds or send a check, your approved invoice will be pended until we receive the funds
Next Once you have completed the process, the “Submit” button will be grayed out
Next Authorized invoices will remain in the Pending section until the next invoice is generated A copy of the authorized invoices will be listed in the Posted section To view the fee invoice, click on the Invoice #
Next The fees are now assessed on a monthly basis The fee is shown on a per participant basis The invoice also shows the plans the fee is being assessed on
Next To print the invoice – click on the Printer icon The invoice can also be exported to Excel To export the invoice – click on the export icon
Next The highlighted option is the recommended format when exporting to Excel The invoice can be formatted into several formats
If you have any questions, please contact Carla Townson at 713 744-3841 or Diane Redenbaugh at 713 939-4072