Download
1 / 55
610 likes | 951 Views
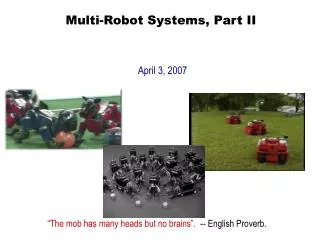
Multi-Robot Systems with ROS Lesson 3. Teaching Assistant: Roi Yehoshua roiyeho@gmail.com. Agenda. Simulating multiple robots in Stage Creating nodes for multiple robots Collision avoidance. ROS Stage Simulator. http://wiki.ros.org/simulator_stage

E N D
Multi-Robot Systems with ROS Lesson 3 Teaching Assistant: RoiYehoshua roiyeho@gmail.com
Agenda • Simulating multiple robots in Stage • Creating nodes for multiple robots • Collision avoidance (C)2014 Roi Yehoshua
ROS Stage Simulator • http://wiki.ros.org/simulator_stage • Stage simulates a population of mobile robots, sensors and objects in a 2D bitmapped environment. • Stage is designed to support research of multi-agent autonomous systems, so it provides fairly simple, computationally cheap models of lots of devices rather than attempting to emulate any device with great fidelity. • Multi-Robot Patrolling Task - Simulation in Stage/ROS (C)2014 Roi Yehoshua
Stage World Files • The world file is a description of the world that Stage must simulate. • It describes robots, sensors, actuators, moveable and immovable objects. • Sample world files can be found at the /world subdirectory in ros_stage package (C)2014 Roi Yehoshua
World File Format • The basic syntactic features of the world file format: entities, properties and comments • The define statement can be used to define new types of entities. • For example: define topurg ranger defines a ranger device named topurg • Entities may be instantiated using the syntax: • topurg(pose [ 0.050 0.000 0 0.000 ]) • This entry creates a ranger device with initial position (0.05, 0) and orientation of 0 (C)2014 Roi Yehoshua
World File Format • Entities may be nested to indicate that one entity is a child of another • Defines a single position device with a ranger sensor attached to it define erratic position ( size [0.35 0.35 0.25] origin [-0.05 0 0 0] gui_nose 1 drive "diff" topurg(pose [ 0.050 0.000 0 0.000 ]) ) (C)2014 Roi Yehoshua
willow-erratic.world define block model ( size [0.5 0.5 0.5] gui_nose 0 ) define topurg ranger ( sensor( range [ 0.0 30.0 ] fov 270.25 samples 1081 ) # generic model properties color "black" size [ 0.05 0.05 0.1 ] ) define erratic position ( #size [0.415 0.392 0.25] size [0.35 0.35 0.25] origin [-0.05 0 0 0] gui_nose 1 drive "diff" topurg(pose [ 0.050 0.000 0 0.000 ]) ) (C)2014 Roi Yehoshua
willow-erratic.world # set the resolution of the underlying raytrace model in meters resolution 0.02 interval_sim 100 # simulation timestep in milliseconds window ( size [ 745.000 448.000 ] rotate [ 0.000 -1.560 ] scale 28.806 ) # load an environment bitmap floorplan ( name "willow" bitmap "willow-full.pgm" size [54.0 58.7 0.5] pose [ -29.350 27.000 0 90.000 ] ) # throw in a robot erratic( pose [ -11.277 23.266 0 180.000 ] name "era" color "blue") block( pose [ -13.924 25.020 0 180.000 ] color "red") (C)2014 Roi Yehoshua
Running Stage • To run Stage with a specific world file use the following command: • Browsing the stage window should show up 2 little squares: a red square which is a red box and a blue square which is the erratic robot. • rosrunstage_rosstageros `rospack find stage_ros`/world/willow-erratic.world (C)2014 Roi Yehoshua
Running Stage (C)2014 Roi Yehoshua
Simulating Multiple Robots in Stage • First, you need to build a model of every robot you need in the world file • For example, let’s add 3 more robots to the previous world file • First we will copy it to the home directory and change its name to willow_multi_erratic.world • Notice that you also need to copy willow-full.pgm • $ cd ~ • $ cp /opt/ros/hydro/share/stage_ros/world/willow-erratic.world willow-multi-erratic.world • $ cp /opt/ros/hydro/share/stage_ros/world/willow-full.pgm . (C)2014 Roi Yehoshua
Simulating Multiple Robots in Stage • Now add the following lines at the end of the file willow-multi-erratic.world • Then run again the stage simulator • # robots • erratic( pose [ -11.5 23.5 0 0 ] name "robot0" color "blue") • erratic( pose [ -13.5 23.5 0 0 ] name "robot1" color "red") • erratic( pose [ -11.5 21.5 0 0 ] name "robot2" color "green") • erratic( pose [ -13.5 21.5 0 0 ] name "robot3" color "magenta") • # block( pose [ -13.924 25.020 0 180.000 ] color "red") • rosrunstage_rosstageros willow-multi-erratic.world (C)2014 Roi Yehoshua
Simulating Multiple Robots in Stage (C)2014 Roi Yehoshua
Simulating Multiple Robots in Stage • Each robot subscribes and publishes its own topics (C)2014 Roi Yehoshua
Simulating Multiple Robots in Stage • You can move one of the robots by publishing to /robot_X/cmd_vel topic • For example, to make robot 2 move forward type: • rostopic pub /robot_2/cmd_vel -r 10 geometry_msgs/Twist '{linear: {x: 0.2}}' (C)2014 Roi Yehoshua
Simulating Multiple Robots in Stage (C)2014 Roi Yehoshua
Creating a ROS Package • Now we will create a ROS node that will make one of the robots move forward • The ID of the robot will be given as a command-line argument to the node (C)2014 Roi Yehoshua
catkin Workspace • Make sure you have a catkin workspace ready • If you don’t have, run the following commands: • And add the following line to your bashrc • $ mkdircatkin_wscatkin_ws/src • $ cdcatkin_ws/src$ catkin_init_workspace$ cd ..$ catkin_make • source ~/catkin_ws/devel/setup.bash (C)2014 Roi Yehoshua
Creating a ROS Package • Create a new ROS package called stage_multi • Create a world subdirectory in the package and copy the world files into it • $ cd ~/catkin_ws/src • $ catkin_create_pkgstage_multistd_msgsrospyroscpp • $ mkdir ~/catkin_ws/src/stage_multi/world • $ cp ~/willow-multi-erratic.world ~/catkin_ws/src/stage_multi/world • $ cp ~/willow-full.pgm ~/catkin_ws/src/stage_multi/world (C)2014 Roi Yehoshua
Creating a ROS Package • Now compile the package and create an Eclipse project file for it: • $ cd ~/catkin_ws • $ catkin_make --force-cmake -G"Eclipse CDT4 - Unix Makefiles" (C)2014 Roi Yehoshua
Directory Structure (C)2014 Roi Yehoshua
Import the Project into Eclipse • Now start Eclipse • Choose catkin_ws folder as the workspace folder (C)2014 Roi Yehoshua
Import the Project into Eclipse • Choose File --> Import --> General --> Existing Projects into Workspace (C)2014 Roi Yehoshua
Import the Project into Eclipse • Now choose the ~/catkin_ws/build folder (C)2014 Roi Yehoshua
Project Structure • Open the "Source directory" within the project so that you can edit the source code (C)2014 Roi Yehoshua
Add New Source File • Right click on srcand select New –> Source File, and create a file named move_robot.cpp (C)2014 Roi Yehoshua
ROS Init • A version of ros::init() must be called before using any of the rest of the ROS system • Typical call in the main() function: • Node names must be unique in a running system • We will make the node names unique by concatenating the robot’s number to the end of the node name • For that purpose we will need to supply the robot’s number as a command-line argument • ros::init(argc, argv, "Node name"); (C)2014 Roi Yehoshua
move_robot.cpp (1) #include "ros/ros.h" #include "geometry_msgs/Twist.h" #include <string> using namespace std; #define MAX_ROBOTS_NUM 20 #define FORWARD_SPEED 0.2 introbot_id; ros::Publisher cmd_vel_pub; // publisher for movement commands voidmove_forward(); (C)2014 Roi Yehoshua
move_robot.cpp (2) int main(intargc, char **argv) { if (argc < 2) { ROS_ERROR("You must specify robot id."); return -1; } char *id = argv[1]; robot_id = atoi(id); // Check that robot id is between 0 and MAX_ROBOTS_NUM if (robot_id > MAX_ROBOTS_NUM || robot_id < 0 ) { ROS_ERROR("The robot's ID must be an integer number between 0 an 19"); return -1; } ROS_INFO("moving robot no. %d", robot_id); // Create a unique node name string node_name = "move_robot_"; node_name += id; cout << node_name; ros::init(argc, argv, node_name); ros::NodeHandlenh; (C)2014 Roi Yehoshua
move_robot.cpp (3) // cmd_vel_topic = "robot_X/cmd_vel" string cmd_vel_topic_name = "robot_"; cmd_vel_topic_name += id; cmd_vel_topic_name += "/cmd_vel"; cmd_vel_pub = nh.advertise<geometry_msgs::Twist>(cmd_vel_topic_name, 10); move_forward(); return 0; } (C)2014 Roi Yehoshua
Twist Message • http://docs.ros.org/api/geometry_msgs/html/msg/Twist.html • This message has a linear component for the (x,y,z) velocities, and an angular component for the angular rate about the (x,y,z) axes. geometry_msgs/Vector3 linear float64 x float64 y float64 z geometry_msgs/Vector3 angular float64 x float64 y float64 z (C)2014 Roi Yehoshua
move_forward voidmove_forward() { // Drive forward at a given speed. geometry_msgs::Twist cmd_vel; cmd_vel.linear.x = FORWARD_SPEED; cmd_vel.angular.z = 0.0; // Loop at 10Hz, publishing movement commands until we shut down ros::Rate rate(10); while (ros::ok()) // Keep spinning loop until user presses Ctrl+C { cmd_vel_pub.publish(cmd_vel); rate.sleep(); } // Stop the robot geometry_msgs::Twist stop_cmd_vel; stop_cmd_vel.linear.x = 0.0; stop_cmd_vel.angular.z = 0.0; cmd_vel_pub.publish(stop_cmd_vel); ROS_INFO("robot no. %d stopped", robot_id); } (C)2014 Roi Yehoshua
Compiling the Node • Before building your node, you should modify the generated CMakeLists.txt in the package • Change the lines marked in red: • After changing the file call catkin_make • cmake_minimum_required(VERSION 2.8.3) • project(stage_multi) • … • ## Declare a cpp executable • add_executable(multi_syncsrc/SyncRobots.cpp) • ## Add cmake target dependencies of the executable/library • ## as an example, message headers may need to be generated before nodes • # add_dependencies(stage_multi_nodestage_multi_generate_messages_cpp) • ## Specify libraries to link a library or executable target against • target_link_libraries(move_robot ${catkin_LIBRARIES}) (C)2014 Roi Yehoshua
Running the Node Inside Eclipse • Create a new launch configuration, by clicking on Run --> Run configurations... --> C/C++ Application (double click or click on New). • Select the correct binary on the main tab (use the Browse… button) ~/catkin_ws/devel/lib/stage_multi/move_robot • Make sure roscore and stage are running • Click Run (C)2014 Roi Yehoshua
Running the Node Inside Eclipse (C)2014 Roi Yehoshua
Setting Command Line Arguments (C)2014 Roi Yehoshua
Running the Node Inside Eclipse (C)2014 Roi Yehoshua
Running the Node Inside Eclipse (C)2014 Roi Yehoshua
Running the Node Inside Eclipse (C)2014 Roi Yehoshua
Launch File • Now we will create a launch file that will make all the 4 robots move forward • We will use the args attribute in the <node> tag to specify the command line arguments • Create a launch subdirectory in stage_multi package • Add stage_multi.launch file to this directory and copy the following code (C)2014 Roi Yehoshua
Launch File • Note that the node names must be unique • <launch> • <node name="stage" pkg="stage_ros" type="stageros" args="$(find stage_multi)/world/willow-multi-erratic.world"/> • <node name="move_robot_0" pkg="stage_multi" type="move_robot" args="0" output="screen"/> • <node name="move_robot_1" pkg="stage_multi" type="move_robot" args="1" output="screen"/> • <node name="move_robot_2" pkg="stage_multi" type="move_robot" args="2" output="screen"/> • <node name="move_robot_3" pkg="stage_multi" type="move_robot" args="3" output="screen"/> • </launch> (C)2014 Roi Yehoshua
Launch File • Run the launch file using the following command: • roslaunchstage_multistage_multi.launch (C)2014 Roi Yehoshua
Launch File (C)2014 Roi Yehoshua
Launch File • The robots will eventually bump into the obstacles: (C)2014 Roi Yehoshua
Reading Sensors • Now we will make the robots move until they sense an obstacle • Will they be able to sense each other as obstacles? • For that purpose we will use the laser data published on the topic /base_scan • The message type used to send information of the laser is sensor_msgs/LaserScan (C)2014 Roi Yehoshua
move_robot.cpp (1) #include "ros/ros.h" #include "geometry_msgs/Twist.h" #include "sensor_msgs/LaserScan.h" #include <string> using namespace std; #define MAX_ROBOTS_NUM 20 #define FORWARD_SPEED 0.2 #define MIN_SCAN_ANGLE -60.0/180*M_PI #define MAX_SCAN_ANGLE +60.0/180*M_PI #define MIN_PROXIMITY_RANGE 0.5 introbot_id; ros::Publisher cmd_vel_pub; // publisher for movement commands ros::Subscriber laser_scan_sub; // subscriber to the robot's laser scan topic boolkeepMoving = true; voidmove_forward(); voidscanCallback(const sensor_msgs::LaserScan::ConstPtr& scan); (C)2014 Roi Yehoshua
move_robot.cpp (2) int main(intargc, char **argv) { if (argc < 2) { ROS_ERROR("You must specify robot id."); return -1; } char *id = argv[1]; robot_id = atoi(id); ... // subscribe to robot's laser scan topic "robot_X/base_scan" string laser_scan_topic_name = "robot_"; laser_scan_topic_name += id; laser_scan_topic_name += "/base_scan"; laser_scan_sub = nh.subscribe(laser_scan_topic_name, 1, &scanCallback); move_forward(); return 0; } (C)2014 Roi Yehoshua
move_robot.cpp (2) voidmove_forward() { // Drive forward at a given speed. geometry_msgs::Twist cmd_vel; cmd_vel.linear.x = FORWARD_SPEED; cmd_vel.angular.z = 0.0; // Loop at 10Hz, publishing movement commands until we shut down ros::Rate rate(10); while (ros::ok() && keepMoving) // Keep spinning loop until user presses Ctrl+C { cmd_vel_pub.publish(cmd_vel); ros::spinOnce(); // Need to call this function often to allow ROS to process incoming messages rate.sleep(); } ... } (C)2014 Roi Yehoshua
scanCallback // Process the incoming laser scan message voidscanCallback(const sensor_msgs::LaserScan::ConstPtr& scan) { // Find the closest range between the defined minimum and maximum angles intminIndex = ceil((MIN_SCAN_ANGLE - scan->angle_min) / scan->angle_increment); intmaxIndex = floor((MAX_SCAN_ANGLE - scan->angle_min) / scan->angle_increment); floatclosestRange = scan->ranges[minIndex]; for (intcurrIndex = minIndex + 1; currIndex <= maxIndex; currIndex++) { if (scan->ranges[currIndex] < closestRange) { closestRange = scan->ranges[currIndex]; } } //ROS_INFO_STREAM("Closest range: " << closestRange); if (closestRange < MIN_PROXIMITY_RANGE) { keepMoving = false; } } (C)2014 Roi Yehoshua
Reading Sensors (C)2014 Roi Yehoshua