Download
1 / 18
190 likes | 557 Views
Artificial Teeth Arrangement and Denture Base Waxup. 1. Procedures for Arranging Artificial Teeth and Waxing Up Denture Bases. a. Tooth arrangement 1. If try-in is going to be accomplished, tinfoil is applied to cast over edentulous area as separator 2. Set the maxillary posterior teeth

E N D
1. Procedures for Arranging Artificial Teeth and Waxing Up Denture Bases a. Tooth arrangement 1. If try-in is going to be accomplished, tinfoil is applied to cast over edentulous area as separator 2. Set the maxillary posterior teeth a. Flow wax around denture base retention to seal frame to cast b. Lower incisal guide pin 0.5 mm c. Set posterior teeth in maximum intercuspation 1. Marginal ridges set at same height 2. Maintain buccal alignment with adjacent teeth 3. Eccentric contacts must be avoided
1. Procedures for Arranging Artificial Teeth and Waxing Up Denture Bases a. Tooth arrangement d. Return incisal guide pin flush with upper member e. Grind occlusal surfaces until pin touches the table to develop tight maximum intercuspation
1. Procedures for Arranging Artificial Teeth and Waxing Up Denture Bases b. Wax-up 1. Snowshoe principle a. Establish full coverage; cover ridge, mucco-buccal and lingual folds entirely b. Pressure is distributed over a broad surface area rather than concentrated on a point 2. Bulk wax - from finish lines to 1 mm past blue design line a. Overwax 2 mm onto the external finish line; allows finishing with no step between metal and acrylic b. Fill peripheral roll
b. Wax-up 3. Gingival trim - duplicate natural tissue a. 45° angle on the buccal side b. 90° angle on the lingual side 4. Festooning - eminences, when contoured should appear natural 5. Check occlusion to ensure no tooth movement has occurred during waxing
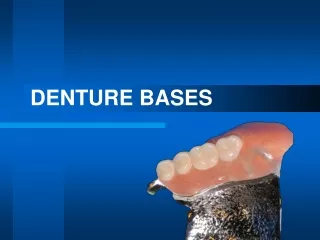
Denture Bases Flasking and boiling out Processing Finishing
(1) Flasking and Boiling out RPD Bases (a) Flasking 1 Lower half flasking a Separate casts from mounting b Dip casts in sepoarator c Cover everything with stone EXCEPT wax and artificial teeth d DO NOT CREATE UNDERCUTS e Be careful not to cover wax or scratch it while cleaning the stone away
(1) Flasking and Boiling out RPD Bases f Use separator between the lower half and upper half of the flasks 2 Upper half flasking a Ensure metal to metal contact of upper and lower halves b Uncover occlusal surfaces of acrylic teeth c Scoop out palate to aid in deflasking d Use separator
(1) Flasking and Boiling out RPD Bases 3 Stone cap a Overfill slightly b Ensure metal to metal contact (b) Boil out 1 One flask takes 4.5 minutes to heat up before separating 2 Separate flask and remove all wax residue 3 Watch for floaters
(2) Processing RPD Bases (a) Apply separator 1 Paint a minimum of 2 coats on all stone surfaces 2 DO NOT allow separator to pool in retention areas (b) Packing 1 When working with acrylic, wear chemical resistant gloves 2 Wash gloves thoroughly to prevent a line of demarcation caused by powder on gloves 3 Mix acrylic resin IAW manufacturer’s directions
(2) Processing RPD Bases 4 Split pack a Place acrylic in both halves of flask 1 The frameworks are retained in the lower half of the flask and the teeth in the upper 2 This prevents the teeth and/or frameworks from being dislodged during trial packing b Use 2 plastic sheets between halves c Trial pack at least three times using plastic sheets between the halves for each trial pack d Do not allow acrylic to dry out during packing
(2) Processing RPD Bases 5 Final pack - moisten both sides of acrylic with monomer to ensure there is no line of demarcation between the two halves (c) Cure - 160° F for 8 hours and 45 minutes 1 Record flask numbers for identification purposes 2 Ensure flasks are completely submersed in water
(3) Finishing RPD Bases (a) Deflask - recover casts with frameworks in place (b) Remount the casts on the articulator (c) Restore vertical dimension of occlusion 1 Ensure incisal pin contacts the incisal guide table 2 Be sure to maintain contacts in tight centric occlusion
(3) Finishing RPD Bases (d) Carefully remove RPDs from casts (don’t break acrylic or bend out clasps) (e) Finish 1 Trim flash using arbor bands or acrylic trimming stone 2 Free acrylic from clasp using sandpaper discs 3 Smooth transition between acrylic and external finish lines using rubber points and wheels 4 Borders should be round with no sharp edges
(3) Finishing RPD Bases 5 Use a fissure bur to grind bubbles from gingival trim (f) Polish 1 Do not pumice festooning away - go back to finishing for hard to get areas 2 Close attention should be given around clasps 3 Repolish metal areas as necessary (g) Disinfect RPDs IAW manufacturer's directions