Download
1 / 20
200 likes | 428 Views
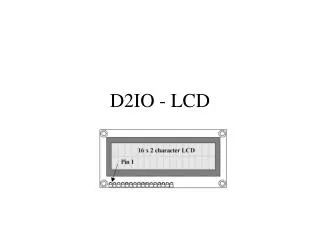
LCD's. LCD Types. Many types available. Most common are: Character Pre-programmed with a set of alphanumeric characters & symbols Size range from 8×1 to 40×4 (characters) Graphic Either graphic only (set each pixel individually ), or both graphic & character modes

E N D
LCD Types • Many types available. Most common are: • Character • Pre-programmed with a set of alphanumeric characters & symbols • Size range from 8×1 to 40×4 (characters) • Graphic • Either graphic only (set each pixel individually ), or both graphic & character modes • Common sizes (pixels) 128×64, 240×128, 320×240 (QVGA) etc..
LCD backlights & Display properties • Backlights • CCFL (needs converter), LED & OLED (no backlight required) • Display properties • Reflective,Transmissive, Transflective (better in sunlight)
LCD polarizer Reflective displays have an opaque rear polarizer that includes a diffuse reflector, such as brushed aluminum. This layer reflects polarized ambient light that has entered the front of the display back trough the LCD cell. Reflective displays require ambient light to be seen. They exhibit high brightness, excellent contrast, and wide viewing angles. They are particularly suitable for use in battery operated equipment where an adequate level of light is always available. Reflective LCD's cannot be backlit, however they can be front lighted in some applications. Transmissive displays have a clear polarizer on the front and the back. The display therefore depends on light coming through from the back of the display toward the observer in order to be seen. Most, but not all transmissive displays are negative image, and we sometimes add colored filters to different areas of the display to highlight different annunciators. Another example of a transmissive polarizer display would be a transparent window where you could see the segments superimposed over your line of vision through the display window (this assumes a sufficient ambient light source exists on either side of the window). Transflective displays have a rear polarizer which includes a translucent material which reflects part of the ambient light, and also transmits backlighting. As the name implies, it is a compromise between the transmissive and reflective viewing mode. Used in reflection, it is not as bright and has lower contrast than the reflective type LCD, but it can be backlit for use in low light conditions. This polarizer is the best selection for a display that can be used in all lighting conditions with a backlight. Source - http://www.pacificdisplay.com/lcd_polarizers.htm
LCD on the MCB23XX Boards LCD Pins LPC23XX pins - DB4 = P1.24 - DB5 = P1.25 - DB6 = P1.26 - DB7 = P1.27 - E = P1.31 (for V1 P1.30) - RW = P1.29 - RS = P1.28 Keil MCB23xx uses 4 bit mode!
4 Bit initialization LCD_RS(0) /* Instruction input*/ lcd_write_4bit (0x3); /* Set LCD in known state */ delay (4100); /* Write 0x3 × 3 */ lcd_write_4bit (0x3); delay (100); lcd_write_4bit (0x3); lcd_write_4bit (0x2); /* Select 4-bit interface */ lcd_write_cmd (0x28); /* 2 lines, 5x8 character matrix*/ lcd_write_cmd (0x0C); // Dsplayn cntrl:Disp=ON,Curs/Blk=OFF lcd_write_cmd (0x06); /* Entry mode: Move right, no shift */
LCD Functions • Extract from sample program lcd_init(); lcd_clear(); lcd_print (" Embedded Systems"); set_cursor (0, 1); lcd_print (" Alan "); • User functions - call these from your program (function prototypes are in the lcd header file!) • void lcd_init (void); • void lcd_clear (void); • void lcd_putchar (char c); • void set_cursor (unsigned char column, unsigned char line); • void lcd_print (unsigned char const *string);
Low level non user LCD functions void lcd_write_cmd (unsigned char c) { wait_while_busy(); LCD_RS(0) lcd_write_4bit (c>>4); lcd_write_4bit (c); } • Also a number of low level functions that are called from the user functions see the lcd.c file. • void lcd_write_cmd (unsigned char c) • void lcd_write_4bit (unsigned char c) • static unsigned char wait_while_busy (void) • static unsigned char lcd_read_status (void)
Printing variables to the LCD • To print variables to the LCD it is necessary to convert the variable to its ASCII character representation using the sprintf() function and then printing out the characters using the lcd_print() function. • Example sprintf(lcd_buf, "%d", x); //convert x to ASCII lcd_print(lcd_buf); // print to LCD • where the variable x is an integer to be printed in decimal (hence the %d in the sprintf format string) and lcd_buf is an array of char declared big enough to hold the characters of the number + 1 extra character (for the end of string NULL character). • E.g. char lcd_buf[17]; // LCD buffer big enough for one line of characters on the LCD
LCD Character generation User defines characters can be stored in the LCD CGRAM memory Up to 8 characters can be stored
LCD CG RAM Example /* Load user-specific characters into CGRAM */ lcd_write_cmd(0x40); /* Set CGRAM address counter to 0 */ p = &UserFont[0][0]; for (i = 0; i < sizeof(UserFont); i++, p++) lcd_putchar (*p); lcd_write_cmd(0x80); /* Set DDRAM address counter to 0 */ /* 8 user defined characters to be loaded into CGRAM (used for bargraph) */ const unsigned char UserFont[8][8] = { { 0x00,0x0A,0x00,0x00,0x11,0x0e,0x00,0x00}, { 0x10,0x10,0x10,0x10,0x10,0x10,0x10,0x10 }, { 0x18,0x18,0x18,0x18,0x18,0x18,0x18,0x18 }, { 0x1C,0x1C,0x1C,0x1C,0x1C,0x1C,0x1C,0x1C }, { 0x1E,0x1E,0x1E,0x1E,0x1E,0x1E,0x1E,0x1E }, { 0x1F,0x1F,0x1F,0x1F,0x1F,0x1F,0x1F,0x1F }, { 0x00,0x00,0x00,0x00,0x00,0x00,0x00,0x00 }, { 0x00,0x00,0x00,0x00,0x00,0x00,0x00,0x00 } };
LCD CG RAM Example lcd_putchar (0x00); Our character has been defined at address 0x00; Therefore to display the user defined character simply use the lcd_putchar function.
LCD simulation in uVision Add the file Sim.ini to the directory of your current project. In the Options for target simulator (magic wand icon) select the debug tab.
LCD simulation in uVision Add the file Sim.ini as the Initialization file in the left hand panel for the simulator options using the file browser icon.
LCD simulation in uVision The Sim.ini maps the LCD write address to 0x1000000 in memory. By viewing address 0x10000000 in the memory window it is possible to simulate the display of the LCD.
LCD simulation in uVision Change display format to Ascii