Download
1 / 4
40 likes | 45 Views
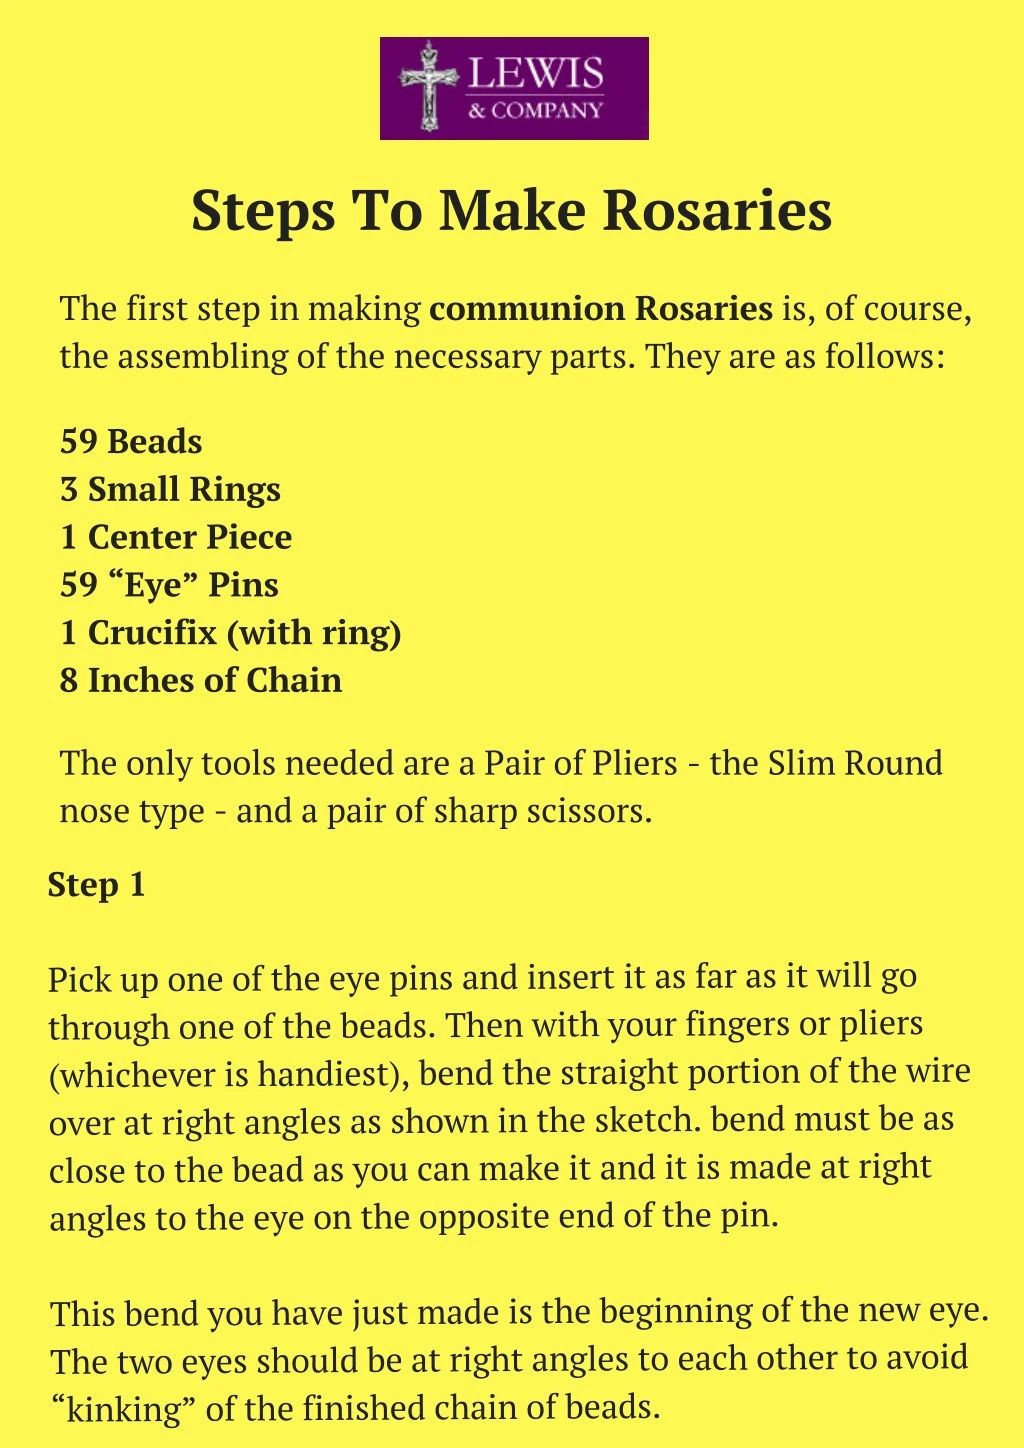
Most important step to make communion rosaries is collecting the necessary parts like beads, small rings, center piece, Inches of chain, Crucifix etc. Get complete information here www.rosaryparts.com/rosary-instructions/

E N D
Steps To Make Rosaries The first step in making communion Rosaries is, of course, the assembling of the necessary parts. They are as follows: 59 Beads 3 Small Rings 1 Center Piece 59 “Eye” Pins 1 Crucifix (with ring) 8 Inches of Chain The only tools needed are a Pair of Pliers - the Slim Round nose type - and a pair of sharp scissors. Step 1 Pick up one of the eye pins and insert it as far as it will go through one of the beads. Then with your fingers or pliers (whichever is handiest), bend the straight portion of the wire over at right angles as shown in the sketch. bend must be as close to the bead as you can make it and it is made at right angles to the eye on the opposite end of the pin. This bend you have just made is the beginning of the new eye. The two eyes should be at right angles to each other to avoid “kinking” of the finished chain of beads.
Step 2 With the pliers in the right hand, grip the bent over section of the pin (now pointing to your right), near the nose of the pliers and near the end of the pin. Circle your thumb toward you and put a little bend in the end of the pin. Since the human wrist is not constructed so that it will make a complete circular turn, it is now necessary that you take two grips or “bites” of the work. The little bend mentioned above is the beginning of the “Eye” you are making. To complete the “Eye” and make it into a perfect circle, you now grasp the jaws of the pliers with your LEFT HAND. This will keep them tight on the Eye Pin. Then circle your RIGHT HANDto the right as far as it will goand take a fresh grip of the pliers. Now when you turn the pliers toward yourself, you will form an almost complete circle in the wire like the one already formed on the other end. This eye should not be quite closed. Leave it open a little so that you can later on close it around the next pin in the chain. This is the basic process in making a Rosary. It should be practiced until you can form an eye on one end of the pin almost identical in size and roundness with the original one. Now, put the pins through all 59 of the beads and form eyes on each one as above, leaving the new eyes not quite closed. Step 3 Pick up two of the beads and hook the new eye of the one
through the original eye of the other. This is the first step in assembling the Rosary. Grasping the pin with your pliers in the manner shown by the sketch, close the eye. DO NOT squeeze the eye closed by pressing on the sides - doing this is sure to spoil the roundness of the eye. Also do not press on your pliers any tighter than necessary. It is very easy to mar the pins. Using the method described above, assemble the five groups of ten and the group of three which you need. Step 4 Cutting the chain is next. Fourteen pieces are required, each four or five links long as you prefer. These are easily snipped off with a pair of scissors, but in cutting the chain be careful to have exactly the same number of links in each of your fourteen pieces. Step 5 Open one of the small “jump” rings by bending the prongs sideways. Opening the ring in this manner makes it easy to close without losing its shape. Slip the ring through one of the upper openings in the centerpiece and a piece of the chain and close it. Step 6 The final assembly consists of joining together the various parts in the approved manner as shown in the picture.
In connecting, it is necessary to slightly open the closed end of the last eye pin of each decade, in order to attach the chain. Before making the final assembly of the long string of beads and the centerpiece, hold the string up by one end and let it dangle freely. Then when you attach the free end of the centerpiece, see that there is no “twist” in the string. Even a slight twist will cause the Rosary to kink - something easily avoided with a little care. Lewis & Company - 2600 Fifth Avenue - Troy, NY 12180 800-342-2400 www.rosaryparts.com