Download
1 / 72
720 likes | 795 Views
#. See Figure. SIMPLY RIMS BASIC OPERATION GUIDE FOR STATE OES EMPLOYEES Screen Prints/Figures Follow. 9. 26. See Figure. See Figure. STEPS TO TAKE:

E N D
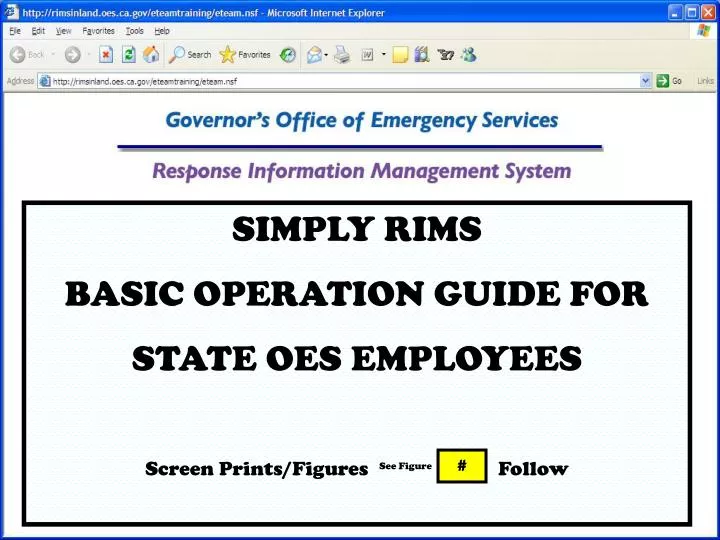
# See Figure SIMPLY RIMS BASIC OPERATION GUIDE FOR STATE OES EMPLOYEES Screen Prints/Figures Follow
9 26 See Figure See Figure • STEPS TO TAKE: • Determine if this activation has been ‘named’. Look in the views to see if there is an Event Report created for this particular activation. (Check with Executive prior to creating for naming protocol) • Determine which report (if any) you are responsible for creating or updating (according to which SEMS position you are filling in the SOC, REOC or as Duty Officer) Example; Planning & Intelligence Section staff are responsible for the SEMS Situation Report • SitReps can be ‘linked’ or ‘related’ to either an Event or Incident report.
STEPS TO TAKE: • Remember: State OES does not manage Incidents, so only Cities or OA’s will create Incident Reports. **EXCEPTION IS WHEN REQUESTED TO CREATE FOR THE CITY OR OA. • Determine if a report has been previously created for this particular activation by your reporting location ** Example, SOC, Inland REOC, Southern REOC or Coastal REOC. • There should only be ONE report from each location for a particular activation. Only one SEMS SitRep from the SOC, Only one SEMS SitRep from the Inland REOC.
6 26 See Figure See Figure STEPS TO TAKE: 7. If a report HAS been created, DO NOT create another. Instead go into the existing report and UPDATE that report. 8. If a report has NOT been created yet, you will need to CREATE a report for this activation. 9. Go to the Navigation Pane on the left side of your screen, near the top, find RED text that says “CREATE REPORT”, Choose the report you are responsible for and click on that report title. 10. The report will open in a new window on your screen, in EDIT mode – ready to be filled in. ** Wait for the SUBMIT /CANCEL buttons to load before you begin entering info
26 See Figure STEPS TO TAKE: 11. Once you’ve entered the information available to you, click on the SUBMIT button at the top right side of the report. Any fields indicated with RED text are required and you must make an entry in these fields in order to submit the report. 12. If you don’t have information for some of the other fields – DON’T WORRY! You can still submit the report and when the additional information is obtained, go back into the same report and UPDATE it; add the new information.
NAVIGATION PANE * To Create new reports * To View or Sort existing reports * To Move around within RIMS * To NAVIGATE the system 1
* The little triangles are called “Twisties” * A twistie to the left of text indicates a “Header” with related information ‘under’ it. * A single mouse click will open or expand to show the information. Another click will collapse or close it. 2
Click “Twistie” to Expand/Open To see additional choices! 3
List of Report Categories (Headers). * Note the twisties to the left 4
Click “Twistie” again to Expand/Open one more level to see all reports in that group. 5
CREATE REPORT Create a report in the top section of the Navigation Pane – red text. Red Text = CREATE NEW REPORT RED= WRITE 6
Click “Twistie” to Expand/Open To see additional choices! 7
VIEW/UPDATE View existing reports in the bottom portion of the Navigation Pane – Blue text. Many different ways to lay out/sort/view the documents in the system. Sorted by various criteria. BLUE = VIEW 8
Tool Bar – Stationary at the Top Tool Bar – Floating moves down with the page 11
Refresh -Manually updates Web page info Expand All – Opens all twisties showing all headers and report link listings in view pane. Next – Turns to the next page of Report links listings Collapse All – Closes all twisties showing only headers in view pane. Previous – Turns back one page of Report links listings 12
* All Reports View – Easiest way to find information * Event or Incident name – All reports associated will be listed * Reports sorted alphabetically by Report Type 13
EVENT EVENT All Reports Related to this Event sorted Alpha by report type. All Reports Related to this Event sorted Alpha by report type. All Reports Related to this Incident sorted Alpha by report type. Incident 14
Event Name (Headers) Incident Name (Headers) 15
Report that named the Event 2006 Winter Storms Incident report ‘related’ to 2006 Winter Storms Situation reports ‘related’ to 2006 Winter Storms State or Federal Agency Situation Report related to AAA Terrorist Statewide Event Duty Log related to AAA Terrorist Statewide Event Report that named the Event AAA Terrorist Statewide Event Incident reports ‘related’ to AAA Terrorist Statewide Event Situation reports ‘related’ to AAA Terrorist Statewide Event 16
Event Reports created ONLY by State OES SEMS SitRep names the jurisdiction Incident Reports include the jurisdiction name Agency SitRep name the specific Agency Over-all status for Jurisdiction or Agency being reported on 17
Who has responsibility at this reporting level: Usually will be the reporting entity. However Cities/OA’s can cede responsibility for managing the Incident if they choose. Date & Time Report Created 18
Black triangles in Columns – Sort view by that Criteria. 1st click sorts alpha A-Z 2nd click sorts alpha Z-A 3rd Click returns to default view Many different ways to look at or sort the same group of existing documents 19
Napa County Flash Flood Incident Sierra Severe Weather- Blizzard/Snow Storm Incident Sacramento OA Flood Incident Fresno OA Severe Weather- Storm Incident San Joaquin Levee Damage/Break Incident Ventura County Land Slide Incident San Bernardino Mudslide Incident Various Incidents around the state Unrelated (as far as we know) at this time. 21
Napa County Flash Flood Incident Sierra Severe Weather- Blizzard/Snow Storm Incident Sacramento OA Flood Incident Fresno OA Severe Weather- Storm Incident San Joaquin Levee Damage/Break Incident Ventura County Land Slide Incident San Bernardino Mudslide Incident State OES determines that all these Incidents are part of a statewide Event ie: Winter Storms 2006 22
Each Operational Area/County continue to manage their individual, named Incidents. (Remembering to send in SitReps to the REOC’s) They “Relate” the Incident reports to the Event report Winter Storms 2006 Napa County Flash Flood Incident Sierra Severe Weather- Blizzard/Snow Storm Incident Sacramento OA Flood Incident Fresno OA Severe Weather- Storm Incident San Joaquin Levee Damage/Break Incident Ventura County Land Slide Incident San Bernardino Mudslide Incident 26 See Figure 23
EVENT REPORT WINTER STORMS 2006 The Event Report brings everything together under one (umbrella/name) Napa County Flash Flood Incident Fresno OA Severe Weather- Storm Incident San Joaquin Levee Damage/Break Incident Ventura County Land Slide Incident San Bernardino Mudslide Incident Sacramento OA Flood Incident Sierra Severe Weather- Blizzard/Snow Storm Incident 24
Quick Incident vs. Full Incident Starts with 3 tabs available . 6 Required Fields Starts with 6 tabs available . 6 Required Fields ? What’s the Difference? 25
Once submitted 7 tabs available No difference from Full Incident Once submitted 7 tabs available No difference from Quick Incident Once submitted: Exactly the SAME! 26
Red text = Required field Wait for buttons to fully load before making any entry. RELATED EVENT/INCIDENT/ACTIVITY * Select from list to LINK or RELATE this report to an Event or Incident. * This report will be listed ‘under’ that Event or Incident in the View * Can be changed/added/un-related at any time Creating any Report: 27
This field will take as much text as you want to put in. These buttons provide an Expanded Text Window for each of the fields. Creating any Report: 28
LEAVE BLANK EVERYONE CAN SEE! **WARNING: Please read before making any entries in this field! DISTRIBUTION: This field is in all the forms. Any Entry in this field limits the ability to VIEW to the Individual or Group listed. ANY ENTRY ONLY that Individual or Group can SEE the report! 29
Choose from a list of Groups created by & specific to State OES **WARNING: Please read before making any entries in this field! DISTRIBUTION: This field is in all the forms. Any Entry in this field limits the ability to VIEW to the Individual or Group listed. Choose from an alphabetical list of all Individual RIMS users who have created a personal profile in the system 30
Click YES to Send Notification Enter your message for the Notification. * 140 characters maximum. NOTIFICATION: This field is in all the forms. Send messages to Groups or Individuals of report(s) in the system. (Only available if the person has indicated a notification method in their personal profile). ** Please do NOT send notification to Groups unless requested. 31
NOTIFICATION: This field is in all the forms. *Please only notify when specifically REQUESTED! Click for a list of Individuals (who provided a Preferred Notification Method) A click on the name moves it to the Notification field on the right. A click in that box removes it. 32
NOTIFICATION: This field is in all the forms. *Please only notify when specifically REQUESTED! Click for a list of Groups created by & specific to State OES A click on the group name moves it to the Notification field on the right. A click in that box removes it. 33
Add a Web page anytime! Attachments can ONLY be added once the form has been SUBMITTED and is in READ mode. 34
READ MODE = No open fields or drop downs. EDIT or UPDATE mode = Open fields and drop downs UPDATE OR EDIT! Wait for buttons to load! Once you SUBMIT your report – it will open on your workspace in READ Mode. 35
IN READ MODE Click on small blue text Add new information to the Situation Summary! A Window will Open – Make your entry and Submit! It will be added at the TOP of the field Date, Time & ID Stamped 36
Use the Navigation Pane to Create, View other reports or move within the system. Once finished reading or updating: 37
Report Header - “Mission Request” Choose Mission Request MRT or Mission Request Create in the top section of the Navigation Pane – red text. 38
Choose level of the Threat; This gives the Mission its Priority. (Click the link for explanations of each.) 39
Status: This is the “overall ” status of the mission. This field is now color-coded (choose carefully) and must be updated manually. Default = “Red - Action Required” (this lets us know to go in and approve or deny) Once a Mission Number has been issued remember to change it to “Purple-Coordinating”. As the mission progresses, the Status must be updated accordiningly. 40
All required fields (RED TEXT) must be completed before State OES staff can click here to issue the Mission Number. 41
Choose OA from list(new window will open) If a City or Special District type name in field below Enter Contact info for the Requesting Agency 42
If this Mission Request is related to an Existing Event or Incident – Choose it from the list. (a new window will open) If not, it can always be ‘related’ at a later time E- 2005-06 Winter Storms E- CA Response to Katrina E – CA Response to Rita E – London Terrorist Bombing I – Topanga Incident I – Tulare County Flood (North County Area) 43
Requested Mission: What is needed; what needs to be acomplished? Type: What ‘type’ of Mission is it? If unsure, choose the option “Other” Needed By: Reasonable Date when the resource is needed. 44