Download
1 / 18
180 likes | 189 Views
October 21, 2014. Who made this image? Darkroom or digital? How do they make the image?. Multiple Exposure. Can be done many ways: In camera Layering negatives in enlarger

E N D
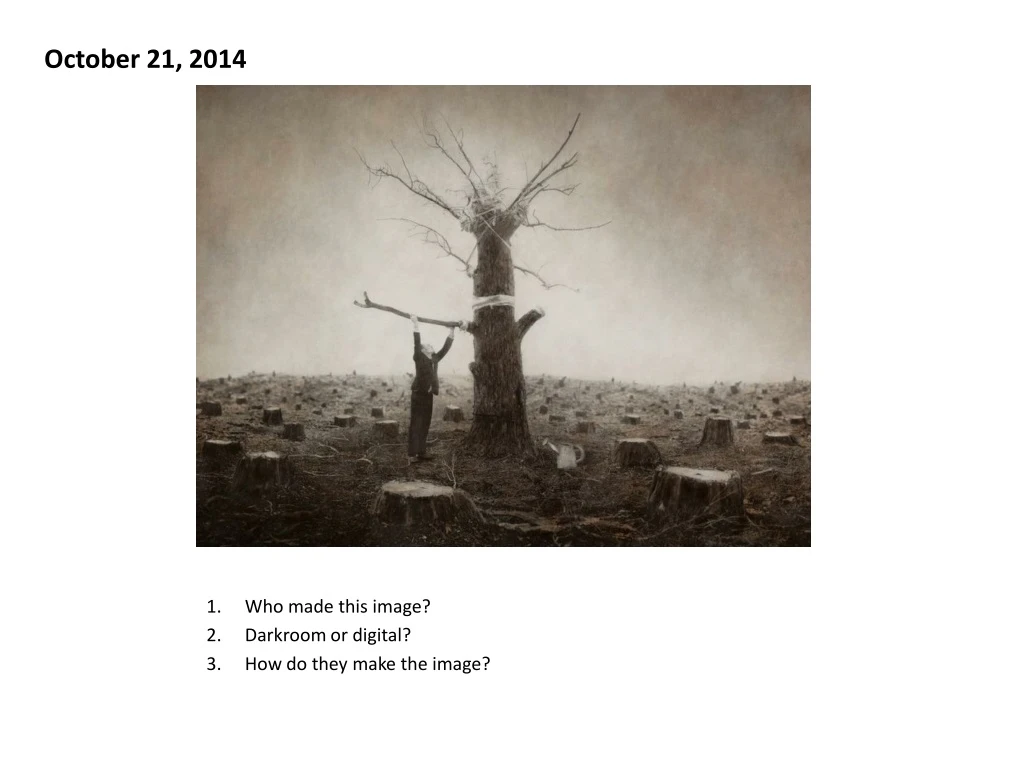
October 21, 2014 Who made this image? Darkroom or digital? How do they make the image?
Multiple Exposure • Can be done many ways: • In camera • Layering negatives in enlarger • Different negative in each enlarger and exposing different area of the paper to get what you want (that’s how Robert and Shana Parkeharrison do it)
Burn and Dodge areas to get seamless images • MUST FIND PROPER EXPOSURE FOR EACH NEGATIVE • Keep in mind that layering two negatives in one enlarger will result in longer exposure times and adjusting the filter
Negative Alteration • Anything done to a negative is permanent and cannot be undone • Be intentional • Scratch with paper clip, needle, whatever you can find to scratch the emulsion • Can experiment with other alterations- burning, ripping, etc. Be creative
Solarization • Made popular by Man Ray • Find proper exposure of image • Develop image • Before the image is done being developed expose image to an additional light source- flashlight.
More Precise Steps of Solarization • 1. Commandeer two enlargers, preferably side by side. • 2. Raise the head of one enlarger to the highest point and close the aperture to its smallest opening. Place a dry towel or paper towels on the enlarger baseboard. Set the timer to 2 seconds. • 3. Select a negative that has a lot of contrast and put into the other enlarger. • 4. Using a #5 filter to increase the contrast as much as possible, make a test strip to determine the appropriate exposure time. Don’t be surprised if your exposure time is high, since the #5 filter will significantly cut down the amount of light hitting the photo paper. • 5. Expose the photo paper as you would a normal print. For best results, use a slightly shorter exposure time (by 10-20 percent) than you would if you were not planning to solarize, i.e. than what the test strip suggests. • 6. Place the exposed paper into the tray of developer and agitate. • 7. Once the image starts to become visible, remove the paper from the developer. You will get different results depending on whether you let the paper develop for more or less time. Generally, you will keep the paper in the developer for approximately 10-15 seconds. • 8. Place the paper on a sheet of glass or the back of a flat tray and squeegee off the excess water. • 9. Place the paper on the base of the enlarger that is raised to its highest point, emulsion side up. • 10. Expose the paper for the 2 seconds you set earlier. • 11. Return the paper to the developer for the remaining time, agitating normally. • 12. Finish up the processing as you would any other print.
Hand-Tint • Must be matte paper- need pre matte solution and spray after • When hand tinting it is a good idea to start with the smaller areas to be colored first. This helps prevent accidental color errors later on. Decide on a progression of areas to color. Generally, you will go from smallest to largest and then return to smaller areas for touch ups. • Color as you would anything else • 24 hours before they are completely dry. Set your tinted photo in a cool, dry place that is away from dust while it is drying.
Brush On Developer • Find Proper Exposure of an image • Brush on developer with paint brush • Dip image into developer halfway and let developer drip down the page • EXPERIMENT • Be intentional
Reversal Print • Emulsion to Emulsion • Place Glass On Top • Expose under enlarger
Toning • Expose and develop image as usual • Clean Print before toning • Do not mix toner solution • USE GLOVES • Place Print in toner • When done was for 10 minutes minimum
Experiment! • This print utilizes crinkled plastic over paper during exposure time • Play with where you place the materials and what materials you are layering
A Few Reminders • It is great to experiment when working but all decisions should be intentional. Make artistic decisions and be responsible for your art. • Remember mistakes are chances to learn and grow from so don’t be discouraged. • It’s okay to ask for help • Try, Try and try again • Have fun!