Download
1 / 35
350 likes | 359 Views
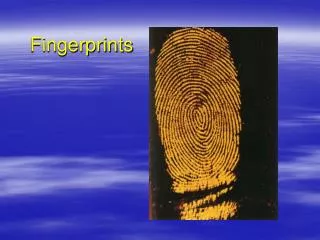
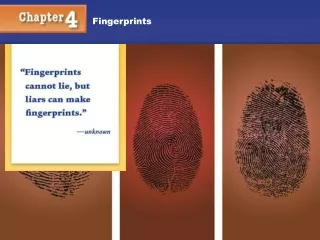
Lesson 2 Fingerprints. Say there’s been a robbery at a house. Police arrive the scene. What will be the first thing the police search for? Why?. One of the reasons : Fingerprint is unique. If the thief has left a fingerprint, that could lead to a quick arrest!. Activity 2.1.

E N D
Say there’s been a robbery at a house. Police arrive the scene. What will be the first thing the police search for? Why? One of the reasons: Fingerprint is unique. If the thief has left a fingerprint, that could lead to a quick arrest!
Activity 2.1 How much do you know about fingerprints? Complete Worksheet 2.1 to check your understanding.
Classification • Arches • Ridges enter on one side and exit on the other side. • Approximately 6% of people exhibit this pattern.
Loops • Ridges enter on one side and exit on the SAME side. • Approximately 60% of people exhibit this pattern.
Whorls • Consists of circles and spirals. • Approximately 34% of people exhibit this pattern.
Types of fingerprint evidence • Patent prints • Visible prints are made on a surface when the ridges of fingers come into contact with a colored material such as blood, paint, grease or ink.
Types of fingerprint evidence • Latent prints • Invisible prints deposited on hard and non-absorbent surfaces are usually developed by the application of a powder, whereas prints on porous surfaces generally require treatment with a chemical. • Examples of hard and non-absorbent surfaces are glass, mirror, tile, etc.
Types of fingerprint evidence • Latent prints (Cont’d) • Examples of porous surfaces are paper, cardboards. • Examiners use various chemical methods to visualise latent prints such as iodine fuming. • Super Glue fuming develops latent prints by reacting with body oil residue found in fingerprint.
Types of fingerprint evidence • Physical prints • Physical prints are ridge impressions left on a soft material, such as wax, soap and dust.
Activity 2.2: Practice the identification skills Fingerprint ridge details
e.g. fork Activity 2.2: Practice the identification skills Locate and label the ridge details
dot fork ending ridge hook ending ridge double hook eye bridge
Activity 2.3 Making a fingerprint (Part 1) Part 1 Direct fingerprinting (a known fingerprint made from an individual) • Rub a 2B pencil over a white paper until it is covered with graphite. • Rub your index finger against your nose or forehead and place the finger on the center of a microscope slide. • Press and roll your index finger firmly on the graphite pad and then press the finger on the worksheet thoroughly. • Take a transparent adhesive tape and press it onto the fingerprint. • Repeat step 2 to 4 for another index finger.
Activity 2.3 Making a fingerprint (Part 2) Part 2 Latent Fingerprinting (Fingerprinting dusts makes latent prints visible) • Use a handkerchief to wipe a microscope slide free of any stray fingerprints. Handle the slide only by the edges. • Rub your index finger against your nose or forehead and place the finger on the center of the microscope slide. • Sprinkle the iron powder onto the edge of the print.
Activity 2.3 Making a fingerprint (Part 2) • Lightly shake the slide to apply a thin coating of iron powder onto the latent print. • As the print becomes visible, you should shake the slide lightly until there is no excess iron powder on the slide. • To lift the fingerprint from the slide, you should position the untouched portion of the tape above the imaged fingerprint and smooth the tape over the developed print. • Place the fingerprint on the worksheet. • Repeat step 7 to 13 for the rest of your fingers.
Activity 2.3 Making a fingerprint (Part 3) Part 3 Statistics • Identify the pattern of each of your fingerprint. • Write down the name of pattern under each fingerprint. • Count the numbers of each pattern.
Activity 2.3 Making a fingerprint (Part 4) Part 4 Identify the ridgeline details • Choose the fingerprint with best resolution among all your fingerprints. • Examine the fingerprint with a magnifying glass. • Use Table 1 of Worksheet 2.2 to help identify separate fingerprint ridgeline details. List out the names of ridgeline details on the worksheet. Count the frequency of each ridgeline detail.
Activity 2.3 Group discussions • Count the number of patterns of all fingerprints among your group members. What is population percentage of each pattern? Show your calculations. • Which pattern is most common among your group members?
Activity 2.3 Group discussions • Which colour is the most popular color for fingerprint powder? Why? Answer: Black is the most popular colour because it creates the most contrast on a white card, commonly used for filing and recording fingerprints. This provides a uniform medium for the comparison of black ridges of the questioned print to the black inked ridges of the known print.
The steps in analysing and comparing fingerprints Five steps in analysing and comparing fingerprints. Step 1: Identify the general pattern of the central area of the fingerprint. Step 2: Match fingerprint ridgeline details. Step 3: Compare the unknown print and the known print, point by point, feature by feature, to see if they match. Step 4: Evaluate whether the unknown print matches the known print or not. Step 5: A second examiner verifies the results.
Steps in analysing and comparing fingerprints
How many points of similarity between the prints are required to match two fingerprints?
Note: After calculating the probability, at least 13 points of similarity between the prints are required to identify a match between two fingerprints.
Automated Fingerprint Identification Systems (AFIS) • Capturing, storing, searching, and retrieving fingerprints via computer is now a standard practice among police agencies and forensic science laboratories. • Automated Fingerprint Identification Systems (AFIS) are computerised databases of digitised fingerprints that are searchable through software. • An AFIS can store millions of prints which can be searched in a matter of minutes by a single operator.
Activity 2.4:Case study • Read the case profile. • Follow the five steps in analysing and comparing fingerprints. • Write a report to conclude your findings.
Activity 2.4 Read the case profile A suspect was arrested in a burglary case. When the suspect was fingerprinted, the desk sergeant noticed something very unusual – his fingerprints somehow had been altered. The suspect admitted that he had peeled off the skin from one of his thumbs and transplanted it onto another thumb. The suspect even claimed that “I have new thumbprints. I am a clean person.” Furthermore,the police have recovered an excellent latent thumbprint from an unsolved burglary case 3 years ago. There are some indications that these 2 cases may be related.
Activity 2.4 Your role… • The recovered print and the suspect’s new thumbprints are provided for your analysis. • Can a match be made between the direct thumbprints from the suspect and the latent thumbprint found at the crime scene? • Imagine you were a fingerprint examiner and you need to evaluate the presented evidence, reach conclusions and provide findings in a report to the law enforcement authorities and the court.
Activity 2.4 Before you start… Discuss with your group members: • In order to analyse and compare fingerprints, what will be the next steps? • If necessary, you may use a mind map or concept map to show your answers.
Activity 2.4: At the end… In you report, you should • identify whether there is a match between the latent print and the direct prints. Circle and label the area(s) on the direct thumbprint and recovered latent print correspondingly. • identify which part of the thumbprint was altered. Circle the area(s) on the direct thumbprint and recovered latent print correspondingly.
Suggested Answers Known left thumbprint from suspect Recovered print from robbery store
Suggested Answers Known left thumbprint from suspect Known right thumbprint from suspect
Activity 2.4 Follow-up group discussions • “The suspect admitted that he had peeled off the skin from his left thumb fingertip and transplanted them onto his right thumb.” • Explain whether the new fingerprint would last forever. • Is the suspect identified? If you were a member of the jury, would you believe the “evidence”?
Suggest how one would not leave his/her fingerprints. Justify the possibility. • Are lip prints or toe prints unique like fingerprints? Explain briefly. • Comment the statement “A fingerprint classification system can unequivocally identify an individual. ”