Download
1 / 122
1.22k likes | 1.55k Views
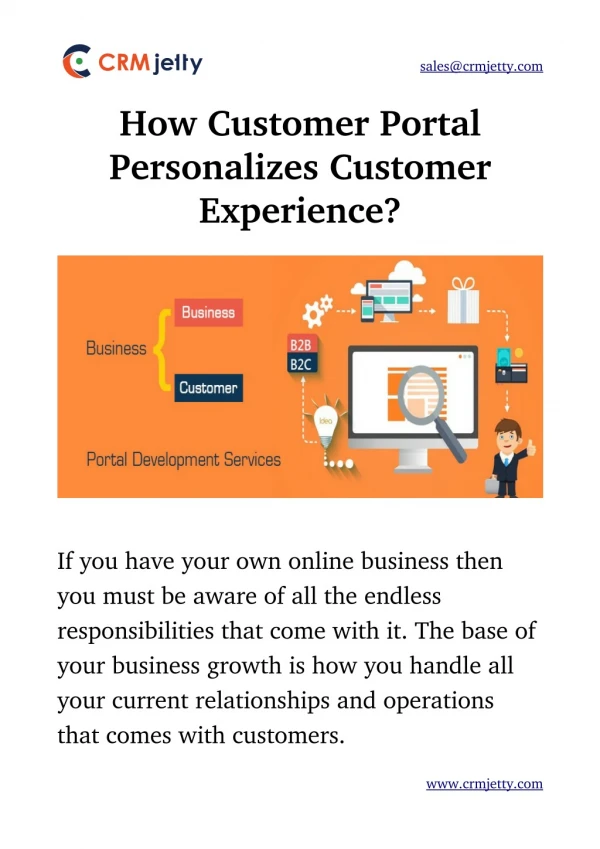
Centricity Customer Portal Management. Learning the “Ws” of the Centricity Customer Portal and the big “H”. Centricity Customer Portal Management. This guide will cover the five “Ws” of the Centricity Customer Portal (CCP) and the big “H” What – What is the Centricity Customer Portal?

E N D
Centricity Customer Portal Management Learning the “Ws” of the Centricity Customer Portal and the big “H”
Centricity Customer Portal Management • This guide will cover the five “Ws” of the Centricity Customer Portal (CCP) and the big “H” • What – What is the Centricity Customer Portal? • Who – Who manages the CCP? • Why – Why are we using the CCP? • When – When will I start managing the CCP? • Where – Where do I find the CCP? • How – How do I manage the CCP?
What is the Centricity Customer Portal? • The Centricity Customer Portal, or CCP is the Learning Management System (LMS) that delivers CBT training to users.
What does the CCP look like? • The left navigation includes categories to view CBTs. • View Courses • Required – CBTs that have been specifically assigned to your Knowledge Position, typically by the person in the manager role. • Enrolled in – CBTs that you have clicked on the Enroll button from the Required, Catalog or Curricula sections. • Catalog – Complete listing of all CBTs uploaded. • Curricula – CBTs grouped into prebuilt roles. • Instant Knowledge • Library – Training materials for using the CCP and CBT surveys • Manuals/Companion Guides – Downloadable PDFs of product manuals. Also, a link to ordering hard copies. • Services section – This is content migrated from the Education Site and will be housed here going forward.
What does the CCP look like? This is a small sample of the CBTs listed on the Catalog page.
What does the CCP look like? This is an abbreviated example of CBTs organized into curricula. Back to contents
Who manages the CCP? • Each customer will appoint from their business a manager of the CCP. The person in the manager role will have specific administration privileges, such as assigning CBTs to groups of users and running reports. • Some customers may not need to create groups of users or assign CBTs. Once the staff has self-registered, the Curriculum section is the best place for staff to begin taking CBTs. Back to contents
Why are we using the CCP? • The CCP is a one-stop shop for all your education needs, including product information, on-site training information and registration, as well as giving the person designated as manager control over the users and CBTs to be assigned. Back to contents
When will I start managing the CCP? • Once your practice has been entered into the CCP, if you are in the manager role, you will be notified that your staff can self-register, and you can assign CBTs to categories of users, if you want. • You will be notified by either a GE project manager or by the Education Team when your practice is in the CCP. Back to contents
Where do I find the CCP? • The url for the CCP is http://centricityportal.gen21.com/knav/nav. • A GE project manager or the Education Team will initially provide you with login credentials for your management role. You will also receive a Siebel Account number with instructions of how to use it when logging in. Back to contents
How do I manage the CCP? • The first view of the CCP is the login page. Managers will login first with credentials provided by either a GE project manager or a member of the Education Team. • Once logged in, the manager can forward the CCP URL to staff members, along with a provided Siebel Account number, used to link your practice to the appropriate location within the CCP. • The functions a manager will be able to perform in the CCP are all wizard based.
How do I manage the CCP? • Upon logging in, you will be prompted to choose a Knowledge Position. The name of your practice will be displayed. In this example, the practice is Physicians Associates and the position of manager is the default. • Select Submit. A Knowledge Position is a category of users in the CCP. A manager would be in the Knowledge Position Manager role, whereas a student would be in a Knowledge Position Student role.
How do I manage the CCP? • Once in the CCP, the Tools button is where the manager will go to access all wizards and reports. • The manager will be able to do the functions listed below in the CCP. You can jump to different sections by clicking on the hyperlinks below. It is mandatory that you use this presentation in conjunction with making CCP changes until you are more familiar with some of the terminology. Self registration Taking CBTs Create your own username and passwordCreate custom Knowledge Positions Assign users to Knowledge Positions Assign CBTs to Knowledge Positions Remove course assignments Change password Purchase CBT Subscription for upgrading organizations Run reports
Self-registration In this section you will learn how your staff will be added to the CCP. As the manager, you will login with credentials provided to you in a communication from the Education Team, or information from a project manager. Once you have logged in, forward the URL of the CCP to your staff, along with the Siebel Account number provided, and they can begin self-registering. CCP URL: http://centricityportal.gen21.com/knav/nav
Self-registration • From the Logon screen, choose Register as new user.
Self-registration • Complete all the fields. • The Account Number field is where your staff adds the Siebel Account number provided to the person acting as manager. Enter this number to link your staff to the appropriate group of users for your practice. • If you did not receive your Siebel Account number, contact the Education Team at the end of this presentation. • When finished, click the Send information button to complete self-registration.
Self-registration • It is important to note that users registering via the self-registration process are automatically placed into the Student-level Knowledge Position, created for your practice. You will learn more about Knowledge Positions shortly, but if you have any users that you want to be able to manage the CCP, after they have self-registered, they need to be added to the Manager Knowledge Position for your practice. • Remember, as manager you have different permissions than a student user; therefore, you must add them to the Manager Knowledge Position after they have self-registered to have those same permissions. Back to Wizards contents
Taking CBTs • Your staff can begin taking CBTs right away by either going to the Curricula section to take CBTs grouped together by role, or as individual courses in the Catalog section. • In the Software & Upgrades section, you will find the PM and EMR CBT Library Guides • As the manager of your staff’s CBT usage, you have the option of creating custom groups (called Knowledge Positions) of users and assigning CBTs to those groups. Then, you can assign specific staff to those groups. You cannot, however assign CBTs to individual users.
Taking CBTs • Be sure your pop up blockers are deactivated prior to accessing the CBTs, because they open in a new browser window. • There are several issues that can occur to prevent a CBT from performing properly. The most common ones follow: • Your network has restrictions that may keep the CBT from opening in its own window. Solution: discuss with your IT administrator. • The individual users have pop up blockers employed. The way you can tell that there is a pop up blocker being used is if the CBT never starts and you see a blank window.Solution: discuss with your IT administrator that you may have pop up blockers keeping your CBTs from opening in their own browser windows. • A CBT Troubleshooting Guide is included at the end of this presentation. Back to Wizards contents
Creating your own username and password There are a couple of ways you can add yourself to the CCP, but only one way will allow you to add your email address at the same time. In this section you will learn how to create your own username and password, so that you do not have to use the Siebel Account Number as your username. Plus, you will be able to add your email address, which reminds those practices who have a 1-year or 3-month subscription that the expiration date is a month away. Also, you will add yourself to the Manager Knowledge Position (KP), which allows you to perform managerial functions of the CCP.
Creating your own username and password • Go to the log in page of the CCP, but do not log in. • Instead, click on the Register as new user button, which is exactly what you would have your staff do if they were going to self-register.
Creating your own username and password • Complete all the fields. • The Account Number field is where you add the Siebel Account number. Enter this number to link yourself to your practice. • Be sure to include your email address. • When finished, click the Send information button to complete self-registration. Keep in mind that the number in this example, 5412, is only for illustration purposes. Your organization will have a different number. Your number was provided with your managerial login credentials.
Creating your own username and password • The self-registration by default is going to put you in the Student KP for your practice. As you will learn later about Knowledge Positions, the Manager KP has the role of manager associated with it, so that anyone added to that KP inherits that role. Since you just self-registered into the Student KP, the next step is to assign you to the Manager Role. • Log out of the CCP, and then back in using your default managerial login credentials. • Once you have logged back in with your default managerial login credentials, jump to slide 38.
Create custom Knowledge Positions • In this section you will learn how to create custom Knowledge Positions in the CCP. • There may be employees in your practice who hold numerous roles. In cases such as this, you may want to create a custom Knowledge Position and assign CBTs to these custom roles. • Please note that the Education Team has created role-based curricula for many job functions, so you may not need to create custom Knowledge Positions. These role-based curricula are in the Curricula section. • Some examples: • CPSPM10 Billers • CPSPM10 EDI Reps • CPSEMR10 Clinical Support Staff • CPSEMR10 Providers
Create custom Knowledge Positions • Before creating your first custom Knowledge Position, it is important to understand the hierarchy of the CCP. Physicians Associates Community Manager Knowledge Position Student Knowledge Position Custom Student Knowledge Position The person assigned to the Manager Knowledge Position has the ability to create Student Knowledge Positions and assign courses and users to those positions. For the most part, there is no need to create a Community. A Community is a group of Knowledge Positions
Create custom Knowledge Positions • After selecting the Tools button, the Wizards window opens in a new browser window. • From the Wizards menu, find Create New Business Units and then Run Wizard.
Create custom Knowledge Positions • Select Next Step until this screen. Choose Yes. • For this example the practice name is Physicians Associates and we are going to create a Knowledge Position under the Physicians Associates Community. The Student Knowledge Community for your practice will have already been created for you by the Education Team.
Create custom Knowledge Positions • Select Next Step until this screen. Choose Create a new Knowledge Position. There is typically no need to create a new Business Unit.
Create custom Knowledge Positions • Select Next Step until this screen. While there are many fields, the only one necessary is the Knowledge Position Name field. The naming convention you choose should include your practice, the student role and the specific group. • For example, for Physicians Associates, we want to create a group of students who will learn about front office duties. We use Physicians Associates Student Front Office as the Knowledge Position Name. • The Education Team has already created several curricula for specific functions, including the following: • CPSPM10 Clinical Staff • CPSPM10 Insurance A/R Reps • CPSEMR10 Nurses / MAs • Your practice may not need to create new Knowledge Positions. The maximum characters allowed in this field are 70, so if your practice has a long name, you may need to abbreviate a portion of it.
Create custom Knowledge Positions • Select Next Step until this screen. After confirming the details of the new Knowledge Position, select Next Step.
Create custom Knowledge Positions • Select Next Step until this screen. Choose No, I am finished if you have no more Knowledge Positions to add, or choose Yes to add another Knowledge Position. Back to Wizards contents
Assign users to Knowledge Positions In this section you will learn how to assign users to Knowledge Positions. Each user will be added to a Knowledge Position either prebuilt by the Education Team, or to a new one you create. If you have been designated as a CCP manager, you have already been added to the Manager Knowledge Position. You can assign users to either Student or Manager Knowledge Positions.
Assign users to Knowledge Positions • From the Wizards menu, find Assign or Remove People from Knowledge Positions and then Run Wizard. When you receive management access to the CCP, a manager Knowledge Position has already been created for you. You can add your users to any Student or Manager positions available. An example name of the Knowledge Position would be Physicians Associates Student.
Assign users to Knowledge Positions • Select Next Step until you get to this screen. In the Knowledge Position Name field, enter a partial name to your practice, in this example physicians. Select Next Step to continue.
Assign users to Knowledge Positions • There will be several Knowledge Positions listed. For this example, select a Knowledge Position with the name Student associated. If you are assigning yourself to the Manager KP, then select that, instead of Student KP.
Assign users to Knowledge Positions • Select Next Step until you are on this screen. Choose Assign to assign a user to this Knowledge Position.
Assign users to Knowledge Positions • Select Next Step until you are on this screen. Enter the last name of the employee who you would like to assign. Remember, this user has already self-registered and is already in the system. If they have not self-registered, have them do so first.
Assign users to Knowledge Positions • Select Next Step until you are on this screen. For this example there is only one Turner, so the choice is easy. However, there may be more than one Ted Turner in the Centricity Customer Portal, so be sure the Employee # matches the Siebel Account number for your practice. This unique number is what links your staff to your practice.
Assign users to Knowledge Positions • Select Next Step until you are on this screen. Confirm the assignment and choose Yes. Make the assignment.
Assign users to Knowledge Positions • Select Next Step until this screen. If there are no more users to assign, you will choose I’m finished. For this example we are going to remove Ted Turner, so we will select Assign or remove another user. If you are assigning yourself to the Manager KP, then you are finished and can close the wizard. Log out and when you log back in with your own login credentials, you will see the Manager KP available to you.
Assign users to Knowledge Positions • Just like before, in the Knowledge Position Name field, enter a partial name to your practice. As before, we’ll search physicians. Select Next Step to continue.
Assign users to Knowledge Positions • As before, there will be several Knowledge Positions listed. Select Physicians Associates Student, because that is the Knowledge Position where Ted Turner is located.
Assign users to Knowledge Positions • Select Next Step until this screen. This time select Remove.
Assign users to Knowledge Positions • Select Next Step until this screen. Choose Ted Turner to remove him from this group.