Download
1 / 26
300 likes | 558 Views
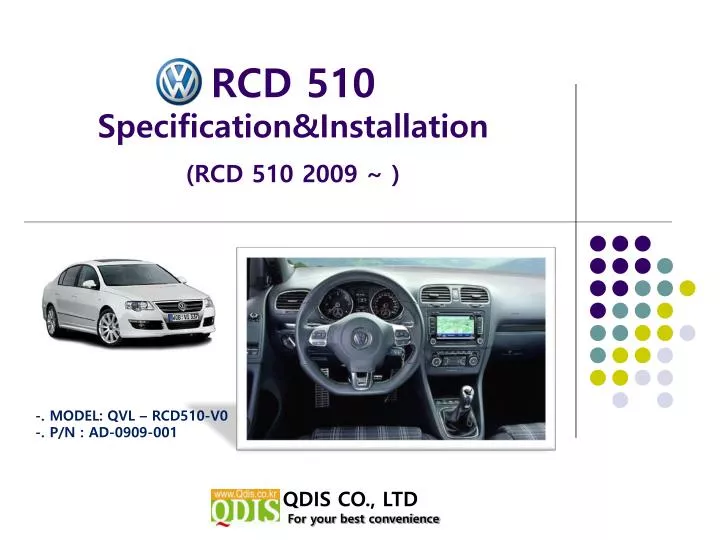
QDIS CO., LTD. For your best convenience. RCD 510 Specification&Installation (RCD 510 2009 ~ ). -. MODEL: QVL – RCD510-V0 -. P/N : AD-0909-001. INDEX. -. Feature……………………………………………………………………….…..3 -. Precaution………………………………………………………………………..4 -. Main Spec……………………………………………………………………….…5

E N D
QDIS CO., LTD For your best convenience RCD 510 Specification&Installation(RCD 510 2009 ~ ) -. MODEL: QVL – RCD510-V0 -. P/N : AD-0909-001
INDEX -. Feature……………………………………………………………………….…..3 -. Precaution………………………………………………………………………..4 -. Main Spec……………………………………………………………………….…5 -. System Composition…………………………………………………………....6 -. Outline Dimension……………………………………………………………...7 -. External Appearance …………………………………………………………..8 -. Connector Pin Assignment ………………………………………………..10 -. DIP Switch Setting …………………………………………………………..12 -. How to use remote…………………………………………………………....13 -. OSD(On Screen Display)………………………………………………......14 -. How to use parking guide line ………………………………………....18 -. Product Composition ………………………………………………............20 -. Installation Structure ………………………………………………............23 -. Installation guide……………………………………………………………….24 -. FAQ………………………………………………………………………………….28 -2-
-RCD 510 Feature • High Quality • Auto detection for NTSC, PALsignals • AV source switching by remote and toggle switch • Possible to control displayed external NAVI, AV image • AV source controlling by original touch -3-
-Precaution - You must keep the car key taken off from the car while you workthis and finally, connect power of the interface. - When to connect the interface cable, you must keep the power cable taken off. - You must work this at the environment without any static electricity or damages. - All of process on this installation should be done by professionals. - You must not break the labels attached on the board, if it’s broken, no warranty. - When you receive this package you have to check whether there’s any parts not included and you have to contact us right away. - Our repair service do not accept any problems caused by user’s any fault or carelessness. -4-
-Main Spec. 1. Input Spec. (MULTI VIDEO INTERFACE) -. 3 x A/V Input (External video source). -. 1 x CVBS(REAR CAMERA) Input. (Rear camera source) -. 1 x Analog RGB Input (Navigation System output) -. 1 x LCD Input (Car system Input) -. 1 x OEM Input 2. Output Spec. -. 1 x OEM Output -. 4 x Audio Select (12V power comes out from 4wires of cable by video, Navi mode) 3. Power Spec. - Input Power : 8VDC ~ 24VDC - Consumption Power : 12WATT, Max 4. Switch Input mode - Input Video MUTE Function : Possible to make each input mute by operating Dip S/W. - Possible to switch Input mode with Keypad(or Remote control) - Possible to switch Input mode with switch for source toggle -5-
-System Composition Switch for source toggle IR MCU NAVIGATION Input (Analog RGB) VIDEO MUX DISPLAY A/V 1 VIDEO CIRCUIT Car Installation OEM LCD A/V 2 A/V 3 CVBS (Rear camera) POWERCIRCUIT (CAR MAIN BOARD) Car Screen Input HEADREST MONITOR A/V OUT Power Input (+8VDC ~ +24VDC) Dip S/W -6-
-Outline Dimension 125mm * 105mm * 22mm 125mm 105mm 22mm -7-
-External Appearance DIP S/W Remote LED LCD-OUT From Interface NAVI Touch From OEM BD (Touch OUT) To Touch Screen (Touch IN) FPC POWER AV(IN/OUT) MODE RGB(IN) -8-
-External Appearance POWER MODE AV(IN/OUT) RGB(IN) LCD-OUT Remote DIP S/W LED -9-
-Connector Pin Assignment *RGB-IN Connect *Power Connect ① ③ ④ ⑤ ⑥ ② ⑦ ③ ④ ⑤ ⑥ ⑦ ① ② *NAVI Touch ① ACC (Red) ② GND (Black) ③ CAN-H (N.C) ④ CAN-L (N.C) ⑤ MMI (N.C) ⑥ SAFE (Violet) ⑦ REAR-C (Grey) ① R DATA (Red) ② G DATA (Green) ③ B DATA (Blue) ④ SYNC (White) ⑤ GND (Black) ⑥ N.C ⑦ N.C ① ② ③ ④ ① Y+ ② X+ ③ Y- ④ X- -10-
-Connector Pin Assignment * Power Cable FILTER & FUSE BOX ACC : 12v~24V GND CAN H (N.C) CAN L (N.C) MMI (N.C) SAFE REAR-C 1m -11-
-DIP SW Setting ※ ON : DOWN, OFF : UP ; Default : all OFF ※DIP S/W Use Example -. Use Input Mode : A/V2, A/V3 -. Use original Navigation ▷ DIP S/W : 1,2 - ON (INPUT MODE SKIP) ▷ DIP S/W : 3 - OFF (enable A/V3) ▷ DIP S/W : 4 - OFF (enable A/V3) ▷ DIP S/W : 5,6,7 - OFF ▷ DIP S/W : 8 - OFF -12-
-How to use remote POWER , PIP : N.C MENU : OSD Menu OK : Select ▲ : Up ▼ : Down ◀ : Left ▶ : Right *FACTORYMODE (Interface setting) : To press ◀ button for 2 sec, or ▲ → ▼ → ▲ →MENU in sequence -13-
-OSD(On Screen Display) · Analog RGB Mode · Video Mode • IMAGE Menu • BRIGHTNESS:It is used to adjust brightness of the screen. • CONTRAST: It is used to adjust distinction (Image noise clearness). • SATURATION: Adjust the saturation the picture. • HUE: It is used to adjust the display hue adjustment of the screen. • SHARPNESS: Adjust the sharpen or soften the picture. • USER IMAGE :select color of screen (only four type) -14-
OSD(On Screen Display) · Analog RGB Mode · Video Mode • OSD Menu • LANGUAGE • TRANSPARENT • H_POSITION : Move the position of AV sources to Left, Right • V_POSITION : Move the position of AV sources to Up, Down -15-
OSD(On Screen Display) · Analog RGB Mode · Video Mode • UTIL Menu • FACTORY RESET : Initializing of all values of OSD setting (Impossible to reset of screen position, only possible for functions in OSD) -16-
-Factory Mode · Factory Mode - Operated by pressing ▲ → ▼ → ▲ →MENU of remote or keypad in order. • Factory Mode • IMAGE – H-POSITION : Move to Left, Right • - V-POSITION : Move to Up, Down • PARK - PARK ENABLE : Setting to use ‘Parking guide line’ • - H-POSITION : Move the lines to Left, Right • - V-POSITION : Move the lines to Up, Down -17-
-Factory Mode : Parking Guide Line Factory Default : PARK ENABLE – OFF ① ① Set “PARK ENABLE” to “ON” on The park mode like the left picture no.1 * If you would like to remove this line, just select “ON” on the above process. ② ② After setting, once you put the gear to rear, the screen displays the parking guide line like the left picture no. 2. -18-
Factory Mode : Parking Guide Line ③ ③ The way to move the lines: Once you operate “*Factory Mode” again, when the lines are appeared,OSD image will be displayed like the left picture no.3After that, you select “PARK” and can move the lines by ‘UP’,’DOWN’ keys of keypad. H-POSITION: Move to Left, Right V-POSITION: Move to Up, Down -19-
Product Composition - LCD cable 1 EA - Navi Cable 1 EA - Toggle Switch1 EA - Power Cable 1 EA - A/V cable 1 EA - IR cable 1 EA - Sub Board 1 EA - FPC Cable 1 EA - 지지대 2 EA - Touch Cable 3 EA ( 8P , 4P , FFC ) -Remote -20-
Installation Structure LED DIP S/W I R LCD OUT RCD VIDEO INTERFACE Head Unit Original FFC POWER A/V(IN/OUT) RGB(IN) MODE Monitor Original Touch CAN(H) ACC : 12v~24V GND To MAIN Original Connector NAVI TOUCH AV1 AV2 AV3 REAR C AV/OUT CAN(L) TOUCH(OUT) F-CAM-DET R G B AUDIO R GND SYNC TOUCH(IN) FPC SAFE AUDIO L Yel Yel RED Whi VIDEO REAR-C -21-
-Installation Guide 1. OriginalFPCcableconnection ○ After separating LCD and Head unit board, take apart the original FPC cable. To insert the original cable ○ Connect the separated FPC cable to provided Interface FPC cable (TO LCD), connect the Interface FPC cable (To CTRL BD) to the original connector. Insert to the original connector
-Installation Guide 2.Touch Cable connection ○ After taking apart the original touch cable from LCD side, connect the provided interface touch cable.(Refer to the below how to connect) Provided interface Touch IN cable Provided interface Touch OUT Original touch cable Original Connector ○ Insert the provided “Touch Out” Cable to the original connector like the above picture. ○ Connect the original touch cable (FPC) to the provided “Touch IN” cable.
-Installation Guide 3. Daughter Connection Interface ○ Connect daughter board with the other cables like the above picture ○ Fix the both edge points on the backside of LCD by supporter panel.
-Precaution in Installation ※ Recommended installation method Like the left pictures, for safety, connect the original cable which was connected with Touch IN cable, after taking out to head unit side. Otherwise, LCD might be able to be damaged by contact error of LCD connector. Connect Touch cable taken out to head unit side to out side like the left picture.
-FAQ 1. When can not change mode. -. Check if the IR Cable (Remote) is connected or not. -. Check if LED is turned on or not. If it is not turned on, Check if power cable is connected or not. 2. When the screen is displaying only black color.-. Check if 2nd LED is turned on or not. If it is not turned on, please check all video sources that you will connect with the interface is operating well or not. -. Check if interface is connected well -. Check if the touch cable interferes the connection between LCD and Head unit board 3. When displayed color of screen is not proper. (If it’s too dark or the color is not proper) -. Try to do “Initializing in Factory, If the color of screen keeps on displaying wrong color, you have to ask manufacturer for the problem. -. Check if LCD is connected well with FPC cable of sub-board. 4. When Back-up camera is not displayed on the screen. -. Turn Dip S/W no.7 on. 5. When the mode you set is not skip. -. Check if Dip S/W is set in proper way. 6. When Main screen on the car is not displayed. -. Check if In/Out cables are connected well. If it keeps showing the same problem, you have to ask manufacturer for the problem. 7. When the screen is displaying only white color. -. Check if out cable is connected well. If it keeps showing the same problem, you have to ask manufacturer for the problem. -26-