Download
1 / 44
440 likes | 535 Views
Belmont Instrument Corporation. FMS 2000 Fluid Management System. Fluid Management. Control Fluid Delivery Avoid Hypothermia Avoid Air Embolus Avoid Vessel Trauma. Indications for Use.

E N D
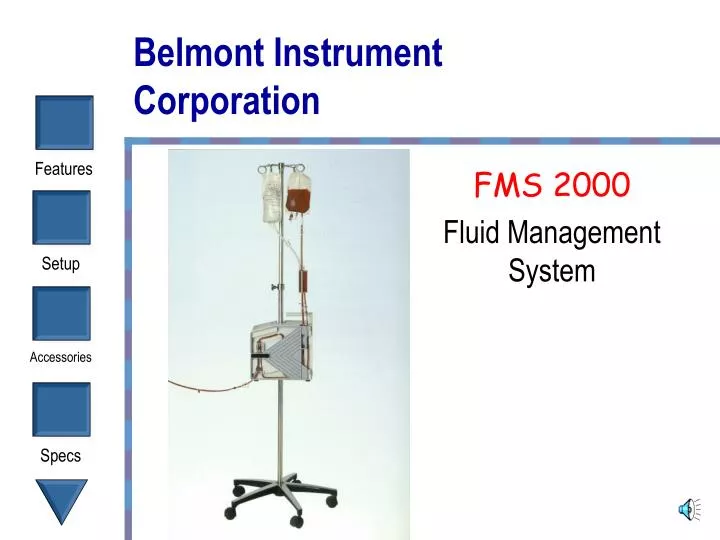
Belmont Instrument Corporation FMS 2000 Fluid Management System
Fluid Management • Control Fluid Delivery • Avoid Hypothermia • Avoid Air Embolus • Avoid Vessel Trauma
Indications for Use • For use in high blood loss surgical procedures, trauma and any situation where rapid replacement and warming of blood or replacement fluid is required.
Overview • Controlled Rapid Infusion • Efficient Fluid Warming • Active Air Detection and Handling • Line Pressure Control • Simple Setup and Operation
Controlled Rapid Infusion • 3 Touch Buttons To Control Infusion Rate • UP and DOWN infuses from 2.5 to 1000 ml/min • BOLUS infuses fixed volumes • Separate key for 500 ml/min
Controlled Rapid Infusion • Roller Pump • Eliminates need for pressure bag infusion • Vigilance by Constant Display of: • Flow Rate • Total volume infused • Fluid Temperature • In-line pressure
Efficient Fluid Warming • Electromagnetic induction heating • 16 stainless steel rings
o ( 4 C I n p u t F l u i d ) 4 0 3 5 3 0 ) C 2 5 o ( e r u t a r 2 0 e F u l p m e F l u i d t m p e r a t u r e e x i t i n g t h e h e a t e x c h a n g e r ( d i s p l a y ) T 1 5 F l u i d t e m p e r a t u r e e x i t i n g t h e p a t i e n t l i n e 1 0 P a t i e n t L i n e 5 P r i m e M a x R a t e ( 1000ml/min) P r i m e 0 3 0 0 2 0 4 0 6 0 8 0 minutes Efficient Fluid Warming • Warms fluid from 4oC to 37.5 oC in a single pass . i d t e m p e r a t u r e e n t e r i n g t h e h e a t e x c h a n g e r sec sec sec sec sec Time o o Note: Initially 4 C fluid is warmed to near 10 C by the disposable and tubing at ambient temperat ure.
Air Detectors • Fluid out air detector • Ensures system does not run dry • No need to de-air bags • Ultrasonic air detector • Interlock design for easy loading
Air Detectors • In-line Air Detector • Ultrasonic air detector • 2nd air detector located in patient infusion line • Easy to load
High Pressure Alarm • Pressure Sensor • Continuously displays system pressure • Stops infusion with pressure > 300mmHg or sudden pressure spike • Slows flow rate to maintain a safe line pressure when infusing through a small catheter
Simple Setup and Operation • No dedicated operator reduces manpower • Setup and prime < 1 minute • Heats instantly • Displays operational clues and diagrams
Setup- IV pole Mounting • Mount the system on an IV pole with a maximum pole diameter of 1.25 inches (3.18 cm) and a minimum base diameter of 24 inches (61 cm) • Do not mount the system higher than 30 inches (76 cm) off the ground to prevent tipping
Setup –IV Pole Mounting • Lift up on the handle of the pole clamp to open • Position the pole clamp around the IV pole and push down on the handle to lock the clamp in place
Setup –IV Pole Mounting • Install the Support Assembly (clamp and washer) directly below the FMS 2000 • Clamp the reservoir support onto the IV pole above the unit
Setup- Removing the disposable • 1. Remove the reservoir chamber • 2. Pull out the interlock block from the tray • 3. Lift out the disposable holding the reservoir chamber and the heat exchanger
Setup- Loading the Disposable: Step #1 • Load circular heat exchanger with red arrow pointing up and the red tubing aligned with the red line on the system
Setup - Loading the Disposable: Step #2 • Snap the reservoir chamber into the reservoir support • Load interlock block into air detector with the arrow pointing into the machine • Thread pump tubing over pump head
Setup- Loading the Disposable: Step #3 • Place pressure chamber into pressure transducer cavity • Thread tubing into 2nd air detector • Place tubing on both sides of valve
Setup- Powering Up • Switch the circuit breaker ON • AC POWER PRESENT appears at startup
Setup – Main System Prime • Spike fluid to be infused • Press Prime to self-prime the main circuit
Setup – Patient Line Prime • After system prime is completed, press PRIME PT LINE to prime patient infusion line • Visually inspect patient line for air. Press STOP when all air has been removed
DO NOT mix calcium containing solutions with blood products Catheter size and length influence flow rates Operation - Cautions
Operation - Infuse • UP and DOWN infuses from 2.5 to 1000 ml/min • Minimum infusion rate of 2.5 ml/min • Maximum infusion rate of 1000 ml/min • No heating at infusion rates of 2.5 and 5 ml/min
Operation- Bolus • Infuses fixed volume • Preset volumes can be changed in increments of 50 from 100 to 500 ml How do I change the bolus ?
Operation – Adjust Bolus Volume • Change the preset bolus volume by press and holding the BOLUS key • New bolus volume will appear in the VOL line as BOL • Release the key when the desired bolus volume appears and start the infusion
Operation – 500ML/MIN RATE • Infuses at 500 ml/min with the touch of one button
Operation- Automatic Air Purge • Automatic purge of air after 500 ml of infusion • Keeps system clear of air generated as fluids are warmed
Operation –Recirculate • Pressing RECIRC will recirculate fluid through the system at 200 ml/min. • Permits mixing of fluids • RECIRC can be used to warm fluid before disconnecting power for transport
Operation – Battery Operation • Automatic as soon as AC is disconnected • Maximum infusion rate of 50 ml/min • No heating, at least 30 minutes of operation • Automatically recharges when AC is present
Frequently Asked Questions • Q: Will the system’s magnetic field interfere with nearby equipment? • A: No, the FMS 2000 will not interfere with nearby equipment. The system has been tested and passes IEC 601-1-2, medical electrical equipment collateral standard. • Q: Do the disposables contain latex? • A: No, disposables and all accessories do not contain any latex.
Frequently Asked Questions • Q: How much power do I need to run the system? • A: The maximum power requirement is 1500 watts. We advise that the system should be on a dedicated 120 volt, 15 amps or greater circuit.
Frequently Asked Questions • Q: Do I have to de-gas the fluid bags before I infuse and what happens if I get air in the flow path? • Unlike pressurized infusion devices, there is no need to de-gas the fluid bags. If air is detected by the air detectors, the system automatically stops pumping and shuts off the flow to the patient. Air in the main system circuit can be purged by allowing the system to reprime the flow path. Repriming is done automatically without breaking open the disposable.
Frequently Asked Questions • Q: What happens if the AC power is temporary disrupted? • A: The battery mode will automatically kick in when AC power is removed. There is no heating in battery mode. The system will run for at least 30 minutes at a maximum infuse rate of 50 ml/min. All the safety features and protections are active in the battery mode. When the battery runs low, the system will display the BATT LOW message and sound an alarm. The system should be plugged into an AC outlet to continue operation and charge the battery. The normal charge time for the battery is 8 hours.
Frequently Asked Questions • Q: Why is the infusion rate running at a slower rate than the one I set? • A: The system will keep the in line pressure under the pressure limit by reducing the infusion rate. Check for obstructions in line. Use the appropriate infusion set for the flow rate you desire. Use the chart below as a guide to help determine the catheter you need. The pressure limit should be set to the maximum setting of 300 mmHg, which is the default at power-up.
Troubleshooting • System does not prime -Symptom: System will not count down from 100 to 0 ml in prime Fluid bags are fully spiked and clamps are fully opened. Pump head tubing is not stretched and is seated firmly within the fluid out sensor Fluid out sensor and tubing is clean
Troubleshooting • System does not prime If the problem persists, the coarse blood filter in the reservoir chamber may be clogged. Replace the reservoir chamber or disposable.
Troubleshooting • High Pressure • Symptom: High Pressure Alarm message Patient line is not blocked and the infusion site is well placed. Recirculate line is not blocked. Use the appropriate infusion set for the desired flow rate. Guide: Match the infusion set to flow rate and fluid type.
Troubleshooting • Power Module Overtemp Symptom: Power Module Overtemp alarm The air vents at the bottom of the machine are not blocked.
Troubleshooting • Pump Fault Pump turns freely and the head is clean. Make certain the pump tubing is not caught.
Accessories – 3 Liter Reservoir • Allows for mixing of blood products for high volume cases • Prevents fluctuations of blood cell and plasma proteins levels • Quick disconnects for easy installation
Accessories – Dual Patient Line • Reduce in-line restriction • Increase flow rate to the patient
Accessories – Fluid Replacement Supply • Replace clogged coarse blood filter after extensive operation • Quick disconnects for easy installation