Download
1 / 33
330 likes | 519 Views
Bicycle Mechanics and Repair Decal Mechanical Engineering 98/198 Fall 2013 Lecture 10. Let’s get to the bottom of this. To the very bottom of everything. Outline. Frame design Frame materials Electronic shifting Bamboo bikes?! Formula racing. Example of frame loading.

E N D
Bicycle Mechanics and Repair DecalMechanical Engineering 98/198Fall 2013 Lecture 10 Let’s get to the bottom of this. To the very bottom of everything.
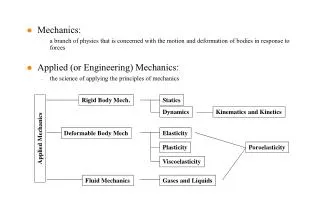
Outline • Frame design • Frame materials • Electronic shifting • Bamboo bikes?! • Formula racing
Example of frame loading • Frame deformation is largely due to: • Material construction • Steel, aluminum, or • carbon fiber? • High or low modulus • Composite materials • Frame design • Aero or low weight • FEA and CFD analysis
Components Bottom Bracket Pedals
Reverse Thread Normal/ Right thread Reverse/ Left thread Don’t get confused; double check to make sure you’re turning the right way! Righty-tighty, Lefty-loosey • Other places with reverse threads • - Left Pedal • - Right side of adjustable bottom bracket • - Left side of one-piece crank bottom bracket • - Lockring on single rear cog
Removing Pedals • Tools: 15mm long handle wrench • Longer handles will make it easier. τ=rF • Left pedals are left-threaded (reverse) and Right pedals are right-threaded (normal)
Removing Pedals • Rule of thumb – When loosening pedals, always turn wrench towards the back of the bike! Towards the back Towards the back Left pedal Right pedal
Inserting Pedals • Remember that left pedals are left-threaded and right pedals are right-threaded. • Always turn wrench towards the front! Towards the front Towards the front Left pedal Right pedal
Cranks can be attached… Different bottom brackets call for cranks with different tapered fits
The crank puller Threaded screw within a threaded screw
Installing and Removing Different cranks = different tools
Removing 1. Remove dust caps (if you have any) 2. Remove the crankbolt
SECOND FIRST 3. Thread on the large threaded barrel of the crankpuller TIGHT 4. Tighten the crankpullerarm until the crankarms fall off!
Exceptions Cranks with attached spindles (two piece/ thru axle) built-in crank remover
Exceptions BMX cranks …use a hammer
Bottom Brackets Definition 1: Part of the frame that houses the mechanism allowing the crank arms to rotate. Definition 2: Mechanism the fits in the frame allowing the crank arms to rotate
Adjustable Bottom Bracket • Adjustable Bottom Bracket • Bearings can be accessed and re-greased or replaced • Bearings are adjustable • Found on older bikes and some current low-end bikes
Cartridge Bottom Bracket • Cartridge Bottom Bracket • Usually cheaper • Cannot be adjusted or disassembled • Found on newer bikes
One-Piece Crank Bottom Bracket One-Piece Bottom Bracket: Axle and crank arms are a single piece Found on old American bikes and some department store bikes
External Bottom Bracket • External Bottom Brackets • allows for bearings and spindle to be larger • more durability and more stiffness • hollow through center lighter Bearings are housed outside frame.
Adjustable Bottom Bracket Non-adjustable Cup May Be Reverse Threaded Axle Adjustable Cup Crank Arm Bearings Bolt Lock Ring Cap
Cutaway View Non-adjustable Cup May Be Reverse Threaded Adjustable Cup Crank Arm Bolt Axle Lock Ring Bearings
One-Piece Crank (Ashtabula) BB Chainwheel (may be removable) Cups Washer Crank Lock Nut Reverse Thread Bearings Cone Reverse Thread
Cutaway View Bearings Washer Lock Nut Reverse Thread Crank Cone Reverse Thread
Primary Differences Cups face inwards and one of them is adjustable Cups face outwards and are not adjustable The two crankarms and axle are separate components The entire crank consists of one piece
Cartridge Type Bottom Bracket Cartridge (Does not come apart) Reverse Thread Lockring Crank Arm Bolt Cap
View Through Frame Cartridge Reverse Thread Lockring Bearings are not accessible Frame goes here There is no way to adjust this type of bottom bracket. It is replaced as a unit as soon as a malfunction appears.