Download
1 / 22
240 likes | 467 Views
DIGITAL ELECTRONICS AND EMBEDDED SYSTEMS. Submitted By : Ajay Kumar Roll No. : 1022331007 Branch : ECE. TABLE OF CONTENTS. Digital Electronics PCB Designing Embedded System Microcontrollers & its types AVR & ATMEGA 168 Introduction to Arduino Compiler

E N D
DIGITAL ELECTRONICS AND EMBEDDED SYSTEMS • Submitted By : Ajay Kumar • Roll No. : 1022331007 • Branch : ECE
TABLE OF CONTENTS • Digital Electronics • PCB Designing • Embedded System • Microcontrollers & its types • AVR & ATMEGA 168 • Introduction to Arduino Compiler • Working in Arduino environment
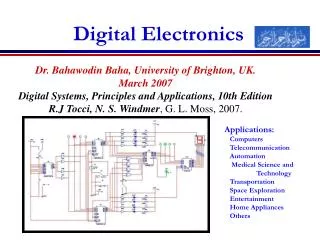
DIGITAL ELECTRONICS • Digital Electronics represent signals by discrete bands of analog levels rather than by a continuous levels. • Basically there are two states or levels in digital electronics : 1. Logic High > designated as ‘1’. 2. Logic Low > designated as ‘0’.
Types of Digital Circuits • Combinational Circuits : In these circuits , the past states are immaterial and the output depends only upon the present state. Example: logic gates. • Sequential Circuits : In these circuits , the next state is completely determined by the past states. Hence these follow a predictable structures and essentially require a timing device. Example: flip flops , counters.
PCB DESIGNING • A PCB is used to mechanically support and electrically connect electronic components using conductive pathways tracks etched from copper laminated onto a non-conductive substrate. • There are two parts to design PCB : • Using software. • Using hardware
Software Designing of PCB • EXPRESS SCH is a CAD software used for drawing schematics. • EXPRESS SCH includes hundreds of components and symbols one can use in schematics. • But in case if required component is not available, it can be easily designed using this software.
EMBEDDED SYSTEMS • In general, an Embedded System is: > A system built to perform its duty, completely or partially independent of human interference. > Specially designed to perform a few tasks in the most efficient way. • All the embedded systems are based on microprocessors or microcontrollers.
What is a Microcontroller? A microcontroller (MCU/μC) is a small computer on a single IC consisting internally of a relatively simple CPU, clock, timers, I/O ports and memory. It can be programmed to control numerous other electronic devices using it on chip peripherals.
Types of Microcontrollers • Today there are no. of manufacturers of microcontrollers and much different architectures are available there. • In India the most used microcontrollers are : • 8051 • PIC • AVR
AVR SERIES FROM ATMEL ATMEGA 16 ATMEGA 32 ATMEGA 64 ATMEGA 128 ATMEGA 8 128 Kb Flash 32 Kb Flash 8Kb Flash 16 Kb Flash 64 Kb Flash 512 Bytes EEPROM 512 Bytes EEPROM 1 Kb EEPROM 2 Kb EEPROM 4 Kb EEPROM 1Kb SRAM 1 Kb SRAM 2 Kb SRAM 4 Kb SRAM 4 Kb SRAM
Why AVR? They are fast. Executes most of the instructions in single execution cycle. 4 times faster than PIC Consume less power .
ATMEGA 168 • It is having 28 pins in DIP package. • It has 16 KB of flash memory and 1KB RAM. • There are three ports in this device; Port B, Port C and Port D. • Port B and Port D are 8 bits ports, while Port C is 7 bits port. • The pin diagram of ATMEGA 168 is shown:
INTRODUCTION TO ARDUINO COMPILER • Arduino is C++ based , hence it inherits all the advantages of C++ programming. • Arduino is growing as one of the most popular compiler used by students, hobbyists and professionals.
WORKING IN ARDUINO ENVIRONMENT Each Arduino program is called a SKETCH and has two required functions, called ROUTINES. void setup ( ) { } - All of the code within the curly braces will be run ONCE when the program first runs. void loop ( ) { } - This function is run AFTER setup has finished. All of the code within the curly braces will be run again, and again, until the power is removed.
It is used to verify the code. It is used to upload the sketch into the microcontroller. It is used to create new workspace. It is used to open any saved sketch. It is used to save the current sketch. TOOL BAR & ITS ICONS
Programming - Syntax // - Single line comment /* */ - Multiline comment { } – used to define a block of code that starts and ends. ; - used to define the end of a line of code.
Programming – Control Structures if(condition) { } else if (condition) { } else(condition) { } This will execute the code between the curly braces if the condition is true, and if not test the condition of the “else if”. If that is false , the “else” code will execute. for (int i =0; i < #repeats; i ++) { } Used when you would like to repeat a line of code a specific # of times. Often called a FOR LOOP.
Programming - Digital pinMode (pin, mode) ; - Used to address the pin # on the Arduino board you would like to use 0-19. The mode can either be INPUT or OUTPUT. digitalWrite (pin, value); - Once a pin is set to output it can be set to either HIGH (5 Volts) or LOW(0 volts). This basically means turn ON and OFF.