Download

1 / 60
600 likes | 611 Views
STELR Ranging multimeter. These instructions refer the STELR Ranging Multimeter that was introduced during 2017 It has part code LB313-010 marked on the case The older (non-ranging) multimeter has the part code ST050-01 marked on the case

E N D
STELR Ranging Multimeter • STELR Ranging multimeter
STELR Ranging Multimeter • These instructions refer the STELR Ranging Multimeter that was introduced during 2017 • It has part code LB313-010 marked on the case • The older (non-ranging) multimeter has the part code ST050-01 marked on the case • Instructions for the older multimeter can be found on the STELR website here: https://stelr.org.au/stelr-modules/renewable-energy/#how-to-use
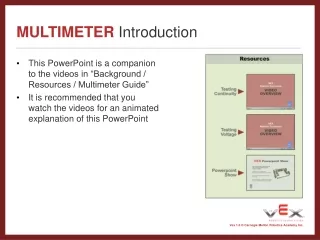
STELR Ranging Multimeter • Features • Input jacks • Turning on (and off) • LCD display • How to measure voltage • How to measure current • How to measure resistance • Other measurements • Use of the ‘select’ button • Use of the ‘hold’ button
STELR Ranging Multimeter LCD display
STELR Ranging Multimeter LCD display Select button
STELR Ranging Multimeter LCD display Hold button Select button
STELR Ranging Multimeter LCD display Hold button Select button Rotary switch
STELR Ranging Multimeter LCD display Hold button Select button Rotary switch Shock-proof case
STELR Ranging Multimeter LCD display Hold button Select button Rotary switch Shock-proof case Input jacks
STELR Ranging Multimeter • Please also refer to the instruction leaflet accompanying each multimeter.
STELR Ranging Multimeter Input jacks
STELR Ranging Multimeter The centre jack is a common negative Input jacks
STELR Ranging Multimeter The centre jack is a common negative The right jack should be used as positivefor all measurements except when measuring between 200mA and 10A Input jacks
STELR Ranging Multimeter Input jacks
STELR Ranging Multimeter Note that when connected this way the maximum values are 600V and 200mA. A 200mA fuse protects this circuit and the fuse will ‘blow’ if these values are exceeded. Input jacks
STELR Ranging Multimeter The centre jack is a common negative The left jack should only be used as positivefor when measuring between 200mAand 10A. For example when using the wind turbine. Input jacks
STELR Ranging Multimeter Input jacks
STELR Ranging Multimeter Note that when connected this way the maximum values for current is 10A. This circuit has no fuse for protection and a current of 10A can be passed through the circuit for a maximum of 10 seconds before the multimeter will be damaged. Input jacks
STELR Ranging Multimeter Turning the multimeter on
STELR Ranging Multimeter Rotary switch in OFF position
STELR Ranging Multimeter Turn rotary switch to any other setting to turn on
STELR Ranging Multimeter The display will activate once the multimeter is turned on Turn rotary switch to any other setting to turn on
STELR Ranging Multimeter If the display does not activate, it means either the battery is flat or the fuse has blown. Go to https://stelr.org.au/stelr-modules/renewable-energy/#how-to-use to find out how to change the battery and the fuse.
STELR Ranging Multimeter If the display does not activate, it means either the battery is flat or the fuse has blown. Go to https://stelr.org.au/stelr-modules/renewable-energy/#how-to-use to find out how to change the battery and the fuse. The multimeter will automatically power off if unattended for over 5 minutes. To reactivate, turn to off and then to any other setting.
STELR Ranging Multimeter LCD display
STELR Ranging Multimeter A reading of ‘0L’ indicates that the multimeter is off-scale. LCD display
STELR Ranging Multimeter Measuring voltage
STELR Ranging Multimeter There are two voltage settings Measuring voltage
STELR Ranging Multimeter AC Voltage Measuring voltage
STELR Ranging Multimeter There are no STELR activities that require the use of AC. Students should never use this setting. AC Voltage Measuring voltage
STELR Ranging Multimeter DC Voltage Measuring voltage
STELR Ranging Multimeter DC Voltage When measuring DC voltage students should always use the right hand socket for the positive lead Measuring voltage
STELR Ranging Multimeter DC Voltage The multimeter is auto ranging for voltage and will measure any voltage up to 1000V on this setting. Measuring voltage
STELR Ranging Multimeter Measuring resistance
STELR Ranging Multimeter There is one resistance setting Measuring resistance
STELR Ranging Multimeter There is one resistance setting When measuring resistance, students should always use the right hand socket for the positive lead. Measuring resistance
STELR Ranging Multimeter There is one resistance setting The multimeter is auto ranging for resistance and will measure any resistance up to 40 M on this setting. Measuring resistance
STELR Ranging Multimeter Measuring current
STELR Ranging Multimeter There are three different current settings Measuring current
STELR Ranging Multimeter When the dial is set to any of the three current settings, the default is to measure direct current (DC) There are three different current settings Measuring current
STELR Ranging Multimeter There are no STELR activities that require the use of AC. Students should never use this setting. To measure AC current, press the select switch. This toggles between AC and DC current Measuring current
STELR Ranging Multimeter To measure current, always start with the meter set to amps Measuring current
STELR Ranging Multimeter To measure current, always start with the meter set to amps When using the amps setting the left-hand positive socket must be used Measuring current
STELR Ranging Multimeter If the reading is less than one amp, move the dial to the milliamp position Measuring current
STELR Ranging Multimeter If the reading is less than one amp, move the dial to the milliamp position When using the milliamps setting the right-hand positive socket must be used Measuring current
STELR Ranging Multimeter If the reading is less than one milliamp, move the dial to the microamp position Measuring current
STELR Ranging Multimeter If the reading is less than one milliamp, move the dial to the microamp position When using the microamps setting the right-hand positive socket must be used Measuring current
STELR Ranging Multimeter Other measurements
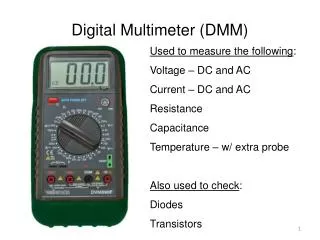
STELR Ranging Multimeter • There are other settings on the multimeter that can be used for testing frequency, capacitance, transistors and diodes. • These are not required for use as part of the STELR program, but may be of general use in other programs. • For detailed instructions on the use of these settings, please refer to the Digital Multimeter Operator’s Manual sheet included with the multimeters.
STELR Ranging Multimeter Capacitance