Download
1 / 19
200 likes | 390 Views
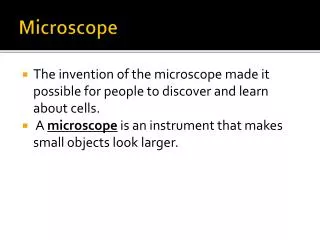
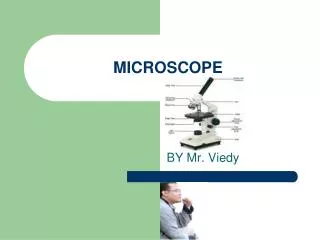
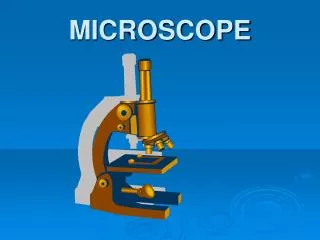
Microscope Investigation. Using the Microscope That gizmo pictured to the left is a BIG deal. It literally opened up worlds of organisms and information to scientists. It's importance in the history of medicine and our understanding of disease should not be underestimated.

E N D
Using the Microscope That gizmo pictured to the left is a BIG deal. It literally opened up worlds of organisms and information to scientists. It's importance in the history of medicine and our understanding of disease should not be underestimated. That gizmo is a compound light microscope.For you, the biology student, it is perhaps the most important tool for you to understand. By the time you are done toying with these pages (& reading your text & paying attention in class), you should be able to : 1. name all of its parts and describe the function of each2. explain how to carry the thing, properly prepare a slide, & focus correctly3. calculate total magnification4. estimate the size of a specimen being observed
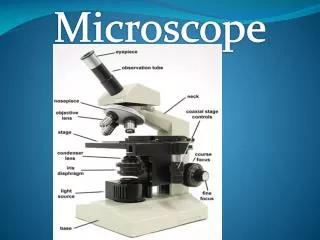
THE PARTSMatch the names in the word bank with the numbered parts in the picture.
Answers to THE PARTS : 1) base 2)lightsource 3) diaphragm 4) stage 5) stage clips6) low power objective lens 7) high power objective lens 8) nosepiece 9) arm 10) fine focus knob 11) body tube 12) coarse focus knob 13) ocular (eyepiece)
WHAT THE PARTS DONow it's time to memorize the function of each microscope part.To help you practice, here's a matching exercise. 1. the lens you look through, magnifies the specimen2. supports the microscope3. holds objective lenses4. magnify the specimen (2)5. supports upper parts of the microscope, used to carry the microscope6. used to focus when using the high power objective7. where the slide is placed8. regulates the amount of light reaching the objective lens9. used to focus when using the low power objective10. provides light11. hold slide in place on the stage
Answers to 'WHAT THE PARTS DO' : 1. ocular 2. base 3. nosepiece 4. low power objective lens, high power objective lens 5. arm 6. fine focus knob 7. stage 8. diaphragm 9. coarse focus knob 10. light source (lamp or mirror) 11. stage clips
Important Microscope Vocabulary : magnification \mag-ne-fe-'ka-shen\ n 1. apparent enlargement of an object 2. the ratio of image size to actual size A magnification of "100x" means that the image is 100 times bigger than the actual object. resolution \rez-e-loo-shen\ n 1. clarity, sharpness 2. the ability of a microscope to show two very close points separately
OK, well. There are a few other tidbits about the compound microscope you should remember :
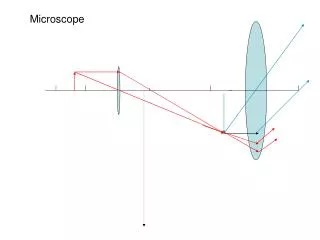
"Compound" just refers to the fact that there are two lenses magnifying the specimen at the same time, the ocular & one of the objective lenses.
2. If two lenses are always magnifying the specimen, how do you figure out the total magnification being used ?
You multiply the power of the ocular and the power of the objective being used. total mag. = ocular x objective For example, if the ocular is 10x and the low power objective is 20x, then the total magnification under low power is 10 x 20 = 200x. Easy, right ?
3. How do you carry one of those things, called a microscope ?
With two hands, one holding the arm & the other under the base. Something like a football. (They're expensive, we don't want to drop 'em.)
Here's what I suggest. Once you have your slide in place on the stage, make sure the low power objective (the shortest objective lens) is in position & turn the coarsefocus until the lens is at a position closest to the stage. Set the diaphragm to its largest opening (where it allows the most light through). Then, while looking through the ocular, begin to slowly turn the coarse focus. Turn slowly & watch carefully. When the specimen is focussed under low power, move the slide so that what you want to see is dead-center in your field of view, & then switch to a higher power objective. DO NOT touch the coarse focus again --- you will break something ! Once you are using a high power objective, focus using the fine focus knob ONLY. Be sure to center your specimen before switching to a higher power objective or it may disappear.
Example #1: • ocular power = 10x low power objective = 20x high power objective = 50x • What is the highest magnification you could get using this microscope ?
Answer 500x Ocular x high power = 10 x 50 = 500. (We can only use 2 lenses at a time, not all three.)
Microscope Review is Complete. How did you do?