Download

1 / 19
190 likes | 196 Views
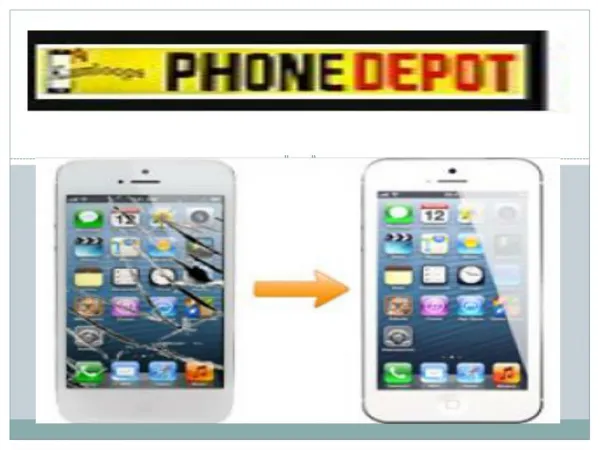
ISPEAK PHONE Offering the best BUYBACK LCD program by providing easy money and best rates on Apple, samsung, and ipad broken LCDs and digitizers. done settle for less, generate more revenue and sell us now.

E N D
Hello! I am Emilyclark I am here because I love to give presentations. You can find me at https://cellphonepartswholesale.blogspot.com/
! The motivation of learning to fix your damaged iPhone LCD screens is your deep attachment to it. Not loving your favouriteiPhone is hard-to-believe statement because come on its iPhone. Why on earth would we not be a die hard fan of this iconic unusual devices. Let’s acknowledge this fact that holding your most favorite model either iphone 6 or latest iPhone X Series, It's always ignites the sense of belonging, a joy of treat and little sparkles in life.
1 Tragedy of breaking Your iPhone LCDs
We all went through those three seconds of mini heart attack as you bend down to pick up your dropped iPhone. Nothing in the world can make you feel dreadful than those spider web like cracks on your once shiny unblemished screen. It is everyone's mistake as I myself experienced that sinking feeling of loss. • And, if you don't have a membership of Apple care you might get wounded fingers or having the thoughts of buying new one which can be a little too hard on pocket. As complicated as it seems for a novice, you can actually fix your iphone or get it fixed by not spending too much. Let’s answer your million questions of How’s further.
2 What to do right away:
Screen can be smashed in different level of severity and you could be handling minor crack along the corner to completely web like shattered display with no working on the device. We will try to guide you dealing best with each situation but first what you should do right after your LCDs got damaged?
This is a slide title • First thing to do is to analyze your iphone by not just giving a quick glance and put it back in your pocket but actually a deep look by putting it on a surface level to your eye. • Check it with your finger’s sheer pressure and how many cracks do the screen gets. Is it still working or just completed shuts down due to heavy smash? Whether the screen is about to fall out or fail completely? In most of the cases it will still be in place so you can at least keep using it until the proper maintenance is done.
3 Different repair Solutions to Consider:
We know you must be eager to jump to any quick solution possible but we also know that it is highly important to educate you first about each solution. Remember that doing-it-yourself fix which does not guarantee results is challenging. Several things can be done while trying it out, you can cut your finger on a cracked display, injure yourself while fixing the phone or can damage the delicate internal components of the phone. • If you are feeling a little bit hesitant they we will recommend you to send your cracked LCDs to a Third party professional repair centres otherwise if you can totally pull-off DIY iphone fix then go confidently for the step by step guide to fix your iPhone below:
Self repair cracked iPhone Screen: • Before You start a repair, If your LCD glass is intact but the screen is black or you have lost touch control, you should always give a chance to soft reset at this point. • Press and hold the Power button on the right side of your phone. • While holding the Power button down, press and hold the Volume Down button on the left side of your phone. • Hold both buttons down until you see the Apple logo on the screen. • If the Apple logo doesn't appear after holding down the buttons and waiting for at least 90 seconds, your phone likely needs a screen repair.
General Repair Guidelines: • Always use good lighting - smart device components are small and you'll need plenty of light to see what you are doing. • Maintain a clean, organized workspace so you don't lose or confuse any components. • Group your screws so you can keep track of where they came from. Most screws cannot be interchanged. • Apply enough heat to loosen adhesive but not enough to damage the device. • At any point during a repair, if the adhesive becomes hard to separate, apply more heat.
Things you need: • To fix your iPhone LCD you have to choose each tool very carefully and honestly speaking there are lots of iphone parts wholesalers but not all of them provide quality. We recommend using only quality and genuine parts from a reputable supplier likeIspeakphone. We have quality parts, tools, and much more for all your repair needs. • The first thing you will be needing is the new iphone LCD replacement screen and LCD panel. Since the iPhone LCD screen and panel are strongly connected together, we will recommend you buying a single unit from a professional wholesale cellphone repair company in the USA. Apart from purchasing a good quality iPhone LCD screen replacement, you probably lack the specialized toolsyou’ll need for the job. Luckily, Ispeakphone also offers a handy kit that includes pretty much everything you’ll need.
Metal spudger Phillips head srewdriver Pentalobescrewdriver Tri-point screwdriver A Suction Cup Clear Packing Tape Dehydrator, heat Gun, or heat mat
While not required to repair your iPhone, we also recommend you use a magnetic mat and screw capsules to keep everything organized. You're going to be working with some tiny screw here; these will help you keep them on your table and not lost on the floor.
STEP 1 - Take Back Up and Power Off: Always remember to take backup of your mobile data before starting any DIY fix on it. Also this step is highly important if you are sending your iphone to professional repair services. STEP 2 - Remove the Pentalobe/Dock Screws: • At the bottom of your device, on either side of the Lighting connector port, are two pentalobe screws. Remove them using thepentalobe screwdriver. You may also want to consider replacing them with Phillips head screws when reassembling, as the pentalobe screwdriver can strip the screws, rendering them difficult to work with.
STEP 3 - Prevent Further Breakage During The Repair: • Step three is to prevent further breakage contained and bodily harm during your repair by taping over the glass. • Lay overlapping strips of clear packing tape over the iPhone's display until the whole face is covered. • This will keep glass shards contained and provide structural integrity when prying and lifting the display. • STEP 4 - Use the suction cup to Lift the Front Panel: • Using a slightly wet suction cup, pry up the unscrewed screen. Make sure that the cup is firmly attached to the front panel and don’t be afraid to use a little force; this display is more firmly rooted to the back panel than most devices.
Test the new Screen:It's now safe to turn your iPhone back on. If all went well, you should see an Apple logo. Once the iPhone finishes booting up completely, make sure you check the following functions since the components involved were transferred and moved around:Make sure the new display doesn't have any dead pixels or ghosting issues.Check touch sensitivity to make sure the new digitizer doesn't have any dead spots. I do this by pulling up a keyboard and typing every letter on it.Place a test call and make sure the proximity sensor and earpiece are working okay.Launch the Camera app and flip the camera around to test the front-facing camera.Lastly, test Touch ID and make sure it seems to be working okay. It's a good idea to pop into settings and add a new fingerprint just to make sure the reader is doing what it should do.