Download
1 / 67
710 likes | 993 Views
Typography and Graphic Design Eric Miller Graphic Design Guide. Typography is crucial to almost all design projects. It is important to understand basic typography terms, how to use it effectively and how to find and identify the best fonts for a project.

E N D
Typography and Graphic Design Eric MillerGraphic Design Guide
Typography is crucial to almost all design projects. It is important to understand basic typography terms, how to use it effectively and how to find and identify the best fonts for a project.
Type FamiliesThe different options available within a typeface, such as roman, bold and italic, make up a type family. Times New Roman and Helvetica are examples of type families. These families are extremely useful because a designer can use just one or two within a project, but still have a wide variety of styles to choose from. This helps to achieve a consistent design.
Letter Anatomy • There is a standard set of terms to describe the parts of a character. • These terms, and the parts of the letter they represent, are often referred to as "letter anatomy" or "typeface anatomy." • By breaking down letters into parts, a designer can better understand how type is created and altered and how to use it effectively.
Basic Typography Terminology • Typeface • A typeface refers to a group of characters, such as letters, numbers, and punctuation, that share a common design or style. Times New Roman, Arial, Helvetica and Courier are all typefaces.
Font • Fonts refer to the means by which typefaces are displayed or presented. Helvetica in movable type is a font, as is a TrueType font file.
Type Families • The different options available within a font make up a type family. Many fonts are at a minimum available in roman, bold and italic. • Other families are much larger, such as Helvetica Neue, which is available in options such Condensed Bold, Condensed Black, UltraLight, UltraLight Italic, Light, Light Italic, Regular, etc.
Serif Fonts • Serif fonts are recognizable by the small lines at the ends of the various strokes of a character. • As these lines make a typeface easier to read by guiding the eye from letter to letter and word to word, serif fonts are often used for large blocks of text, such as in a book. • Times New Roman is an example of a common serif font.
Sans Serif Fonts • Serifs are small lines at the ends of character strokes. • Sans serif, or without serif, refers to typefaces without these lines. • Sans serif fonts are often used when a large typeface is necessary, such as in a magazine headline. • Helvetica is a popular sans serif typeface. • Sans serif fonts are also common for website text, as they can be easier to read on screen. • Arial is a sans serif typeface that was designed specifically for on-screen use.
Point • The point is used to measure the size of a font. One point is equal to 1/72 of an inch. • When a character is referred to as 12pt, the full height of the text block (such as a block of movable type), and not just the character itself, is being described. • Because of this, two typefaces at the same point size may appear as different sizes, based on the position of the character in the block and how much of the block the character fills.
Pica • The pica is generally used to measure lines of text. One pica is equal to 12 points, and six picas are equal to one inch.
Baseline • The baseline is the invisible line on which characters sit. While the baseline may differ from typeface to typeface, it is consistent within a typeface. Rounded letters such as "e" will extend slightly below the baseline.
X-height • The x-height is the distance between the meanline and the baseline. It is referred to as the x-height because it is the height of a lowercase "x." This height can vary greatly between typefaces.
Meanline • The meanline falls at the top of many lowercase letters such as "e," "g" and "y." It is also at the curve of letters like "h."
Cap height • The cap height is the distance from the baseline to the top of uppercase letters like "H" and "J."
Ascender • The part of a character that extends above the meanline is known as an ascender. • Note that this is the same as extending above the x-height.
Descender • The part of a character that extends below the baseline is known as a descender, such as the bottom stroke of a "y."
Stem • The vertical line of a "B" and the primary diagonal line of a "V" are known as the stem. The stem is often the main "body" of a letter.
Bar • The horizontal lines of an "E" are known as bars. Bars are horizontal or diagonal lines of a letter, also known as arms, and are open on at least one side.
Bowl • An open or closed circular line that creates an interior space, such as in "e" and "b."
Counter • The inside of a bowl. • Leg • The bottom stroke of a letter, such as the base of an "L" or diagonal stroke of a "K.“ • Shoulder • The curve at the beginning of a leg of a character, such as in an "m."
Type Families • The different options available within a typeface, such as roman, bold and italic, make up a type family. • Times New Roman and Helvetica are examples of type families. • These families are extremely useful because a designer can use just one or two within a project, but still have a wide variety of styles to choose from. • This helps to achieve a consistent design.
Roman • Roman is the standard style of a typeface, not altered by weight, width, angle or any other characteristic. This is often used for large blocks of text, such as the text of a book. • Italic • Italic type is at an angle, generally slanting to the right from bottom to top. • Italics are specifically designed within a typeface, meaning certain letters may be significantly different than the roman version to improve appearance and legibility. • Oblique type, on the other hand, is the roman type slanted at an angle, as-is. The two are often confused.
Bold • Bold, or boldface, type is a heavier weight than roman type. As there is no official standard for naming typeface style, bold is often referred to as black or medium, or other names depending on the weight and the preference of the typeface designer. • Light • Light type is thinner than the roman option. Depending on how light the type weight is, it will often be used at large sizes so it is legible, or to achieve a specific style. As with bold, there are light varieties such as ultralight.
Extended • Extended type is wider than the standard type of a family. It is useful for headlines and other large type areas, and provides even greater flexibility within a family. • Condensed • Condensed type is a narrower face, which can fit into small spaces. Like extended, it provides more style options while staying within the same family. • Combined Styles • Most type families will not just provide bold, italic, condensed, light, and so on, but combinations of each. This gives the designer even more options to work with. For example, Helvetica Neue is available in Regular, Italic, Bold, Bold Italic, Light, Light Italic, UltraLight, UltraLight Italic, Condensed Bold and Condensed Black. By using the options with a type family, and the combinations of each, designers can achieve a consistent layout while using a variety of styles.
Tracking, Kerning and Letterspacing • The distance between characters is controlled by tracking, kerning and letterspacing. • Tracking is adjusted to change the space between characters consistently across a block of text. This may be used to increase legibility for an entire magazine article. • Kerning is the reduction of space between characters, and letterspacing is the addition of space between characters. • These smaller, precise adjustments may be used to tweak a specific word, such as in a logo design, or a large headline of a story in a newspaper.
Leading • Leading refers to the distance between lines of text. This distance, measured in points, is measured from one baseline to the next. A block of text may be referred to as being 12pt with 6pts of extra leading, also known as 12/18. This means there is 12pt type on 18pts of total height (12 plus the 6pts of extra leading).
The elements of graphic design are used, and often combined, to create graphic works. • They should not be confused with principles of design, such as balance and white space, but rather components such as color, type and images.
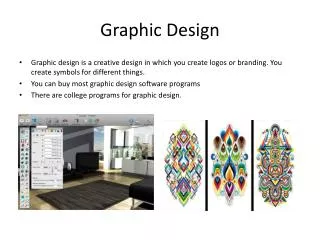
Most commonly used elements in graphic design. Shapes • From ancient pictographs to modern logos, shapes are at the root of design. • They are used to establish layouts, create patterns, and build countless elements on the page. • With graphics software such as Illustrator, creating and manipulating shapes is easier than ever, giving designers the freedom to create them at will.
Lines • Lines are used to divide space, direct the eye, and create forms. • At the most basic level, straight lines are found in layouts to separate content, such as in magazine, newspaper, and website designs. • This can of course go much further, with curved, dotted, and zigzag lines used as the defining elements on a page and as the basis for illustrations and graphics. • Often, lines will be implied, meaning other elements of design will follow the path of line, such as type on a curve.
Color • Color is an interesting element of graphic design because it can be applied to any other element, changing it dramatically. • It can be used to make an image stand out, to show linked text on a website, and to evoke emotion. • Graphic designers should combine their experience with color with an understanding of color theory.
Type • Type, of course, is all around us. In graphic design, the goal is to not to just place some text on a page, but rather to understand and use it effectively for communication. • Choice of fonts (typefaces), size, alignment, color, and spacing all come into play. Type can be taken further by using it to create shapes and images.
Art, Illustration & Photography • A powerful image can make or break a design. Photographs, illustrations and artwork are used to tell stories, support ideas, and grab the audience's attention. • So the selection is important. • Graphic designers can create this work on their own, commission an artist or photographer, or purchase it at all price levels on many websites.
Texture • Texture can refer to the actual surface of a design or to the visual appearance of a design. • In the first case, the audience can actually feel the texture, making it unique from the other elements of design. • Selection of paper and materials in package design can affect actual texture. • In the second case, texture is implied through the style of design. • Rich, layered graphics can create visual texture that mirrors actual texture.
Using Shapes in Graphic Design Shapes are at the root of graphic design. They are figures and forms that make up logos, illustrations and countless other elements in all types of designs.
Using Shapes • Using shapes properly is one of the keys to successful graphic design. • The form, color, size and other characteristics for the shapes in a layout can determine its mood and message. • Soft, curved and rounded shapes are perceived differently than sharp, angled shapes. • The “white space” or negative space left between shapes will also significantly impact a design. • Experimentation and altering of shapes within a design can ultimately lead to the desired result.
Shape Creation in Modern Graphic Design • Current graphics software has transformed the way graphic designers can deal with shapes. • Adobe Illustrator is the most useful tool for shape creation and manipulation. • Simple shapes such as circles, squares and triangles can be created with a click and drag of the mouse. • Adjusting lines and curves using the tools in Illustrator and similar programs can create more complex shapes, of limitless dimensions. • Colors, patterns, opacity and other characteristics of shapes can easily be altered.
Colour in Graphic Design • HSV Color • The HSV color space is important to look at because it describes color based on three properties: Hue, Saturation and Value. As you edit these values, the full spectrum of colors can be created.
Hue is another word for color. • Red, blue, and yellow are the primary hues, and when combined in equal amounts they create the secondary hues orange, green and violet. • When primary and secondary hues that are adjacent on the color wheel are combined, you get the tertiary hues. • These colors are shown in the color wheel diagram. When you mix the primary colors in different amounts, you get a limitless number of colors.
Saturation is the intensity of a color (or hue). When you mix colors or add black to a color, saturation and intensity drops. If you add white, color becomes lighter, but not necessarily more intense. The image below demonstrates this; the first box is fully saturated, the second has black added and the third has white added.
The lightness or darkness of a color is its value. Like saturation, adding black or white to a color affects value. Tints are colors with added white, and shades are colors with added black. The image above shows tints and shades of the hues of the color wheel.
There are many models used to measure and describe color. • The RGB color model is based on the theory that all visible colors can be created using the primary additive colors red, green and blue. • These colors are known as primary additives because when combined in equal amounts they produce white. • When two or three of them are combined in different amounts, other colors are produced. • For example, combining red and green in equal amounts creates yellow, green and blue creates cyan, and red and blue creates magenta. • As you change the amount of red, green and blue you are presented with new colors. Additionally, when one of these primary additive colors is not present you get black.
RGB Color in Graphic Design • The RGB model is so important to graphic design because it is used in computer monitors. • The screen you are reading this very article on is using additive colors to display images and text. • Therefore, when designing websites (and other on-screen projects such as presentations), the RGB model is used because the final product is viewed on a computer display.
Types of RGB Color Spaces • Within the RGB model are different color spaces, and the two most common are sRGB and Adobe RGB. When working in a graphics software program such as Adobe Photoshop or Illustrator, you can choose which setting to work in.
sRGB: The sRGB space is best to use when designing for the web, as it is what most computer monitors use. • Adobe RGB: Because the Adobe RGB space contains a larger selection of colors that are not available in the sRGB space, it is best to use when designing for print. • It is also recommended for use with photos taken with professional digital cameras (as opposed to consumer-level), because high-end cameras often use the Adobe RGB space.
The CMYK color model is used in the printing process. • The RGB color model (made up of red, green and blue) is used in your computer monitor, and is what you will view your projects in while still on screen. • These colors, however, can only be viewed with natural or produced light, such as in the computer monitor, and not on a printed page. • This is where CMYK comes in.
When two RGB colors are mixed equally they produce the colors of the CMYK model, known as subtractive primaries. • Green and blue creates cyan (C), red and blue creates magenta (M), and red and green creates yellow (Y). Black is added to the model because it cannot be created with the 3 subtractive primaries (when combined they create a dark brown). The K, or “key,” stands for black.
CMYK in the Printing Process • The four-color printing process uses four printing plates; one for cyan, one for magenta, one for yellow and one for black. • When the colors are combined on paper (they are actually printed as small dots), the human eye sees the final image.