Download

1 / 42
420 likes | 427 Views
I4see New Hire Training. 2019-2020. Help Desk Team. Contents. Background Uploading Files Working in the Workqueue Correcting Batch Verification Errors Editing Batch Verified Batches District Verification Correcting District Verification Errors

E N D
I4see New Hire Training 2019-2020
Contents • Background • Uploading Files • Working in the Workqueue • Correcting Batch Verification Errors • Editing Batch Verified Batches • District Verification • Correcting District Verification Errors • District Review and Superintendent Certification Reports • Anomaly Reports • Certification • Student Searches in i4see • Submission History Search • Demographic Information Search • Questions?
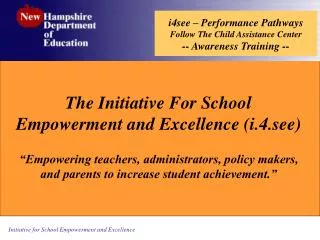
I. Background i4see (Initiative for School Empowerment and Excellence) The Initiative for School Empowerment and Excellence (i4see) is a student level data collection system. Central to the purpose of i4see is an overarching principle that we should not only collect data for reporting needs, but that we should add value to the data being collected and provide information back to schools to empower teachers, administrators, policy makers, and parents to increase student achievement - enabling schools to follow every child and to analyze groups of students over time. • Administrators and teachers have easy access to valuable data, helping improve the education for every child. The assignment of a state assigned student identifier (SASID) was the first deliverable of this initiative. • All student-level data collections must be submitted electronically, paper submissions will not be accepted. All submissions should be comma separated data files (.csv). It is important that your file does NOT contain header records. • A submission calendar can be found here: https://www.education.nh.gov/data/i4see_calendar.htm
II. Uploading Files A batch is a Comma Separated Value (.csv) file made up of one or more records. A batch can be for one student, a whole school, or a whole district. Submit a batch to i4see by following the steps below: • Select the district for which you are submitting your file (only applies to multi-district SAUs) • Go to UPLOAD FILES • Select a SUBMISSION TYPE from the drop-down • Select REMOVE HEADERS if you have field names in the top row of your .csv file. If you don’t have field names in your file, leave this box unchecked. • Click on CHOOSE FILE to browse to the .csv file saved locally on your machine or network. • Include a COMMENTthat describes the data in your submission, for ease of navigation later (e.g., “Example School BOY 2018-19”). • Click on PRE-CHECK FORMATTING.
II. Uploading Files Pre-Check Formatting checks that data in each field of the submission matches the pre-approved format for that field (e.g., 10 digits in the SASID, mm/dd/yyyy in date fields, etc) • If your file DOES NOT PASS pre-check formatting, you have the option of downloading an Excel list of the formatting errors for review. Once you have corrected the formatting errors in your locally-saved .csv file, try uploading your batch again. • When your file passes all of the format checks you will be able to click on SUBMIT DATA TO DOE, which transfers your batch to the i4see workbench
II. Uploading Files • Formatting Pre-Check • FAILURE • Download an Excel list of the formatting errors • Correct errors in your locally-saved .csv file • Re-upload the batch • Formatting Pre-Check • SUCCESS • Review the previewed records • Click SUBMIT DATA TO DOEto transfer data to the workbench • Proceed to the workqueue
III. Working in the Workqueue Once batches have made it to the workbench (also called the workqueue), they may have any of the following statuses: • VERIFYING – After initial upload or upon re-verifying, your batch may end up verifying for several minutes, especially during peak usage season. Refresh the workbench regularly to update the status. • BATCH VERIFIED – All records passed the validation checks. • BATCH VERIFIED WITH ERRORS – You will need to edit the submission to correct any errors or confirm any warnings. Errors may also be fixed by deleting the batch, making the corrections in your locally-saved .csv file, and re-uploading the batch. • BATCH EDITING – If you edit a batch it will automatically change to this status. You must re-verify the batch once you are finished editing it.
III. Working in the Workqueue Other statuses you may encounter when working on the workbench include: • UPLOADING – This rarely lasts longer than a few seconds after initial upload, and should resolve after refreshing the workbench • VALIDATION ERROR – If you receive a validation error, it means i4see cannot understand something entered in at least one of the fields in your batch. This is usually the result of a typo (e.g., mm/dd//yyyy, with two slash marks). Contact the i4see Help Desk for assistance. • Please note, sometimes the only solution to fix a validation error is to delete the batch and re-upload the file. For this reason, ALWAYS save a version of your .csv file until you KNOW you will no longer need it, preferably with all corrections included!
III. Working in the WorkqueueCorrecting Batch Verification Errors • There are many data elements that may generate errors once you’ve uploaded your submission to the workbench • If you don’t understand why you received an error, the first place to check is the Data Dictionary. • The Data Dictionary may be accessed from the HELP menu in i4see, or you can go to the following link: https://my.doe.nh.gov/datadictionary/collections.aspx • We recommend bookmarking this link for ease of use! • Once at the Data Dictionary, click on the link associated with the submission on which you’re working. • Review the elements mentioned in the error and check the validation rules and accepted codes listed on each element’s description page. • If you are not able to determine what to fix, please submit a ticket or call the i4see Help Desk.
III. Working in the WorkqueueCorrecting Batch Verification Errors To correct errors in batches that are Batch Verified with Errors: • SELECT the batch. • Click VIEW DETAIL Please note: Data in batches that are Batch Verified with Errors WILL NOT populate any reports, including Anomaly Reports.
III. Working in the WorkqueueCorrecting Batch Verification Errors Batch verification errors are separated into two types: • STANDARD ERRORS: These must be corrected before the batch can be verified. • CONFIRMATION WARNINGS: These must be confirmed before the batch can be verified. If the data in a warning is incorrect, it should be corrected, not confirmed. • For example, if a student is 18 years old but reported in 1st grade, you will receive the warning Grade should correspond to the age of the student. • If the student should have been reported in 12th grade, CORRECT the record, DON’T CONFIRMthe invalid data. • If the data is correct, you may confirm the record
III. Working in the WorkqueueCorrecting Batch Verification Errors Sample Errors: • CONFIRMATION WARNING: Student is not preschool or kindergarten but the student’s full day percentage is less than 100 percent • This warning must be corrected or confirmed before the batch can validate • The Unconfirmedcolumn will list the number of records that remain unconfirmed. When this column reads zero (0),it means all records generating the warning have been confirmed • STANDARD ERROR: Grade code is invalid for current school • This error MUST be corrected before the batch can validate
III. Working in the WorkqueueCorrecting Batch Verification Errors TO CONFIRM A WARNING • Click on the validation rule text • Review the record(s) that are generating the warning • Are the records correct? • No: Edit and correct the record(s) • Yes: Select the CONFIRM checkbox to the left of each record, or choose CONFIRM ALL
III. Working in the WorkqueueCorrecting Batch Verification Errors TO CORRECT A STANDARD ERROR • Click on the validation rule text • Review the record(s) that are generating the error • If necessary, click on the student’s hyperlinked SASID for a brief submission history • Click the EDITbutton to the left of the record • Correct the data • Click SAVE
III. Working in the WorkqueueEditing Batch Verified Batches Editing batches that are “Batch Verified” • SELECTthe batch • Click on UNLOCK EDIT. • This will put your batch in BATCH EDITING status.
III. Working in the WorkqueueEditing Batch Verified Batches • Re-SELECT the batch you’ve just unlocked • Click on EDIT BATCH. • Once in the batch, edit the records as necessary. • You may search for a specific SASID while in the batch. • Upon completion of edits, return to the workqueue, re-SELECTand re-VERIFY the batch.
IV. District Verification • Certain submissions during the school year require additional verification beyond Batch Verification, known as District Verification • Go to REPORTING DISTRICT BATCH VALIDATION • Select the applicable SUBMISSION TYPE from the dropdown menu. • If all batches of the selected Submission Type are Batch Verified, you will have the option to VERIFY ACROSS DISTRICT. This will combine all of the batches in the district for the same submission type into one table and then will run them through more validation checks.
IV. District Verification Below are the District Verification Statuses: • DISTRICT VERIFIED – All records in the district’s batches for the applicable submission type have been checked for internal consistency and have passed validation. • DISTRICT VERIFIED WITH ERRORS – Errors were detected during District Verification and will need to be corrected before the submission can be district verified. • DISTRICT EDITING – Just as with batch verification, once you begin making edits to a district verified batch, it will go into EDITING mode. You will need to re-verify across the district (and possibly re-verify all batches) once edits are complete.
IV. District VerificationCorrecting District Verification Errors To correct District Verification errors • In the District Batch Validation screen for the appropriate submission type, click the VIEW & CORRECT DISTRICT ERRORS button. • This button will only be “live” if any batches in your submission are at District Verified with Errors status. • Proceed to correct any Standard Errors or correct/confirm any Warnings, just as you would during Batch Verification. • When edits are complete, return to the District Batch Validation screen and click RE-VERIFY ALL BATCHES if necessary. • Once all batches are Batch or District Verified, click VERIFY ACROSS DISTRICT
IV. District VerificationDistrict Review and Superintendent Certification Reports In addition to verifying the data in your submissions, another aspect of District Verification is the confirmation of REPORTS. • Not all submissions that require District Verification include confirmation reports • Reports are located on the same page as the District Verification process (REPORTING DISTRICT BATCH VALIDATION) • There are two types of reports that require confirmation: • SUPERINTENDENT CERTIFICATION REPORTS: These can only be confirmed by the district’s certifying authority (the Superintendent or Charter School Administrator). Superintendent Certification Reports are only associated with the BOY and EOY Enrollment submissions • DISTRICT REVIEW REPORTS: These can be confirmed by any i4see user. • It’s recommended that staff within the district who are familiar with the subject matter of each District Review and Superintendent Certification Report review those reports for validity prior to confirmation. • For example, staff who work with homeless youth should review the Homeless-related reports; staff who work with special education should review the IEP-related reports; etc
IV. District VerificationDistrict Review and Superintendent Certification Reports District Review and Superintendent Certification Reports may be added or removed over time. Only reports prefaced with Confirmation Required must be confirmed.
V. Anomaly Reports • ANOMALY REPORTS are validation reports that compare records in a district’s BOY, MOY, and EOY Enrollment submissions against records in those same submissions from other districts. • Anomaly Reports are located under REPORTING VERIFICATION AND ANOMALY REPORTS. • Due to their inter-district nature, errors picked up by Anomaly Reports cannot be detected via batch or district verification. • ANOMALY REPORTS NEED TO BE REVIEWED MULTIPLE TIMES. • Anomaly Reports compare data among all districts throughout the state. If a district has not yet uploaded a submission, their data is not available for the Anomaly Reports to compare against. • It is VITAL that all districts have their submissions uploaded and verified by the pre-determined deadlines issued by the NHDOE • Deadlines are known months ahead of time. It is unacceptable for a submission deadline to be missed because a user is on vacation, taking a leave of absence, or otherwise participating in a pre-planned event. • Districts should have a plan to ensure all deadlines are met, especially in the event staff are unavailable due to unforeseen absences or unexpected departures.
V. Anomaly Reports • All Anomaly Reports must be CLEARED before a submission can be certified. • In some cases, records that appear on an anomaly report are not errors, but rather legitimate anomalies. If this is the case with any records in your district’s anomaly reports, contact the i4see Help Desk, as these may count as Explained Anomalies • Explained Anomalies are the term for data that are the result of legitimate anomalous situations and not due to an error in reporting • The determination of whether an anomaly is an Explained Anomaly or not can ONLY be made by the NHDOE • Districts are advised to revisit their DISTRICT REVIEW and SUPERINTENDENT CERTIFICATION REPORTS once Anomaly Reports have been cleared. • Edits made due to Anomaly Reports may affect the data included in District Review and Superintendent Certification Reports. As a result, these reports may require re-confirmation.
V. Anomaly Reports These are the anomaly reports related to each Enrollment submission as of the school years listed. Anomaly reports may be added or removed over time.
VI. Certification • Certain i4see submissions must be CERTIFIED by the district’s certifying authority (Superintendent or Charter School Administrator) • Once a submission has been certified, the data within that submission cannot be changed by the district without the submission being uncertified. • Before a submission can be certified: • Every batch in a district’s submission must be DISTRICT VERIFIED • All District Review and Superintendent Certification reports that require confirmation must be CONFIRMED • Any ANOMALY REPORTS associated with the submission must be CLEARED. Explained Anomalies that remain in a district’s Anomaly Report(s) MUST receive approval from the NHDOE. • Submissions cannot be certifiedby a designee of the certifying authority. • Deadlines are known months ahead of time, and the i4see system can be accessed from any internet-connected device. Therefore it is not acceptable for a certification deadline to be missed because the certifying authority was not available due to a vacation, leave of absence, or other pre-planned event. • Unforeseen absences or departures of the certifying authority should be brought to the NHDOE’s attention immediately.
VI. Certification • The NHDOE should be notified whenever a Superintendent or other certifying authority changes. • Only the NHDOE can assign certifying authority to a new Superintendent or Charter School Administrator • To verify your district’s current certifying authority, go to the HOME tab in i4see. The certifying authority(ies) will be listed in the bottom left corner of the MESSAGESbox.
VII. Student Searches in i4see • There are two types of student search in i4see: • Submission History • Demographic Information • The SUBMISSION HISTORY search allows a user to view up to 10 years of a student’s BOY and EOY Enrollment records, and also to make updates to uncertified submissions • The DEMOGRAPHIC INFORMATION search allows a user to view a student’s demographics (name, date of birth, race, gender, etc), and, if necessary, make updates to these data elements • Separating these two search features makes the actual search process go much faster than it did when they were combined, as in the past
VII. Submission History Search • To begin any student search in i4see, you must first go to STUDENTS UPDATE/VIEW STUDENT INFO
VII. Submission History Search • The first search screen you reach after navigating to STUDENTS UPDATE/VIEW STUDENT INFO is the SUBMISSION HISTORY search screen
VII. Submission History Search • On the SUBMISSION HISTORY search screen, you have the option of searching for a student by SASID (the default), LASID, STUDENT NAME AND DATE OF BIRTH, or ASSESSMENT ID • For example, if you are researchingthe uniqueness of aLASID that is preventing you from assigning a SASID, you maysearch by LASID on this screen toidentify other students to whom your district may have assigned that LASID in the past • Similarly, if you want to check if a student has an existing SASID, you may search by STUDENT NAME and date of birth on this screen first, before trying to request a SASID for that student
VII. Submission History Search • The most common use of the SUBMISSION HISTORY search is to research a student’s current enrollment records • This is done to identify conflicting districts, to correct data discrepancies between submissions, and to verify individual student enrollment data To use the SUBMISSION HISTORY search: • Enter a SASID into the search box and click theSEARCH BY SASID button.
VII. Submission History Search • When the search results load, click the SASID INFO button • When the SASID row appears, click the STUDENT SUBMISSIONS button
VII. Submission History Search • Scroll down to view the student’s most recent submission history • To change the number of years you wish to view, click the < or > buttons and then click LOAD. The system defaults to showing only the most recent submission year.
VII. Submission History Search • THINGS TO KEEP IN MIND: • Each time you search for a SASID thru the SUBMISSION HISTORY search, but without navigating away from the screen between searches, you will need to select the SASID INFO button beside the student’s name in the search results. If you don’t do this, you will continue viewing the submission history of the previous student. • You do NOT need to reselect the STUDENT SUBMISSIONS button between searches, provided you don’t navigate away from the screen
VII. Demographic Information Search • The most common reason to use the DEMOGRAPHIC INFORMATION searchis to make updates to a student’s information, to ensure it’s reported accurately To use the DEMOGRAPHIC INFORMATION search: • Navigate to STUDENTS UPDATE/VIEWSTUDENT INFO • Click the UPDATEDEMOGRAPHIC INFObutton. This is the step mostusers miss. Remember, the default student search screenyou first reach is the SUBMISSION HISTORY search screen
VII. Demographic Information Search • The search screen will change slightly, which is how you will know you are on the DEMOGRAPHIC INFORMATION SEARCH screen. • There is no option to search by LASID, Name, or Assessment ID; only SASID. • Enter the SASID of the student you wish to update, then click the SEARCH button
VII. Demographic Information Search • After a moment, the search will return the data for the selected student.
VII. Demographic Information Search • Correct the data that needs to be changed, then click the update button associated with that data element IMPORTANT NOTE: You can only change ONE data element ata time. Make sure tosave all changesindividually as theyare made.
VII. Demographic Information Search • THINGS TO KEEP IN MIND: • Only one data element can be updated at a time. Make and save each correction individually. • Student searches do not transfer from the SUBMISSION HISTORY SEARCH to the DEMOGRAPHIC INFORMATION SEARCH screen or vice versa. • If you need to search for a student through both search options, you will need to do so individually on each screen. • If you change a student’s Country of Birth to something other than the United States or Puerto Rico, you are required to include the Date First Entered US School. • If you are not sure of the specific date, use a generic date based on the student’s school history (e.g., if you know they started in 2016, you might use 9/1/2016 as their first day in a US school). • Students born outside the United States and Puerto Rico include US citizens born abroad, such as those born on a military base overseas
VIII. Questions? Thank you!