Download

1 / 69
720 likes | 934 Views
Chapter 11: 68HC11 Analog to Digital Converter. The 68HC11 Microcontroller. Han-Way Huang. Minnesota State University, Mankato. Basics on A/D Conversion - Almost any measurable quantity, for example, current, voltage, temperature, speed, and time, is analog in nature.

E N D
Chapter 11: 68HC11 Analog to Digital Converter The 68HC11 Microcontroller Han-Way Huang Minnesota State University, Mankato
Basics on A/D Conversion - Almost any measurable quantity, for example, current, voltage, temperature, speed, and time, is analog in nature. - Analog signals must be represented in digital format in order to be processed by the digital computer. - An analog to digital (A/D) converter can convert a electrical voltage to a digital value. - A non-electrical quantity must be converted into electrical voltage before it can be converted into digital value. - A transducer is normally used to convert a non-electrical quantity into a electrical voltage so that it can be further processed by a computer. - The accuracy of an A/D converter is dictated by the number of bits it used to represent the digital value. - An A/D conversion system is illustrated in Figure 10.1
Algorithm of Successive Approximation Method Starting the most significant bit of SAR, for each bit 1. Guess the bit to be a 1. 2. Converts the value of the SAR to an analog voltage 3. Compares the D/A output with the analog input. 4. Clears the bit to 0 if the D/A output is larger.
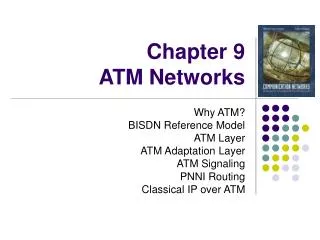
Optimal Voltage Range for the A/D Converter • A/D converter needs a low reference voltage and a high reference voltage to operate. • The low reference voltage (VLREF) is often set to 0 and the • high reference voltage (VHREF) is often set to VCC. • Most A/D converters are ratiometric. • To take advantage the whole dynamic range of the A/D converter, we should set scale and • shift the sensor output to VLREF ~ VHREF. • The A/D conversion result x corresponds to an analog voltage given by • Vx = VLREF + (range x) (2n – 1) • where, range = VHREF – VHREF
Example 11.1 Assume there is a 12-bit A/D converter with VLREF = 0V and VHREF = 5V. Find out the corresponding voltage values for A/D conversion results of 100, 400, 800, 1200, and 2400. Solution: range = VHREF – VLREF = 5 V. V(100) = 0V + (100 5) (212 – 1) = 0.12 V V(400) = 0V + (400 5) (212 – 1) = 0.49 V V(800) = 0V + (800 5) (212 – 1) = 0.98 V V(1200) = 0V + (1200 5) (212 – 1) = 1.46 V V(2400) = 0V + (2400 5) (212 – 1) = 2.93 V
Voltage Scaling Circuit • Example 11.2 Convert the output voltage of an A/D converter from 0-200mV to the range • of 0-5V. • Solution: • AV = 1 + (R2/R1) = (5V/0.2V) = 25 • R2/R1 = 24 Choose 10K for R1, then R2 = 240K.
Voltage Scaling and Shifting Circuit Can translate a voltage from V1 - V2 to the range of 0V – 5V.
Example 11.3 Use the circuit in Figure 11.5 to scale and shift the transducer output from -2.5 ~ 2.5 V to 0 ~ 5V. Solution: 0 = Rf R1 × (- 2.5) – Rf R2 × V1 ---- (1) 5 = Rf R1 × (2.5) – Rf R2 × V1 ---- (2) By choosing V1 = - 12V and Rf = 5KW, R1 and R2 are solved to be 5KW and 24KW. R0 is independent of other parameters, we arbitrarily set it to 5 KW.
An Overview of the 68HC11 A/D Converter - Eight-channel, 8-bit, multiplexed input, successive-approximation conversion method. - A weighted array of capacitors are used to implement the successive-approximation method. - A clock signal is required to control the A/D conversion that must have a frequency no lower than 750 KHz. - Reference voltages are required for the conversion: one is high reference (VRH) voltage, the other is low reference (VRL) voltage. The difference between VRH and VRL cannot be lower than 2.5 V. - Accuracy is only guaranteed for VRL = 0 V and VRH = 5 V. - The conversion is ratiometric. The input voltage VRL converts to $00 and the input voltage VRH converts to $FF.
The Clock Frequency Issue - The A/D converter requires a clock to operate. - Either the E clock or the on-chip RC clock signal can be used. - The RC clock runs at 1.5 MHz. - To choose the E clock signal, clear the bit 6 of the OPTION register to 0. - To select RC clock signal, set the bit 6 of the OPTION register to 1. This circuit requires 10 ms to start and settle. - The 68HC11 completes the conversion of one sample in 32 clock cycles. Registers Related to the A/D Operation - ADCTL: A/D control/status register - OPTION: bits 7 and 6 - ADR1-4: A/D result registers 1 to 4
The OPTION Register ADPU: A/D power up. When set to 1, it enables the A/D converter. After setting this bit, the user must wait at least 100 ms before using the A/D converter. CSEL: clock select. When set to 1, the RC clock signal is selected. Otherwise, the E clock is selected. It takes 10 ms for RC clock to stabilize.
The Procedure for Using the A/D Converter Step 1. Connect the hardware properly. Scale and shift the analog inputs, when necessary, so that they fall between VRH and VRL. Step 2. Set the ADPU bit of OPTION register to enable the A/D converter. Step 3. Select the appropriate clock signal by setting or clearing the CSEL bit of the OPTION register. Step 4. Wait for the A/D converter to stabilize. Step 5. Select the appropriate channel(s) and operation modes by programming the ADCTL register. Step 6. Wait until the CCF flag of the ADCTL register becomes 1 and collect the conversion results.
Example 11.5 Write an instruction sequence to set up the following A/D conversion parameters: Nonscan mode Single-channel mode Select channel AN0 Choose the E clock as the clock source for the A/D converter Enable A/D converter Solution: Set bit 5 of ADCTL to 0 to select nonscan mode. Set bit 4 of ADCTL to 0 to select single-channel mode. Set bits 3-0 of ADCTL to 0000 to select channel AN0. Write the value $00 into the ADCTL register. Set the bit 7 of the OPTION register to enable A/D charge pump. Clear the bit 6 of the OPTION register to select E clock as the A/D control clock signal. Wait for 100 ms for the converter to stabilize.
regbas EQU $1000 ADCTL EQU $30 OPTION EQU $39 LDX #regbas BCLR OPTION,X $40 ; select E clock for the A/D clock signal BSET OPTION,X $80 ; enable the A/D charge pump LDY #30 ; delay for 105 ms for delay DEY ; the charge pump to BNE delay ; stabilize LDAB #$00 STAA ADCTL,X ; start the conversion END
Example 11.6 Write an instruction sequence to set up the following A/D conversion parameters: Non-scan mode Multiple-channel mode Select channels AN4-AN7 Choose E clock as the clock source for the A/D converter Enable the A/D converter Solution: Set bit 5 of ADCTL to 0 to select non-scan mode Set bit 4 of ADCTL to 1 to select multi-channel mode Set bits 3-0 of ADCTL to 0100 to select channels AN4-AN7 Write the value $14 into the ADCTL register. Set the bit 7 of the OPTION register to enable A/D charge pump. Clear the bit 6 of the OPTION register to select E clock as the A/D control clock signal. Wait for 100 ms for the converter to stabilize.
regbas EQU $1000 ADCTL EQU $30 OPTION EQU $39 LDX #regbas BCLR OPTION,X $40 ; select the E clock as the A/D control clock BSET OPTION,X $80 ; enable the A/D converter LDY #30 ; wait for 105 ms delay DEY ; “ BNE delay ; ” LDAB #$14 ; start the A/D conversion STAA ADCTL,X ; “ END
Example 11.7 Write an instruction sequence to convert the analog signal connected to channel AN0 into digital form. Perform four conversions and stop. Assume the frequency of the E clock is 2 MHz. Solution: 1. Circuit connection is shown in Figure 11.6. 2. Write one byte into the ADCTL register and four conversions will be performed. 3. Perform A/D conversion on the AN0 input in single-channel and nonscan mode. Write $00 into ADCTL.
regbas equ $1000 OPTION equ $39 ADCTL equ $30 ADR1 equ $31 ADR2 equ $32 ADR3 equ $33 ADR4 equ $34 org $00 result rmb 4 ; result four bytes to hold A/D results org $C000 ldx #regbas bset OPTION,X $80 ; enable the charge pump to start A/D conversion bclr OPTION,X $40 ; select E clock as the clock source to A/D converter ldy #30 ; delay for 105 ms to wait for the charge pump delay dey ; to stabilize bne delay ; “ ldaa #$00 staa ADCTL,X ; initialize ADCTL and start the A/D conversion again ldaa ADCTL,X ; check CCF bit bpl again ; wait until CCF flag is 1 ldaa ADR1,X ; get the first result
staa result ; save it ldaa ADR2,X ; get the second result staa result+1 ; save it ldaa ADR3,X ; get the third result staa result+2 ; save it ldaa ADR4,X ; get the fourth result staa result+3 ; save it end
In C Language, #include <hc11.h> unsigned char result [4]; main ( ){ OPTION &= 0xBF; /* select E clock as the A/D clock source */ OPTION |= 0x80; /* enable A/D converter */ TFLG1 = 0x40; /* clear OC2F flag */ TOC2 = TCNT + 200; /* start an OC2 operation with 100 ms delay */ while (!(TFLG1 & 0x40)); /* wait for 100 ms */ ADCTL = 0x00; /* start an A/D conversion */ while (!(ADCTL & 0x80)); /* wait until A/D conversion is complete */ result [0] = ADR1; /* save A/D conversion results */ result [1] = ADR2; result [2] = ADR3; result [3] = ADR4; return 0; }
Example 11.8 Take 20 samples from each of the A/D channels AN0 to AN3, convert them to digital values, and store them in memory locations from $D000 to $D04F. Solution: 1. Circuit connection is shown in Figure 11.7. 2. Perform A/D conversion on channels AN0 to AN3 in multi-channel, non-scan mode. Write the value $10 into ADCTL. 3. Take samples at as regular intervals as possible. This can be achieved by starting the next conversion immediately after the previous conversion has been completed but before collecting the result.
N EQU 20 ; number of samples to be taken per channel ORG $D000 result RMB 80 ; reserve 80 bytes to store A/D conversion results ORG $C000 LDX #regbas BSET OPTION,X $80 ; enable A/D charge pump BCLR OPTION,X $40 ; select E clock to control A/D conversion LDY #30 ; wait for 105 ms for charge pump to stabilize delay DEY ; “ BNE delay ; “ LDAA #$10 ; initialize ADCTL STAA ADCTL,X ; “ LDAB #N ; number of samples remained to be taken on each channel LDY #result ; Y points to the buffer that holds the result wait LDAA ADCTL,X ; wait until the current A/D conversion is completed BPL wait ; “ * Start the next conversion immediately so that samples can be taken more uniformly in time LDAA #$10 ; start the next A/D conversion STAA ADCTL,X ; “
* The following eight instructions collect the previous results LDAA ADR1,X ; fetch the result from channel 1 STAA 0,Y ; save the result LDAA ADR2,X ; fetch the result from channel 2 STAA 1,Y ; save the result LDAA ADR3,X ; fetch the result from channel 3 STAA 2,Y ; save the result LDAA ADR4,X ; fetch the result from channel 4 STAA 3,Y ; save the result INY ; move the result pointer INY ; “ INY ; “ INY ; “ DECB ; decrement the loop count BNE wait END
In C Language, #include <hc11.h> unsigned char result[80]; main ( ) { int i; OPTION &= 0xBF; /* select E clock as the A/D conversion clock source */ OPTION |= 0x80; /* enable A/D converter */ TFLG1 = 0x40; /* clear OC2F flag */ TOC2 = TCNT + 200; /* create 100 ms delay */ while (!(TFLG1 & 0x40)); /* “ */ ADCTL = 0x10; /* start an A/D conversion */ for (i = 0; i < 20; i++) { while (!(ADCTL & 80)); ADCTL = 0x10; result [4*i] = ADR1; result [4*i + 1] = ADR2; result [4*i + 2] = ADR3; result [4*i + 3] = ADR4; } return 0; }
The LM35 Precision Centigrade Temperature Sensors Pins and circuit connections Features - No external calibration required. - Very linear over the temperature range - Draws only 60 mA from power supply and has very low self-heating. - Converts the ambient temperature into voltage
Example 11.9 Use the circuit shown in Figure 11.8b as a building block in a system to measure room temperature. Display the result in two integer digits and one fractional digit using the seven-segment displays. Assume the room temperature never goes below 0 oC and never goes above 42.5 oC so that the A/D converter of the 68HC11 can be used to perform the conversion and drive the seven-segment displays. Solution: 1. The voltage output from the circuit shown in Figure 10.6b will be between 0V and 425 mV. 2. Better precision can be obtained by scaling the voltage corresponding to 42.5 oC to 5 V. 3. Voltage scaling circuit is shown is Figure 11.9.
Setting of Configuration Data for MC14489 bit 7: no decode, set to 0. bit 6: special decode, set to 1. bit 5 to 3: bank 5 to 3 hex decode, set to 0. bit 2: bank 2 special decode, set to 1. bit 1: bank 1 hex decode, set to 0. bit 0: normal mode, set to 1. Format of Display Data
REGBAS EQU $1000 SPCR EQU $28 SPDR EQU $2A SPSR EQU $29 DDRD EQU $09 ADR1 EQU $09 OPTION EQU $39 ADCTL EQU $30 PORTB EQU $04 PORTD EQU $08 TCNT EQU $0E TOC2 EQU $18 TFLG1 EQU $23 OC2 EQU $40 ; mask to check the OC2F flag of TFLG1 OC2M EQU $BF ; mask to clear OC2F flag for the BCLR instruction SP_DIR EQU $3A ; value to configure SPI pins directions SPCR_IN EQU $54 ; value to initialize SPCR register ADPU EQU $80 ; mask to select ADPU bit of the OPTION register ADCLK EQU $40 ; mask to select CSEL bit of the OPTION register A2D_INI EQU $00 ; value to configure A/D control register TCNT EQU $0E TOC2 EQU $18 TFLG1 EQU $23
ORG $00 byte1 RMB 1 ; storage for temperature data byte2 RMB 1 ; “ byte3 RMB 1 ; “ remain RMB 2 ; to hold the remainder of division oc2cnt RMB 1 ; output comparison count of OC2 ORG $C000 LDX #regbas LDAA #$C0 STAA byte1 ; store the fixed value of display data LDAA #$FC ; “ STAA byte3 ; “ * The following 4 instructions initialize the SPI system LDAA #SPDIR ; set up SPI pin directions STAA DDRD,X ; “ LDAA #SPCR_INI ; initialize SPI parameters STAA SPCR,X ; “ BCLR PORTD,X $20 ; enable SPI transfer to MC14489 LDAA #$45 ; send configuration data to MC14489 STAA SPDR,X ; “ BRCLR SPSR,X $80 * BSET PORTD,X $20 ; load data into configuration register
* The following 5 instructions enable the A/D converter and select E clock to control A/D * conversion process and wait for the charge pump to stabilize BCLR OPTION,X ADCLK ; select E clock for A/D conversion BSET OPTION,X ADPU ; enable A/D converter LDY #30 ; delay 105 ms so charge pump can stabilize delay DEY ; “ BNE delay ; “ forever LDAA #A2D_INI ; start an A/D conversion STAA ADCTL,X ; “ here LDAA ADCTL,X BPL here LDAB ADR1,X ; read the A/D conversion result CLRA ; convert to temperature LDX #6 ; reading IDIV ; “ STD remain ; save the remainder XGDX ; swap integer part to D LDX #10 ; separate tens and ones digits IDIV LSLB ; shift ones digits to upper half of B LSLB ; “ LSLB ; “ LSLB ; “
STAB byte2 XGDX ; swap the tens temperature digit in B ADDB byte1 ; combine the decimal pointer specifier with tens digit STAB byte1 ; “ LDD remain ; get back the remainder (in B) LDAA #10 MUL LDX #6 IDIV ; compute remainder × 10 6 XGDX ADDB byte2 ; combine the ones digit and the fractional digit STAB byte2 ; “ BCLR PORTD,X $20 ; enable SPI transfer to MC14489 LDAA byte1 ; get byte1 and send it out STAA SPDR,X BRCLR SPSR,X $80 * ; wait until 8 bits have been shifted out LDAA byte2 ; send out byte2 STAA SPDR,X ; “ BRCLR SPSR,X $80 * ; “ LDAA byte3 ; send out byte3 STAA SPDR,X ; “ BRCLR SPSR,X $80 * ; “ BSET PORTD,X $20 ; load data into the display register of the MC14489
* Use OC2 to create 1 second delay LDAB #100 STAB oc2cnt ; initialize OC2 count to create 1 s delay LDX #REGBAS BCLR TFLG1,X $BF ; clear OC2F flag LDD TCNT,X repeat ADDD #20000 STD TOC2,X wait BRCLR TFLG1,X $40 * ; wait for 10 ms BCLR TFLG1,X $BF ; clear the OC2F flag LDD TOC2,X DEC oc2cnt BNE repeat JMP forever END
C Program for Temperature Measurement #include <hc11.h> main ( ) { unsigned char byte1, byte2, byte3, temp; byte1 = 0xC0; byte3 = 0xFC; /* store characters “degree” and “C” in byte3 */ DDRD = 0x3A; /* configure SPI pin directions */ SPCR = 0x56; /* initialize SPI function */ OPTION |= 0x80; /* start the A/D charge pump */ OPTION &= 0xBF; /* select E clock as the clock source for A/D conversion */ TFLG1 = 0x40; /* clear OC2F flag */ TOC2 = TCNT + 200 /* wait for 100 ms */ while (!(TFLG1 & 0x40)); PORTD &= 0xDF; /* enable SPI transfer */ SPDR = 0x45; /* send configuration data to MC14489 */ while (!(SPSR & 0x80)); PORTD |= 0x20; /* disable SPI transfer to MC14489 */ while (1) { ADCTL = 0x00 /* start and A/D conversion */ while (!(ADTCL & 0x80));
temp = ADR1/6; byte1 += temp / 10; /* place the ten’s digit in the lower half of byte1 */ byte2 = 4 << (temp % 10); /* place the one’s digit in the upper half of byte2 */ temp = (ADR1 % 6) * 10 /6; /* compute the first fractional digit */ byte2 += temp; /* combine the one’s and fractional digits */ PORTD &= 0xDF; /* enable SPI transfer to MC14489 */ SPDR = byte1; /* send out byte1 */ while (!(SPSR & 0x80)); SPDR = byte2; /* send out byte2 */ while (!(SPSR & 0x80)); /* “ */ SPDR = byte3; /* send out byte3 */ while (!(SPSR & 0x80)): /* “ */ PORTD |= 0x20; /* transfer data to the display register */ TOC2 = TCNT + 20000; /* start OC2 operation with 10 ms delay */ TFLG1 = 0x40; /* clear OC2 flag */ for (temp = 0; temp < 100; temp -- ) { while (!(SPSR & 0x80)); TOC2 += 20000; /* start the next OC2 operation */ TFLG1 = 0x40; /* clear the OC2 flag */ } } return 0; }
Measuring the Humidity • The IH-3605 is a humidity sensor made by HyCal Engineering, a division of Honeywell. • The voltage output for relative humidity 0 to 100% is 0.8V to 3.9V. • Pin assignment is shown in Figure 11.12. • Specifications are shown in Table 11.2.
Example 11.10 Construct a humidity measurement system that consists of the 68HC11, an IH-3605 humidity sensor, and four 7-segment displays. Solution: 1. Use a signal conditioning circuit to scale and shift the voltage to 0-5V. 2. Use a 1KW resistor and a 0.16mF capacitor to construct a 1KHz low pass filter. 3. Use a MC14489 to drive four seven-segment displays. 4. Blank the most significant digit when the humidity is not 100%. - Send $91 as the configuration data to blank the most significant digit. - Send $01 as the configuration data when the most significant digit is a 1. 5. Use table lookup method to translate from A/D result to the relative humidity.
REGBAS EQU $1000 SPCR EQU $28 SPSR EQU $29 SPDR EQU $2A DDRD EQU $09 ADR1 EQU $31 OPTION EQU $39 ADCTL EQU $30 PORTB EQU $04 PORTD EQU $08 TCNT EQU $0E TOC2 EQU $18 TFLG1 EQU $23 SP_DIR EQU $3A SPCR_INI EQU $54 APDU EQU $80 ; mask to select ADPU bit of the OPTION register ADCLK EQU $40 ; mask to select CSEL bit of the OPTION register A2D_INI EQU $00 ; value to initialize the ADCTL register CONF1 EQU $91 ; configuration data that need to blank msd CONF2 EQU $01 ; configuration data that display the msd
ORG $00 byte1 RMB 1 ; storage for display data byte2 RMB 1 ; “ byte3 RMB 1 ; “ oc2cnt RMB 1 ORG $C000 LDX #REGBAS LDAA #$A0 STAA byte1 ; first byte of the display data is a constant LDAA #SPDIR STAA DDRD,X LDAA #SPCR_INI ; initialize the SPI system STAA SPCR,X ; “ BSET OPTION,X ADPU ; start A/D charge pump BCLR OPTION,X ADCLK ; select E clock as the clock source of the A/D LDY #30 delay DEY BNE delay forever LDAA #A2D_INI STAA ADCTL,X here LDAA ADCTL,X ; wait until A/D conversion is complete BPL here
LDAB ADR1,X LDY #humid_up ABY LDAA 0,Y ; lookup the upper byte of the humidity STAA byte2 LDY #humid_lo ABY LDAA 0,Y ; lookup the lower byte of the humidity STAA byte3 JSR disp_humid JSR wait_1s JMP forever disp_humid PSHA PSHB PSHY PSHX LDX #REGBAS BCLR PORTD,X $20 ; enable SPI transfer to MC14489 LDAA byte2 ANDA #$F0 ; check the upper four bits BEQ blank LDAA $01 ; choose normal hex decode BRA send
blank LDAA #$91 ; choose special decode to blank display send STAA SPDR,X BRCLR SPSR,X $80 * ; wait until the SPI transfer is complete BSET PORTD,X $20 ; load data into configuration register BCLR PORTD,X $20 ; enable SPI transfer to MC14489 LDY #byte1 LDAB #3 loop_disp LDAA 0,Y STAA SPDR,X BRCLR SPSR,X $80 * ; wait until SPI transfer is complete INY DECB BNE loop_disp BSET PORTD,X $20 ; load data into display register PULX PULY PULB PULA RTS wait_1s PSHA PSHB PSHY PSHX
LDX #REGBAS DES TSY LDAA #50 STAA 0,Y ; initialize OC2 count to 50 LDD TCNT,X loop_50 ADDD #40000 ; start an OC2 operation with 20 ms delay STD TOC2,X BCLR TFLG1,X $BF ; clear OC2F BRCLR TFLG1,X $40 * ; wait until OC2F is set LDD TOC2,X DEC 0,Y ; decrement OC2 count BNE loop_50 INS PULX PULY PULB PULA RTS humid_up FCB $00,$00,…,$09,$10 humid_lo FCB $00,$04,…,$96,$00
C Program for Humidity Measurement #include <hc11.h> unsigned char humid_up [ ] = {…}; unsigned char humid_lo [ ] = {…}; main ( ) { unsigned bytes[3]; /* display data */ unsigned char i, conf_dat; /* loop index and configuration data */ DDRD = 0x3A; SPCR = 0x54; OPTION &= 0xBF; /* select E clock to control A/D converter */ OPTION |= 0x80; /* start the A/D charge pump */ bytes[0] = 0xA0; TOC2 = TCNT + 200; /* create a delay of 100 ms */ TFLG1 = 0x40; /* “ */ while (!(TFLG1 & 0x80)): /* “ */ while (1) { ADCTL = 0x00; /* start an A/D conversion */ while (!(ADCTL & 0x80)); /* wait until A/D conversion is complete */ if (!(humid_up [ADR1] & 0xF0)) conf_dat = 0x91; /* choose special decode mode */ else conf_dat = 0x01; /* choose normal decode mode */
PORTD &= 0xDF; /* enable SPI transfer to MC14489 SPDR = conf_dat; /* send out configuration data */ while (!(SPSR & 0x80)); /* wait until SPI transfer is complete */ PORTD |= 0x20; /* load data into configuration register */ bytes[1] = humid_up[ADR1]; bytes[2] = humid_lo[ADR1]; PORTD &= 0xDF; for (i = 0; i < 3; i++) { /* send out humidity data for display */ SPDR = bytes[i]; while (!(SPSR & 0x80)); } PORTD |= 0x20; /* load data into display register */ TFLG1 = 0x40; /* clear OC2F flag */ TOC2 = TCNT + 20000; /* start an OC2 operation */ for (i = 0; i < 100; i++) { while (!(TFLG1 & 0x40)); TFLG1 = 0x40; /* clear OC2F flag */ TOC2 += 20000; } } return 0; }