Download
1 / 34
380 likes | 779 Views
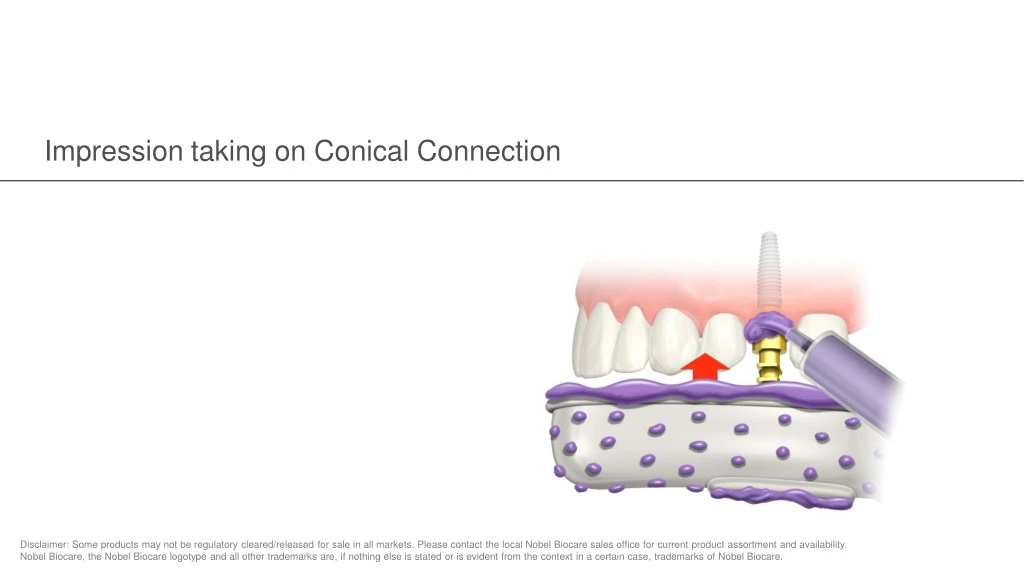
Impression taking on Conical Connection. Influencing parameters & decisions to be taken. When taking impressions, consider the different parameters which might have an influence on the impression taking procedure like technique and components: Tissue-level or bone-level implant

E N D
Influencing parameters & decisions to be taken • When taking impressions, consider the different parameters which might have an influence on the impression taking procedure like technique and components: • Tissue-level or bone-level implant • Connection type (external hex, internal tri-channel, internal conical) • Implant-level or abutment-level impression • Single unit or multiple units • Abutment-level / abutment type: Snappy, Multi-unit, other • Open-tray and closed-tray procedures • Soft tissue condition / emergence profile • Impression material • Standard or individual impression tray
Impression material & procedures • Usually elastomeric impression materials are materials of choice (addition reaction silicone, polyether) • A standard impression tray can be used (for open tray procedure drill holes in the tray at the planned positions of the impression coping) • An individualized impression tray is recommended to better fit the anatomy of the patient and for difficult anatomical situations • Closed tray and pick up techniques are applicable for ‘small/easy‘ cases (e.g. single units) • Open tray techniques are recommended for larger restorations (e.g. bridges)
Purpose of the impression Transfer information about one or more implants to a working model
Implant replica Identical Internal conical connection Implant Implant replica for dental laboratory model, mimicking the implant interface
Impression procedures - options • Implant-level • Closed tray • Open tray • Abutment-level • Closed tray • Version: Pick up with impression coping • Open tray
Impression copings Open tray Closed tray Impression Coping Closed Tray Impression Coping Open Tray Stays on implant (will be repositioned in impression after removal of impression tray) Stays in impression
Impression copings Carefully chose the right impression coping! „B“ for Bridge (multiple units) non-engaging part engaging part Impression coping for single units Impression coping for multiple units
Impression procedure options 1. Implant-level 2. Abutment-level
Impression procedure options 1. Implant-level
Closed tray technique Insertion of Impression Coping Closed Tray in implant Impression Coping Closed Tray
Closed tray technique Fill interface at the head of the screw with suitable material Impression taking
Closed tray technique Removal of the impression coping from implant and mounting of implant replica
Closed tray technique Carefully reposition the impression coping in the impression tray – look out for the specific indentation on the impression coping
Open-tray technique Screw impression copings on implant Impression Coping Open Tray
Open-tray technique Impression tray has been prepared with holes for the impression coping Impression taking Unscrew impression copings from implant, remove impression tray
Open-tray technique Screw implant replica to impression copings and pour model
Impression procedure options 1. Implant-level 2. Abutment-level
Abutment-level impression technique 2. Abutment-level
Closed tray - pick-up technique - Snappy™Abutment • Available in two abutment heights (4 and 5.5mm) and two collar heights* • Laser marking on abutment ensures fast and accurate identification • For single and multiple-unit cement-retained restorations in the posterior region • Predictable and accurate seating with audible „snap“ • One package includes everything needed: abutment and screw, impression coping, healing cap and temporary coping engaging * Collar heights differ depending on implant type and platform size
Closed tray - pick-up technique - Snappy™ Abutment Steps overview Seat abutment and tighten screw
Closed tray - pick-up technique - Snappy™ Abutment Steps overview Snap impression coping on abutment Inject impression material around coping and seat filled impression tray
Closed tray - pick-up technique - Snappy™ Abutment Clinical case
Closed tray - pick-up technique - Snappy™ Abutment Snappy Abutment Replica Abutment replica NP Abutment replica RP Abutment replica WP Abutment replica 6.0 The abutment replica are also available in two different heights (4mm and 5.5mm)
Closed tray - pick-up technique - Snappy™ Abutment Master model fabrication
Closed tray - pick-up technique - Snappy™ Abutment Healing Abutment, Snappy Abutment
Closed tray - pick-up technique - Snappy™ Abutment Snappy Abutment Impression Coping - orientation When placing the impression coping on the Snappy abutment, the indentation on the abutment is aligned with the marking on the impression coping.
Closed tray - pick-up technique - Snappy™ Abutment Snappy Abutment Impression Coping – ‚pick-up‘ in impression
Closed tray - pick-up technique - Snappy™ Abutment Snappy Abutment with healing cap
Closed tray - pick-up technique - Snappy™ Abutment Final crown restoration
Multi-unit Abutment • Screw-retained restoration • Partially edentulous or edentulous cases • Impression procedure on abutment level Multi-unit Abutment seating with handle Multi-unit Abutment straight (with handle for seating) Multi-unit Abutment angled, 17° Multi-unit Abutment straight
Multi-unit Abutment – open tray technique Placement of MUA with handle, removal of handle Apply torque on abutments (straight: 35Ncm, angulated: 15Ncm) Syringe impression material around impression copings MUA Impression Coping Open Tray Master model Placement of implant replicas Impression, unscrew and pick- up of Impression Copings
Multi-unit Abutment – closed tray technique Placement of MUA with handle, removal of handle Apply torque on abutments (straight: 35Ncm, angulated: 15Ncm) Syringe impression material around Impression Copings Impression Coping Closed Tray Master model Reposition impression coping into impression Placement of implant replicas Impression, removal of impression tray and removal of copings from implants
The step after impression taking - provisionalization Provisionalization options on conical connection Temporary solutions Temporary abutments Temporization on final abutment Screw-retained Cement-retained Screw-retained Cement-retained Immediate Temporary Abutment (single unit) Procera Esthetic Abutment Temporary Abutment titanium Multi-unit Abutment (straight, 17º or 30º) Snappy Abutment Temporary MU Abutment Plastic* QuickTemp Abutment (multiple units) Esthetic Abutment (straight or angled) * Temporary abutments plastic are indicated for max. 3 months intraoral use