Download
1 / 60
600 likes | 754 Views
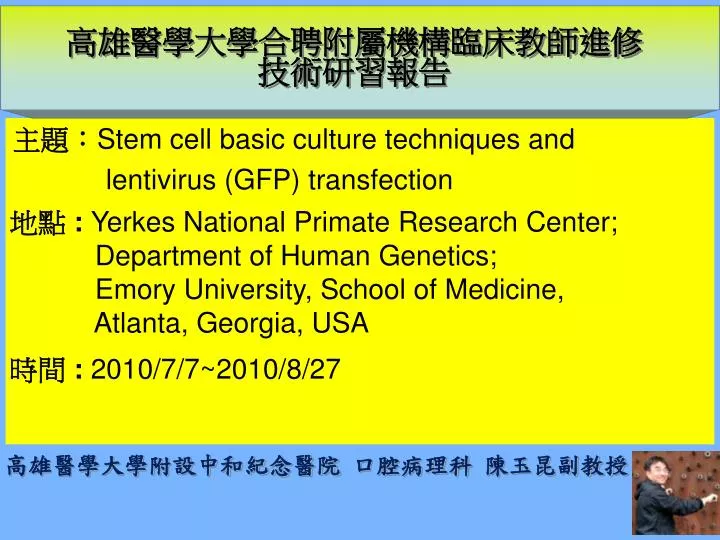
高雄醫學大學合聘附屬機構臨床教師進修 技術研習 報告. 主題: Stem cell basic culture techniques and lentivirus (GFP) transfection. 地點 : Yerkes National Primate Research Center; Department of Human Genetics; Emory University, School of Medicine, Atlanta, Georgia, USA.

E N D
高雄醫學大學合聘附屬機構臨床教師進修技術研習報告高雄醫學大學合聘附屬機構臨床教師進修技術研習報告 主題:Stem cell basic culture techniques and lentivirus (GFP) transfection 地點 : Yerkes National Primate Research Center; Department of Human Genetics; Emory University, School of Medicine, Atlanta, Georgia, USA 時間 : 2010/7/7~2010/8/27 高雄醫學大學附設中和紀念醫院 口腔病理科 陳玉昆副教授
高雄小港 日本成田 喬治亞州
Medical School of Emory University School of Medicine School of Physiology School of Anatomy
Shuttle Bus to the Laboratory Yerkes National Primate Research Center
Yerkes National Primate Research Center; Department of Human Genetics
General guidelines for culturing of cell lines All cell culture must be undertaken inside the culture room. Entrance of Culture Room
General guidelines for culturing of cell lines All cell culture must be undertaken in microbiological safety cabinet using aseptic technique to ensure sterility. Microbiological Safety Cabinet
General guidelines for culturing of cell lines All cell culture must be undertaken in microbiological safety cabinet using aseptic technique to ensure sterility. Microbiological Safety Cabinet
General guidelines for culturing of cell lines All cell culture must be undertaken in microbiological safety cabinet using aseptic technique to ensure sterility. Pipeteman Suction tip 70% alcohol Stripette Suction tube Microbiological Safety Cabinet
General guidelines for culturing of cell lines All cell culture must be undertaken in microbiological safety cabinet using aseptic technique to ensure sterility. 70% alcohol CO2 Incubator 35mm culture dish
Basic culture techniques for stem cell: Materials: Pipeteman Tips Stripette (serological pipettes) 1× PBS w/o Ca2+/Mg2+ (stored at room temperature) 0.05% Trypsin/EDTA (stored at 4°C) 10% DMEM (Dulbecco’s Modified Eagle Medium)/FBS (Fetal Bovine Serum) Medium (stored at 4°C) 10cc-orange 5cc-blue 1cc-green
Basic culture techniques for stem cell: 1. Preparing an aseptic environment A. Hood regulations .Put materials in the fume hood and turn the blower and UV lighton for 10-15 min before use .Close hood sash to proper position to maintain laminar air flow (Avoid cluttering)
Basic culture techniques for stem cell: 2. Preparation of cell growth medium Before starting work check the information given with the cell line to identify what media type, additives and recommendations should be used. Most cell lines can be grown using DMEM culture media or RPMI (Roswell Park Memorial Institute Medium) culture media with 10% FBS, 2 mM glutamine and antibiotics can be added if required. Check which culture media and culture supplements the cell line you are using requires before starting cultures. Culture media and supplements should be sterile. Purchase sterile reagents when possible, only use under aseptic conditions in a culture hood to ensure they remain sterile.
Basic culture techniques for stem cell: Formula for using DMEM media 100ml DMEM – 88ml 10% FBS – 10ml 2 mM glutamine – 1ml 100 U penicillin / 0.1 mg/ml streptomycin – 1ml Formula for using Trypsin 50ml Trypsin 10X – 5ml PBS – 45ml
Basic culture techniques for stem cell: 3. Checking cells A. Cells should be checked microscopically daily to ensure they are healthy and growing as expected. Attached cells should be mainly attached to the bottom of the flask, round and plump or elongated in shape and refracting light around their membrane. Suspension cells should look round and plump and refracting light around their membrane. Some suspension cells may clump. Media should be pinky-orange in color. B. Discard cells if: They are detaching in large numbers (attached lines) and/or look shriveled and grainy/dark in color. They are in quiescence (do not appear to be growing at all).
Basic culture techniques for stem cell: 4. Sub-culturing (Passage) using trypsin D. When ready, carefully remove media from flask of the require into waste pot (containing approximately 10 ml 10% sodium hypochlorite) taking care not to increase contamination risk with any drips. E. Using aseptic technique, pipette enough sterile PBS into the flask to give cells a wash and get rid of any FBS in the residual culture media. Tip flask gently a few times to rinse the cells and carefully remove the PBS back out into waste pot. F. Using pipette, add enough trypsin to cover the cells at the bottom of the flask (e.g. in 25 cm2 flask approx 0.5-1 ml; 75 cm2 flask approx 2-5 ml; 175 cm2 flask approx 5-10 ml).
Basic culture techniques for stem cell: 4. Sub-culturing (Passage) G. Roll flask gently to ensure trypsin contact with all cells. Place flask in 37℃ CO2 incubator. Different cell lines require different trypsinization time. To avoid over-trypsinization which can severely damage the cells, it is essential to check them every few minutes. H. As soon as cells have detached (the flask may require a few gentle taps) add some culture media to the flask (FBS in this will inactivate the trypsin) resuspend cells into the single cells by pipetting up and down.
Basic culture techniques for stem cell: 4. Sub-culturing (Passage) I. Using this cell suspension, pipette required volume of cells into new flasks at required split ratio (seeding). These flasks should then be topped up with culture media to required volume e.g. in 25 cm2 flask approx 5-10 ml; 75 cm2 flask approx 10-30 ml; 175 cm2 flask approx 40-150 ml J. Leave cells overnight to recover and settle. Change media to get rid of any residual trypsin.
Basic culture techniques for stem cell: 5. Changing media A. If cells have been growing well for a few days but are not yet confluent (e.g. if they have been split 1:10), then they will require media changing to replenish nutrients and keep correct pH. If there are a lot of cells in suspension (attached cell lines) or the media is starting to go orange rather than pinky-orange, then media change them as soon as possible.
Basic culture techniques for stem cell: 5. Changing media B. To change media, warm up fresh culture media at 37℃ in water bath for at least 30 min. Carefully remove the media from the flask into a waste pot containing some disinfectant. Immediately replace the media with desired amount of fresh pre-warmed culture media and return to CO2 37℃ incubator. (Passage number is the number of sub-cultures the cells have gone through. Passage number should be recorded and not get too high. This is to prevent use of cells undergoing genetic drift and other variations.)
Basic culture techniques for stem cell: 6. Freezing cells for long-term cell line storage: It is important to store cells for future studies. Cryopreservation ensures that you have back-up cells in case of contamination and loss of cell supply. It is best to cryopreserve cells when they are at their maximum growth rate or almost confluent. Cell banks: It is common practice to create a master bank consisting of 2 to 20 vials of the cell line. Then create one or two working banks from this with 2 to 20 vials in each (depending on how often the cells will be required). When the working bank is used up, a new working bank can be cultured and created from one vial of the original master bank. If possible, keep the master and workingbank in separate liquid nitrogen storage tanks. (This will ensure you always have a stock of cells from a lower passage number and it will also not be necessary to keep purchasing the cell line. )
Basic culture techniques for stem cell: 6. Freezing cells for long-term cell line storage: Materials A.1 ml-2 ml cryovial B. Cell culture medium with 10% FBS (Fetal bovine serum) and necessary supplements C. DMSO (Dimethyl sulfoxide), high purity, sterile, for cell culture D. Prepare freezing medium: to cell culture medium, add 5-10% (v/v) DMSO. E.15ml centrifuge tube. F. Cryo 1 ℃ freezing container (cryogenic controlled rate freezing container).
Basic culture techniques for stem cell: 6. Freezing cells for long-term cell line storage: Freezing cells A. Remove medium from one dish/flask, wash and trypsinize as written in the Cell culture guidelines. B. Once cells are detached, add back 5-10ml media and transfer to centrifuge tube (15ml sterile centrifuge tube). C. Count the cells using trypan blue for a viable cell count. The viability should be over 90% to ensure the cells are healthy enough for freezing. D. Spin down at 1000 rpm for 3 minutes and remove medium. E. Resuspend cells in enough freezing medium to create a cell suspension of 1×10⁶ cells per ml. Pipette up and down to ensure even mixture and aliquot about 1 ml into storage vials. This will provide 1×10⁶ cells per cryovial.
Basic culture techniques for stem cell: 6. Freezing cells for long-term cell line storage: Freezing cells F. Labeled with cell type, passage number, date, number of cells and initials. G. Transfer vials into a cryo 1 ℃ freezing container and place into a -80℃ freezer overnight. H. Transfer vial to liquid nitrogen and record location and all other information on cell bank. (This step must be done as soon as the cells are in freezing media. DMSO and some other cryoprotectants are toxic to cells and so should not be exposed to the cells at room temperature for any longer than necessary. Thawing of the vials and placing of the cell suspension back into culture media should also be done very quickly for the same reasons.)
Basic culture techniques for stem cell: 7. Thawing Cells: The vial should be thawed as rapidly as possible to minimize intracellular ice crystal growth during the warming process. *Check the index for location of the vial to be thawed. *Prepare medium and materials you need. *Remove the vial from freezer or liquid nitrogen tank. Check from the label that it is the correct one. *Place vial on the dry ice and transfer to 37℃ water bath. *While holding the top of the vial, gently agitate the vial, being careful not to allow water to penetrate the cap or seal as this will increase the chance of contamination.
Basic culture techniques for stem cell: 7. Thawing Cells: *When completely thawed, transfer contents of vial to 15ml test tube *Slowly add 10ml warm complete media to the cell suspension, gradually diluting the cells and cryoprotectant and spin at 1000g for 3 min. *Decant media and resuspend pellet in a volume of complete media appropriate for flask. *Transfer cells to flask and incubate at 37℃ and 5% CO2 *Next day check viability.
Basic culture techniques for stem cell: 8. Cell Counting:use hemocytometer slide Protocol A. Trypsinize the monolayer as for routine subculture. B. Transfer cell suspension to the 15ml tube. C. Prepare the Hemocytometer slide:clean the surface of the slide coverslip with 70﹪alcohol and place coverslip on the slide properly attached. Coverslip
Basic culture techniques for stem cell: 8. Cell Counting:use hemocytometer slide Protocol D. Mix the cell suspension and transfer 10µl to the chamber.
Basic culture techniques for stem cell: 8. Cell Counting:use hemocytometer slide Protocol E. Select a 10x objective, and focus on the grid lines in the chamber. Count the number of cell in 5 out of 25 squares (4 corner + central squares of central grid)includes cells touching the middle line on top and left. (If there are very few cells, count 25 squares). Hemocytometer grid:red square = 1 mm2green square = 0.0625 mm2yellow square = 0.04 mm2blue square = 0.0025 mm2at a depth of 0.1 mm.
Basic culture techniques for stem cell: 8. Cell Counting:use hemocytometer slide Calculate: Formula:C ﹦n/v C ﹦cell concentration N ﹦the number of cells counted V ﹦volume counted (ml) Depth of the chamber is 0.1mm and assuming that only the central 1mm2 is used V is 0.1mm3(cubic mm) or 1 × 10⁻⁴ ml, the formula then becomes C ﹦n ×104(count 25 squares cell #are 32, cell#/ml = 32 × 10,000 =320,000)
Basic culture techniques for stem cell: 8. Cell Counting:use hemocytometer slide If the cell concentration is high and only the five diagonal squares within the 1 mm2 were counter 1/5 of the total this equation becomes C =n ×5 ×10⁴ (count 5 squares cell #are 32, cell#/ml= 32 × 5×10,000 =1,600,000
LentivirusTransfection for stem cell: PROTOCOL:CaCl2 transfection (for 3.5cm dish) Day 1‧ 293FT cells preparation Split 293FT cells into 3.5cm dish in complete medium, make sure that cells should be 60-70% confluent on the day of transfection, and cells are healthy. Day 2‧ Transfection (lentivirus) 1. Mix plasmids for EGFP (enhanced green fluorescence protein) Mix 1.35 µg pFUGW (flap-Ubpromoter-GFP-WRE plasmid DNA) 1.014µg pCMV8.2 (core plasmid) – packing plasmid 0.68µg pVSV-G (surface plasmid, envelope glycoprotein from vesicular stomatitis virus) – packing plasmid in 1.5ml sterile tube, add H2O to 25µl.
LentivirusTransfection for stem cell: PROTOCOL:CaCl2 transfection (for 3.5cm dish) Day 2‧ Transfection (continue) 2. Add 25µl 0.5M CaCl2 to 1.5ml tube in step1, vortex to form DNA / CaCl2 solution (1 min). 3. Add 50µl 2X HeBS to the step2, vortex (a while is OK). 4. Leave the precipitates at room temperature for 30 min. 5. Vortex, then add the precipitates to 3.5cm dish (Day 1) and rocking the plate back and forth. 6. Incubate the cells overnight at 37℃ in 5% CO2 incubator.
LentivirusTransfection for stem cell: PROTOCOL:CaCl2 transfection (for 3.5cm dish) Day 3‧ Change medium Remove the medium containing the precipitates, and replace with 2 ml complete medium. Day 4‧Stem cells preparation Prepare 3.5cm dish with stem cells and should be 60-70% confluent on the day of transfection.
LentivirusTransfection for stem cell: • PROTOCOL:CaCl2 transfection (for 3.5cm dish) • Day 5‧ Harvest the virus and infection • 1. Transfer the culture medium containing virus to the 15ml sterile tube. • Filter the medium through the 0.45µm pore size membrane to the 15ml tube (step 1). • 3. Remove stem cells culture medium (Day 4). • 4. Add the virus medium and 8µl (stock:1mg /ml)polybrene per ml to the stem cells dish (step 3) and incubate the cells overnight at 37℃ in 5% CO2 incubator. • * DNA/ CaCl2 / HEPES mix volume 100µl or less, Maximum to 200µl. Polybrene (hexadimethrine bromide) is a cationic polymer used to increase the efficiency of infection of certain cells with a retrovirus in cell culture. Polybrene acts by neutralizing the charge repulsion between virions and sialic acid on the cell surface.
LentivirusTransfection for stem cell: PROTOCOL:CaCl2 transfection (for 3.5cm dish) Solution of transfection 1. 50 ml 0.5M CaCl2 3.67 g CaCl2﹒2H2O 50 ml H2O Filter sterilize through 0.45µm nitrocellulose filter 2. 100 ml 2X heBS (HEPES – Buffered saline) 1.64g NaCl 1.19g HEPES free acid 0.04g Na2HPO4﹒7H2O 80ml H2O Titrate pH to 7.05 with 5N NaOH Add H2O up to 100ml Filter sterilize through 0.45µm nitrocellulose filer
Packing plasmids Lentivirus plasmids Co-transfection Packing cells Packing cells producing pseudovirus particles Pseudovirus containing lentiviral expression construct Infection/Transduction Infected target cells with stable expression construct Target cells LentivirusTransfection for stem cell:
Results (Day 3): only with pFUGW
Results (Day 3): only with pFUGW
Results (Day 3): with pFUGW, pCMV8.2 & pVSV-G
Results (Day 5): with pFUGW, pCMV8.2 & pVSV-G
Results (Day 5): with pFUGW, pCMV8.2 & pVSV-G
Results (Day 5): with pFUGW, pCMV8.2 & pVSV-G
Results (Day 5): with pFUGW, pCMV8.2 & pVSV-G