Download
1 / 53
530 likes | 624 Views
How to Create a Blog for Your Classroom. Aka—Technology that will be really helpful in communicating with students and parents!. Say goodbye to old-school.

E N D
How to Create a Blog for Your Classroom Aka—Technology that will be really helpful in communicating with students and parents!
Say goodbye to old-school Photo from:<div xmlns:cc="http://creativecommons.org/ns#" about="http://www.flickr.com/photos/eurleif/255241547/"><a rel="cc:attributionURL" href="http://www.flickr.com/photos/eurleif/">http://www.flickr.com/photos/eurleif/</a> / <a rel="license" href="http://creativecommons.org/licenses/by-sa/2.0/">CC BY-SA 2.0</a></div>
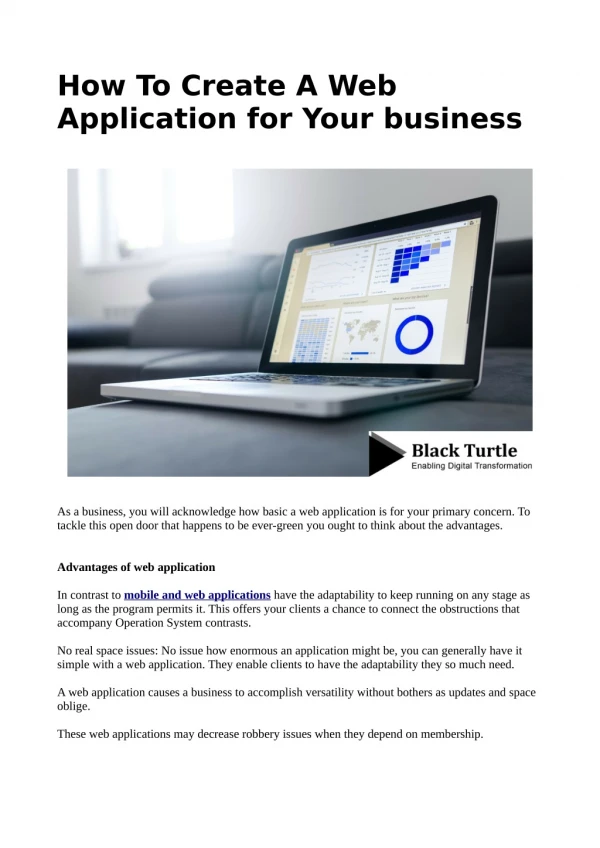
Why Blogs? • Like a webpage that allows parents to comment to you. • Free • Easy to post new information for parents. • Class calendar, post pictures, and post documents. • Students/parents links to internet resources. • Post tests/forms that organize answers for you. • Can connect to the school webpage.
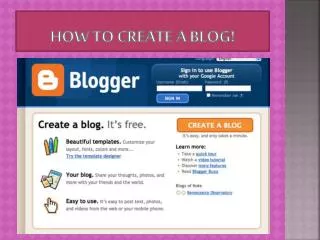
Getting Started • Go to www.blogger.com • Click create a blog • Create a username and password • Your display name is what you will be called on the blog—I use Mrs. Filipiak
Getting Started • Name your blog page. • Pick a template you like—you can always change it later!
Editing the Blog This is what your editing page looks like. Notice the tan tabs, they will be important!
Posting • Posting is a quick way to add an announcement to your blog. • Make sure you are in compose mode. Then, simply type what you want your post to say.
Posting • When you have finished typing out your post. Click publish post and it will automatically be posted on your blog.
Posting • You can also edit/delete posts or reply to comments that parents make on your posts.
Posting • A post looks like this:
Settings • Now that we’re in the settings tab, create a title and description for your blog. • You can check out the other subtabs too if you want to later.
Monetize • We’re skipping this one—basically it wants to put ads on your blog. Booooo!
Layout • This is the designing part of the blog. My favorite part! This screen shows the basics of how your blog page is set up. • Let’s click on “Add a Gadget.”
Gadgets • This gives you a whole list of gadgets you can add to your blog. • You could add a slideshow of pictures. • You could add a poll question. • You could add a bunch of links for your students to use. • You could EMBED something using the HTML/Javascript function.
What is embedding? • Embedding is taking something from another website and attaching it to yours so people can see it! • Here’s an example: I can go to YouTube and see a video that would be great for my students. How can I link that to my page? • Answer: You EMBED it!
Embedding • Embedding involves HTML coding, which is a whole bunch of words and symbols put together that somehow tell the blog to put what you are looking at on your blog. It’s kind of like a web address. . .but not exactly the same. • Let’s try embedding something together. • Go ahead an click the add gadget, add HTML/Javascript.
New Tab • Now open a new tab by clicking ctrl + T. • This allows you to have two WebPages open at the same time • Go to www.youtube.com • Type “sleepwalking dog” in the search bar.
You Tube Embedding • Your page will look like this. Pick the first video.
YouTube Embedding • You will see the video like this. Let’s pretend we want to put it on our blog. • Look for something that says HTML or embed.
Copying • Copy this code by highlighting it and pushing ctrl + c (at the same time). • Now click back to the tab that shows your blog. • You should have box like this. • Type sleepwalking dog in the title.
Pasting • Now paste all that stuff you copied back on youtube by clicking in the next section and pushing ctrl + v (at the same time). • Click “save.”
Success • You will see on your layout page that the video has been added. The video will now appear on your blog.
Changing the Layout • If you want the video somewhere else, click it and drag it on the layout page to move it. Then click “save.”
Picking a Template • If you want to make your blog look cool instead of boring, use a template. You can change it easily whenever you would like to. Simply click on “pick new template” on the layout view. • Select the design you like and click “save template.”
Good! • Now for the scary part! The options below are displayed on all blogs. • We don’t want students to have the option to click to the next blog since we have no idea what the next blog will be about. • Sooooooo . . . we get to modify our template to get rid of that option. • Don’t be scared, it looks worse than it is!
Getting Rid of the Next Page Option • In layout page mode, click on the edit HTML option. • All of this computer language defines how your template looks. • We’re just going to get rid of the navigation bar at the top.
Removing the Navigation Bar • You will see a bunch of HTML code. Start to scroll down and you will see a boxed description of the template you're using. It will look something like this: ----------------------------------------------- Blogger Template Style Name: ;lasdkfjadal;sdkfjasd Designer: xxxx URL: www.hflkasdjfhasdkljhf.com Date: 26 Feb 2020 Updated by: ;alksdfjasdl;fkja ----------------------------------------------- */
Removing the Navigation Bar • Right after the previous text, copy and paste the following: • #navbar-iframe { • height: 0px; • visibility: hidden; • display: none; • } • Select 'Save Template' and you should be set! • **Please note, if you change your template, you will need to do this again.**
Google is taking over the world! • Just trust me on this one. Google is super helpful to us! In fact, www.blogger.com is part of Google. • Go to www.google.com and click on calendar.
Google Calendar • Create a new calendar and name it something to do with school. • Put all important dates on it for school activities that parents would need to know about. • Now let’s go to calendar settings to make this useful for your blog.
Google Calendar • Pick the calendar you want to have available to parents. Click on “share this calendar” and make it “available to the public.” • Next—Click on the name of the calendar you want to share.
Embedding the Calendar • Click on the customize embedding options.
Embedding the Calendar • Make it the size, style, color you want. • Make sure you are only displaying your school calendar, or they will get to see your personal calendar too! • Click update HTML • Copy the HTML code (highlight, then push ctrl + c)
Embedding the Calendar • Now go back to your blog. • In the layout tab, under the page elements sub-tab, click “add a gadget.” • Choose HTML/Javascript. • Put a title for your calendar. • Paste the HTML code by pushing ctrl + v. • Click “save.” • Click and drag the calendar to where you want it on your blog. • The blog calendar will automatically update itself when you add or change something on the google calendar you chose.
Google Documents • To take something from your computer and put it on Google Documents, click on “upload.”
Google Documents • Now click “browse” and find the document you want to add from your computer and click open. • Next, give your document a parent friendly title, and click “upload file.”
Google Documents • You should be back on the main Google Documents page. • Click on the file you want to add to your blog. • Go to “share.”
Putting Documents on Your Blog • Click “publish as webpage.” • You have two options— • Publising it to your blog will show it under your postings and won’t automatically update. • The better option is to publish it as a webpage and click on the box that says automatically republish when changes are made.
Putting Documents on Your Blog • Copy the web address by pushing ctrl + c • Go to your blog in layout mode, page elements. • Click add gadget. Add a link list and Title it “Documents.”
Putting Documents on Your Blog • Paste the web address from your document into New URL. • Give the document the name you want parents to see and then click “add link.” Then you can put more documents on there. When you are done, click “save.” • Basically, you just made your document into a website that parents can access by clicking something on your blog.
Putting Documents on Your Blog • Now when parents look at your site, they see a documents section and can click on the links to see what you’ve posted. • You can add more documents by clicking on your documents file and clicking edit. Then add a new file. You can also delete files there as well.
Link Lists • If you want to make a list of websites available to you students, click add a gadget, link list. • This is the same type of list you made for your documents. I would title it Websites for Students or something along those lines. • Put the web address of the website you want to add in the “New URL” box. • Put the name you want the kids to see in the “New Site Name.”
Link Lists • My link lists looks like this:
Contact Box • To add a place with your contact information for parents, add a gadget, choose text box. • Title it “Contact Mrs./Mr. ________ • Type in your information. • I haven’t found a way to make it link to your email address when you click on it—if you do, let me know!
Editing • Go to www.blogger.com • Sign-in and this page called your “Dashboard” will appear with all of the tab options, they just look different. Once you click on one, it will go back to what you are used to seeing.
Editing • If you are logged in, you can also edit your page by viewing it and clicking on the tool icon.
Google Documents--Forms • Click new, form • Create questions and answers as desired. • Click “done” when you are finished creating a question. • Click “save” when you are completely done.
Google Documents--Forms • Click the pencil icon to edit a question. • Click add item to add more questions.
Google Documents--Forms • You can also change the template (theme). • You can change the response type. • You can decide whether or not the question is required.