Download
1 / 43
440 likes | 449 Views
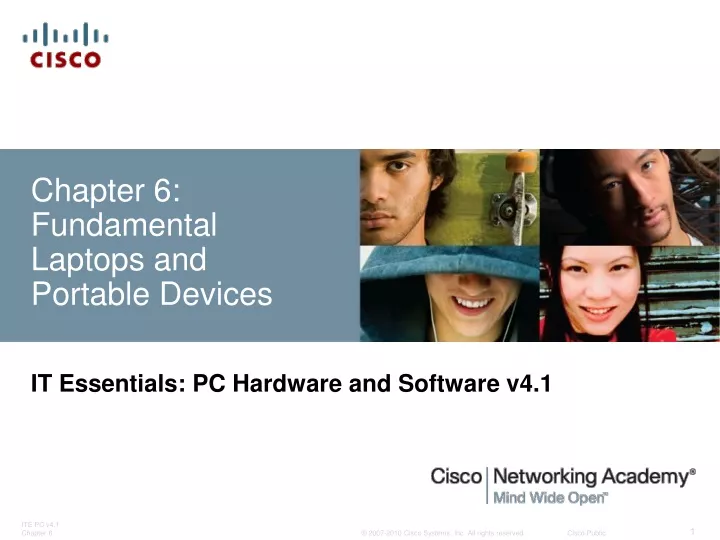
Chapter 6: Fundamental Laptops and Portable Devices. IT Essentials: PC Hardware and Software v4.1. Chapter 6 Objectives. 6.1 Describe laptops and other portable devices 6.2 Identify and describe the components of a laptop 6.3 Compare and contrast desktop and laptop components

E N D
Chapter 6: Fundamental Laptops and Portable Devices IT Essentials: PC Hardware and Software v4.1
Chapter 6 Objectives • 6.1 Describe laptops and other portable devices • 6.2 Identify and describe the components of a laptop • 6.3 Compare and contrast desktop and laptop components • 6.4 Explain how to configure laptops • 6.5 Compare the different mobile phone standards • 6.6 Identify common preventive maintenance techniques used for laptops and portable devices • 6.7 Describe how to troubleshoot laptops and portable devices
Virtual Laptop • Virtual laptop is a stand-alone tool designed to: • supplement classroom learning • provide a virtual “hands-on” experience where real equipment is limited
Laptops and Portable Devices • Notebooks, laptops, and tablets are types of portable computers. For clarity and consistency in this course, all portable computers will be called "laptops". • Personal Digital Assistants (PDAs) offer features such as games, web surfing, e-mail, instant messaging, and many other features offered by PCs. • Smartphones are cell phones with many built-in PDA capabilities.
Components of a laptop • Common laptop features: • Integrated display screen in lid • Integrated keyboard • AC power source or rechargeable battery • Hot-swappable drives and peripherals • Docking station or port replicator to connect to peripherals
Bluetooth status LED Standby LED Battery status LED Components on the outside of a laptop • Top view of virtual laptop
Parallel port AC power connector Battery bay Components on the outside of a laptop (Continued) • Rear view of virtual laptop
Ventilation grill RJ-11 modem Network LEDs Microphone jack Ethernet port USB port PC card slot Headphone jack Security keyhole S-video port Components on the outside of a laptop (Continued) • Left side view of virtual laptop
Latch Infrared port Speakers Ventilation grill Components on the outside of a laptop (Continued) • Front view of virtual laptop
Optical drive VGA port Drive bay indicator Components on the outside of a laptop (Continued) • Right side view of virtual laptop Optical drive indicator
Battery latches Docking connector RAM access panel Hard drive access panel Components on the outside of a laptop (Continued) • Underside view of virtual laptop
Volume controls Power button Pointer controller Fingerprint reader Keyboard Touchpad Components on the inside of a laptop • Open view of laptop
Hard drive Battery Num lock Bluetooth Caps lock Wireless Standby Power on Components on the inside of a laptop (Continued) • LEDs inside laptop
Components on the inside of a laptop (Continued) Monitor, Fn key, and Function keys F1 through F12 • A laptop monitor is a built-in LCD. • The Fn key is used to activate a second function on a dual-purpose key. • The purpose of the Function keys F1-to-F12 depends on the operating system and the application running. • Individual function keys can perform up to seven separate operations when pressed alone or in combination with the Shift, Control, and Alt keys.
Power button Components on a docking station • Top view of docking station Eject button Docking connector
Headphone connector USB port Line In connector PC card slot VGA port DVI port AC power connector Parallel port Keyboard port Ethernet port Exhaust vent RJ-11 port Serial port Mouse port External-diskette-drive connector Components on a docking station (Continued) • Rear view of docking station
Key lock Components on a docking station (Continued) • Right side view of docking station
Compare desktop components and laptop components • Desktop components tend to be standardized. They usually meet universal form factors. • Laptop manufacturers focus on refining laptop components to make them more efficient and compact as a result, laptop components are proprietary. • You may not be able to use components made by one laptop manufacturer to repair a laptop made by another manufacturer.
Compare desktop and laptop CPUs • Laptop processors are designed to use less power and create less heat than desktop processors. As a result, laptop processors do not require cooling devices that are as large as those found in desktops. • Laptop processors also use CPU throttling to modify the clock speed as needed to reduce power consumption and heat. These specially-designed processors allow a laptop to operate longer when using a battery.
Compare desktop and laptop power options Laptop Power Options Desktop Power Options
Configure Laptops • To allow applications and processes to run smoothly: • Configure and allocate system resources. • Install additional components and plug-ins. • Change environmental settings to match software requirements. • A laptop can be customized for specific purposes by adding external components. Adding external components is usually accomplished through the use of Plug and Play, but occasionally driver installation and additional configuration may be required. • Follow safe removal procedures when disconnecting hot-swappable and non-hot-swappable devices.
Configure Laptop Power Settings • The Advanced Configuration and Power Interface (ACPI) standards create a bridge between the hardware and OS and allow technicians to create power management schemes to get the best performance from the computer. • The ACPI standards are applicable to most computers, but they are particularly important when managing power in laptops. • These are the steps to access the ACPI settings in the BIOS: • Enter BIOS setup by pressing the appropriate key or key combination while the computer is booting. Typically this is the Delete key or the F2 key, but there are several other options. • Locate and enter the “Power Management settings” menu item. • Use the appropriate keys to enable ACPI mode. • Save and Exit BIOS setup.
Power Settings in Windows XP and Vista • The Power Options feature in Windows XP or Windows Vista allows you to reduce the power consumption of a number of devices or of the entire system. Use Power Options to control the power management features of the following: • Hard drive • Display • Shut Down, Hibernate, and Suspend modes (Windows XP) • Shut Down, Hibernate, and Sleep modes (Windows Vista) • Low-battery warnings • To configure your power settings, click:Start > Control Panel > Power Options
Replacing Laptop Components • CAUTION: Always disconnect power and remove the battery before installing or removing laptop components that are not hot-swappable.
Laptop Communication Methods • Laptops use several different communication methods: • Ethernet • Wireless Ethernet • Modem • Bluetooth • Infrared • Cellular WAN
Mobile Phone Standards • 1G - First-generation phones primarily used analog standards, including Advanced Mobile Phone System (AMPS) and Nordic Mobile Telephone (NMT). • 2G- Second-generation cell phones were marked by a switch from analog to digital standards. 2G standards included Global System for Mobile (GSM), Integrated Digital Enhanced Network (iDEN), and Code Division Multiple Access (CDMA). • 2.5G - As 3G cell phone standards were being developed, extensions to the existing 2G standards were added. These transitional standards are known as 2.5G standards. • 3G - Third-generation standards enable cell phones to send and receive text, photos, and video, and access the Internet and to use the Global Positioning System (GPS). • 4G - Fourth-generation standards have higher data rates which allow users to download files, such as video and music.
Proper Cleaning Procedures • Follow proper cleaning procedures to clean a laptop. • CAUTION: • Do not spray cleaning solution directly onto the LCD display. • Use products specifically designed for cleaning LCD displays. • Use a soft, lint-free cloth with an approved cleaning solution to avoid damaging laptop surfaces. • Apply the cleaning solution to the lint-free cloth, not directly to the laptop. • Keyboard • Ventilation • LCD display • Touch pad • Floppy drive • Optical disk drive • CD or DVD disc
Optimal Operating Environments • Pack for transport • Clean properly • Ventilate • Air temperature • Humidity
Troubleshooting Process Step 1 Identify the problem Step 2Establish a theory of probable causes Step 3Determine an exact cause Step 4 Implement a solution Step 5Verify solution and full system functionality Step 6 Document findings
Step 1 - Identify the Problem • Laptop information • Manufacturer, model, OS, network environment, connection type • Open-ended questions • What problems are you experiencing with the laptop? • What software has been installed recently? • What were you doing when the problem was first identified? • What error messages have you received? • Closed-ended questions (Can be answered with a ‘yes’ or no’) • Is the laptop under warranty? • Is the laptop currently using the battery? • Can the laptop operate using the AC adapter? • Can the laptop boot and show the operating system desktop?
Step 2 - Establish a Theory of Probable Causes • The problem may be simpler than the customer thinks. • Create a list of the most common reasons why the error would occur. • Battery does not have a charge • Battery will not charge • Loose cable connections • Keyboard does not work • Num Lock key is on • Loose RAM
Step 3 - Determine the Exact Cause • Test your theories of probable causes one at a time, starting with the quickest and easiest. • Use AC adapter with laptop • Replace the battery • Reboot the laptop • Check BIOS settings • Disconnect and reconnect the cables • Disconnect peripherals • Toggle Num Lock key • Remove and reinstall RAM • If Caps lock key is on, turn it off • Non-bootable media in a boot device • Password has changed • If the exact cause of the problem has not been determined after you have tested all your theories, establish a new theory of probable causes and test it.
Step 4 - Implement a Solution • If a quick procedure does not correct the problem, you might need to research the problem further to establish the exact cause. • Divide larger problems into smaller problems that can be analyzed and solved individually. • Create a list of possible solutions and implement them one at a time. If you implement a possible solution and it does not work, reverse the solution and try another.
Step 5 - Verify Solution and System Functionality • Verifying full system functionality and implementing any preventive measures if needed. This ensures that you have not created another problem while repairing the computer. • Reboot the laptop • Attach all peripherals • Operate laptop using only battery • Print a document from an application • Type sample document to test keyboard • Check Event Viewer for warnings or errors • Have the customer verify the solution and system functionality.
Step 6 - Document Findings • Discuss the solution with the customer • Have the customer confirm that the problem has been solved • Give the customer all appropriate paperwork • Document the process in the work order and in your technician’s journal: • Problem description • Solution • Components used • Amount of time spent in solving the problem
Common Problems and Solutions • Laptop problems can be attributed to hardware, software, networks, or some combination of the three. You will resolve some types of laptop problems more often than others.
Chapter 6 Summary • Laptops and PDAs are becoming increasingly popular due to reduced costs, lighter weights, increased capabilities, and battery power for portability. • PDAs and Smartphones are small handheld devices with many of the capabilities of a computer, such as an address book, calendar, e-mail, and Internet access. • Laptops and desktops have ports that are virtually the same, so peripherals are interchangeable. Laptops can use docking stations or port replicators to quickly connect to desktop peripherals and AC power. • Desktop and laptop components, such as motherboards, are not interchangeable. Additionally, laptop components tend to be proprietary to each manufacturer and designed with unique form factors. • The laptop CPU is designed to use less power and create less heat than the desktop computer. It uses CPU throttling to reduce power consumption and heat.
Chapter 6 Summary (Continued) • Functionality of the laptop can be expanded by adding components via PC Card or ExpressCard slots and USB, Firewire, and parallel ports. • An important component of laptop portability is the ability to run on battery power. The current method of managing power is through the operating system with the Advanced Configuration and Power Interface (ACPI). The ACPI standard defines six power management states. • There are several components of a laptop that may need to be replaced. Steps are defined to replace the battery, optical drive, hard drive, memory, and PC Cards. • Cell phone standards were developed in the 1980s. The current third-generation standards enable cell phones to share some laptop functions, such as e-mail, Internet access, address, and calendar functions. Standards have not been adopted worldwide. • Preventive maintenance will ensure optimal operation of the laptop. It is important to keep the laptop clean and in safe environments. It is critical to use the correct materials and techniques when cleaning the various components of a laptop. Procedures for cleaning the components are presented.
Chapter 6 Summary (Continued) • Dust, temperature, and humidity can affect laptop performance. Basic guidelines are to keep the laptop clean, with good ventilation and room temperature between 45 to 90 degrees F (7 to 32 degrees C) and humidity levels in the range of 10 to 80 percent. • Always verify that repair of a laptop is cost-effective. • Troubleshooting laptop problems requires the technician to identify, repair, and document the problem. Troubleshooting steps include: Gather data from customer, verify the obvious, try quick solutions first, gather data from the computer, evaluate the problem, implement the solution, and close with the customer. • When troubleshooting wireless-capable devices, check all status LEDs and signal strength indicators. Remove all unnecessary peripherals to isolate the problem.
Chapter 6 Summary (Continued) • Check for external problems, such as connection errors, power errors, and function key errors. Connection errors can often be solved by removing and reinserting components. Check in Device Manager for errors. Power errors can be caused by the use of incorrect adaptors, damaged batteries, damaged AC adaptors, or dead wall outlets. Check components controlled by Function keys. • Try quick solutions first to solve laptop problems. Reboot and verify the BIOS settings, start the laptop in safe mode, and use the Last Known Good Configuration Option. • For problem resolution, gather information from the computer from the Device Manager, Network Settings, Power Options, Event Viewer, and System Configuration. • Resources for troubleshooting should include the following: other technicians, Internet resources, manufacturers’ FAQs, and online forums. • The final steps in the troubleshooting process are to test the laptop in all scenarios, discuss the solution with the customer, fill out all necessary paperwork and billing documents, and document the solution.