Download
1 / 29
340 likes | 864 Views
Yeast Products. Contents. Yeast Products -------------------------------------------------- 1 Understanding Yeast Products ------------------------------ 2 Mixing Methods --------------------------------------------------5 Steps in Yeast Dough Production -------------------------- 6

E N D
Contents • Yeast Products -------------------------------------------------- 1 • Understanding Yeast Products------------------------------ 2 • Mixing Methods --------------------------------------------------5 • Steps in Yeast Dough Production -------------------------- 6 • Dough Formulas and Techniques -------------------------- 10 • Hard Rolls Recipe --------------------------------------------- 10 • Rolled-In Doughs: Danish Pastry and Croissants ------ 11 • Soft Rolls & French Bread Recipes -------------------------------11 • White Pan Bread & Rye Bread and RollsRecipes ---------12 • Focaccia Recipes ----------------------------------------------------- 13 • Brioche Recipes ------------------------------------------------------- 14 • Sweet Roll Dough Recipes ----------------------------------------- 15 • Danish Pastry Recipes -----------------------------------------------16 • Rolling-in procedure for Danish and croissant dough – 17 • Croissants Recipe ---------------------------------------------------- 17 • Rolling-in procedure for Danish and croissant dough --18 • Fillind and Toppings for Sweet Dough Products and Danish 18- • Cheese Filling Recipe ----------------------------------------------- 19 • Makeup Techniques -------------------------------------------- 21 • Sweet Dough Products ---------------------------------------- 25 • Braided coffee cake- Spiral Danish rolls ------------------ 27 • Danish pockets- Croissants ---------------------------------- 28 • Review& Questions --------------------------------------------- 29
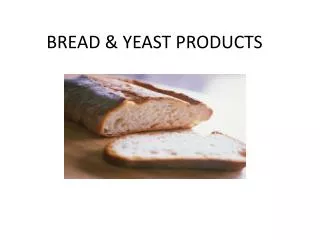
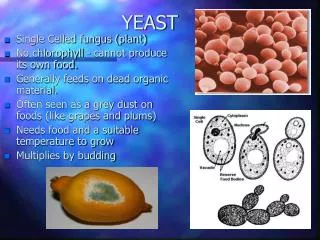
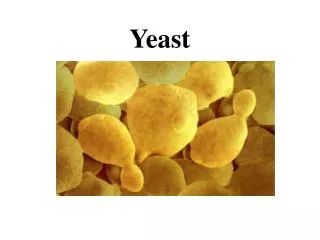
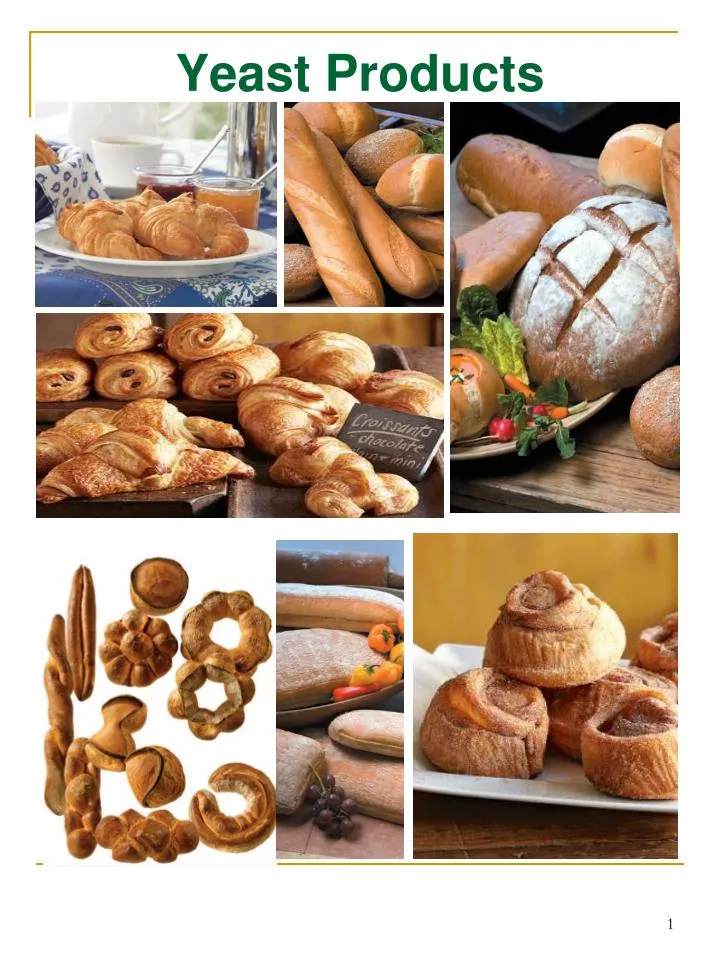
Yeast Products In its simplest form, bread is nothing more than a baked dough of flour and water, leavened by yeast. In fact, some hard-crusted French breads contain only these ingredients, plus salt. Other kinds of bread contain additional ingredients, including sugar, shortening, milk, eggs, and flavorings. But flour, water, and yeast are still the basic building blocks of all breads. Yet for something that seems so simple, bread can be one of the most exacting and complex products to make. Success in bread making depends largely on your understanding two basic principles: gluten development, which we discussed in the previous chapter, and yeast fermentation, which we have touched on and which we will study in greater detail here. This chapter focuses on the production of many kinds of yeast products, including breads, dinner rolls, sweet rolls, Danish pastry and croissants.
Understanding Yeast Products • After reading this chapter, you should be able to • Produce breads and dinner rolls. • Produce sweet dough products. • Produce Danish pastry and croissants. Yeast Product Types Although all yeast doughs are made according to essentially the same basic principles, it is useful to divide yeast products into categories such as the following. REGULAR YEAST DOUGH PRODUCTS Lean Dough Products; A lean dough is one that is low in fat and sugar. 1. Hard-crusted breads and rolls, including French and Italian breads, Kaiser rolls and other hard rolls, and pizza. These are the leanest of all bread products. 2. Other white breads and dinner rolls. These have a higher fat and sugar content and sometimes also contain eggs and milk solids. Because they are slightly richer, they generally have soft crusts. 3. Whole grain breads. Whole wheat and rye breads are the most common. Many varieties of rye breads are produced with light or dark flours or with pumpernickel flour and with various flavorings, especially molasses and caraway seeds. Rich Dough Products; There is no exact dividing line between rich and lean doughs, but in general, rich doughs are those that contain higher proportions of fat, sugar, and sometimes eggs. 1. Nonsweet breads and rolls, including rich dinner rolls and brioche. These have a high fat content but low enough sugar so that they can be served as dinner breads. Brioche dough is especially rich, made with a high proportion of butter and eggs. 2. Sweet rolls, including coffee cakes and many breakfast and tea rolls. These have high fat and sugar and usually eggs. They are usually made with a sweet filling or topping. ROLLED-IN YEAST DOUGH PRODUCTS Rolled-in doughs are those in which a fat is incorporated into the dough in many layers, by using a rolling and folding procedure. The alternating layers of fat and dough give the baked product a flaky texture. 1. Nonsweet rolled-in doughs: croissants. 2. Sweet rolled-in doughs: Danish pastry.
Mixing Methods Mixing Methods Mixing yeast doughs has three main purposes: 1. To combine all ingredients into a uniform, smooth dough. 2. To distribute the yeast evenly throughout the dough. 3. To develop gluten. Two principal mixing methods are used for yeast doughs: the straight dough method and the sponge method. 1. STRAIGHT DOUGH METHOD There is only one step in this method, as practiced by many bakers: PROCEDURE: Combine all ingredients in the mixing bowl and mix. Some bakers dissolve the compressed yeast in some of the water before adding the remaining ingredients. Others omit this step. Active dry yeast, on the other hand, must be rehydrated before mixing. The advantage of softening the yeast in some of the water is that it helps to ensure that the yeast is evenly distributed in the dough. 2. MODIFIED STRAIGHT DOUGH METHOD FOR RICH DOUGHS For rich sweet doughs, the method is modified to ensure even distribution of the fat and sugar. PROCEDURE 1. Soften the yeast in part of the water. 2. Combine the fat, sugar, salt, milk solids, and flavorings and mix until well combined, but do not whip until light. 3. Add the eggs gradually, as fast as they are absorbed. 4. Add the liquid and mix briefly. 5. Add the flour and yeast. Mix into a smooth dough. 3. SPONGE METHOD Sponge doughs are prepared in two stages. PROCEDURE 1. Combine the liquid (or part of the liquid), the yeast, and part of the flour (and sometimes part of the sugar), and mix into a thick batter or soft dough. Let ferment until double in bulk. 2. Punch down and add the rest of the flour and remaining ingredients. Mix to a uniform, smooth dough.
Steps in Yeast Dough Production Steps in Yeast Dough Production There are 12 basic steps in the production of yeast breads. These steps are applied to yeast products in general, with some variations depending on the particular product. 1. Scaling ingredients 2. Mixing 3. Fermentation 4. Punching 5. Scaling 6. Rounding 7. Benching 8. Makeup and panning 9. Proofing 10. Baking 11. Cooling 12. Storing As you can see, mixing of ingredients into a dough is only one part of a complex procedure. 1. SCALING INGREDIENTS All ingredients must be weighed accurately. The only items that may be measured by volume are water, milk, and eggs, which may be scaled at 1 pint per pound (or 1 liter per kilogram). 2. MIXING Use the dough arm attachment when using a vertical mixer. Mix for the specified time. The first two purposes of mixing combining the ingredients into a dough and distributing the yeast are accomplished during the first part of mixing. The remaining time is necessary to develop the gluten. Overmixed and undermixed doughs have poor volume and texture. It is necessary for you to learn to tell by sight and feel when a dough is thoroughly mixed. This can be done only through experience and through the guidance of your instructor. A properly developed dough should feel smooth and elastic. A lean dough should not be sticky. Sometimes it is necessary to add a little more flour if the dough hasn't lost its stickiness after most of the mixing time has passed. Rich doughs are generally undermixed slightly, because a greater tenderness is desired for these products. Note: Mixing times given in bread formulas in this book are only guidelines. Small mixers might be damaged if they are run at too high a speed with a stiff dough. In such cases, use a lower speed and extend the mixing time as necessary. Depending on the mixer, developing a dough at first or slow speed requires about twice as much mixing time as at second speed. Follow the manufacturer's recommendations. 3. FERMENTATION Fermentation is the process by which yeast acts on the sugars and starches in the dough to produce carbon dioxide gas and alcohol. PROCEDURE 1. Place the dough in a lightly oiled container and oil the surface to prevent a crust from forming. (This may not be necessary if humidity is high—about 75%.) 2. Cover the container lightly and let the dough rise at a temperature of about 80°F ( 27°C). 3. Fermentation is complete when dough has doubled in volume. If fermentation is complete, a dent will remain after the hand is pressed into the top of the dough. Gluten becomes smoother and more elastic during fermentation. An underfermented dough will not develop proper volume, and the texture will be coarse. A dough that ferments too long or at too high a temperature will become sticky, hard to work, and slightly sour. An underfermented dough is called a young dough. An overfermented dough is called an old dough. Doughs with weak gluten, such as rye doughs and rich doughs, are usually underfermented or "taken to the bench young."
4. PUNCHING Punching is not hitting the dough with your fist. It is a method of deflating the dough that expels carbon dioxide, redistributes the yeast for further growth, relaxes the gluten, and equalizes the temperature throughout the dough. PROCEDURE Pull up the dough on all sides, fold over the center, and press down. Then turn the dough upside down in the bowl. A second fermentation and punching may or may not take place, depending on the product. 5. SCALING Using a bakers scale, divide the dough into pieces of uniform weight, according to the product being made. During scaling, allowance is made for weight loss due to evaporation of moisture in the oven. This weight loss is approximately 10 to 13 percent of the weight of the dough. Allow an extra 1 ½ to 2 ounces of dough for each 1 pound of baked bread or 50 to 65 grams per 500 grams. 6. ROUNDING After scaling, the pieces of dough are shaped into smooth, round balls. This procedure forms a kind of skin by stretching the gluten on the outside of the dough into a smooth layer. Rounding simplifies later shaping of the dough and also helps retain gases produced by the yeast.
Your instructor will demonstrate rounding techniques. Machines are also available which divide and round portions of dough automatically Figure .1 illustrates a piece of dough being rounded by hand. 7. BENCHING Rounded portions of dough are allowed to rest on the bench for 10 to 15 minutes. This relaxes the gluten to make shaping the dough easier. Also, fermentation continues during this time. 8. MAKEUP AND PANNING The dough is shaped into loaves or rolls and placed in pans or on baking sheets. For all loaves and rolls, the seam must be centered on the bottom to avoid splitting during baking. Breads and rolls take a great many forms. A variety of shapes and techniques are presented in the next section. 9. PROOFING Proofing is a continuation of the process of yeast fermentation, which increases the volume of the shaped dough. Bakers use two different terms so they can distinguish between fermentation of the mixed dough and proofing of the made-up product before baking. Proofing temperatures are generally higher than fermentation temperatures. PROCEDURE Place the panned products in a proof box at 80° to 95°F (27° to 35°C) and about 85 percent humidity. Proof until double in bulk. If a proof box is not available, come as close to these conditions as you can by covering the products to retain moisture and setting them in a warm place. Underproofing results in poor volume and dense texture. Overproofing results in coarse texture and some loss of flavor. Figure. 1 To round a piece of dough, roll the dough on the bench with the palm of your hand. As you rotate the dough, the edge of your hand should pinch the dough against the bench. This movement stretches the surface of the dough so that it is completely smooth except for a seam at the bottom where it was pinched together. Rich doughs are slightly underproofed, because their weaker gluten structure will not withstand too much stretching.
10. BAKING As you recall from the previous chapter, many changes take place in the dough during baking. The most important changes are these: 1. Oven spring, which is the rapid rising in the oven due to production and expansion of trapped gases as a result of the oven heat. The yeast is very active at first but is killed when the temperature inside the dough reaches HOT (60°C). 2. Coagulation of proteins and gelatinization of starches. In other words, the product becomes firm and holds its shape. 3. Formation and browning of the crust. Load the ovens carefully, because proofed doughs are fragile until they become set by baking. Oven temperatures must be adjusted for the product being baked. Rolls spaced apart are baked at a higher temperature than large loaves, so that they become browned in the short time it takes to bake them. In general, popular American lean breads are baked at 400°F to 425°F (200°C to 220°C), while some French breads and rolls are baked at 425° to 475°F (220° to 245°C). Rich doughs and sweet doughs are baked at a lower temperature, 350° to 400°F (175° to 200°C), because their fat, sugar, and milk content makes the crust brown faster. Hard-crusted breads are baked with steam injected into the oven during the first part of the baking period. This aids the formation of a thin, crisp crust. Rye breads also benefit from baking with steam for the first 10 minutes. A break on the side of the loaf is caused by continued rising after the crust is formed. To allow for this final expansion, hard-crusted breads are cut or scored before baking by making shallow slashes on the top of the loaf with a sharp knife or razor. Small rolls bake completely without a break, so they are usually not scored. Baking times vary considerably depending on the product. A golden brown crust color is the normal indication of doneness. Loaves should sound hollow when thumped, if they are done. 11. COOLING After baking, bread must be removed from pans and cooled rapidly on racks to allow the escape of excess moisture and alcohol created during fermentation. Rolls baked apart from each other on sheets may be left on them, because they will get adequate air circulation. If soft crusts are desired, breads may be brushed with melted shortening before cooling. Do not cool in a draft, or crusts may crack. 12. STORING Breads to be served within 8 hours may be left on racks. For longer storage, wrap cooled breads in moisture-proof bags to retard staling. Bread must be thoroughly cool before wrapping, or moisture will collect inside the bags. Wrapping and freezing maintains quality for longer periods. Refrigeration, on the other hand, increases staling. Hard-crusted breads should not be wrapped (unless frozen), or the crusts will soften. Because of the complexity of bread production, many things can go wrong. To remedy common bread faults, check Table 1 for possible causes and correct your procedures.
Dough Formulas and Techniques Bread and Roll Formulas The basic yeast dough mixing and baking methods discussed earlier in this chapter apply to the following formulas. Therefore, the methods are not repeated in detail for each formula. The basic procedures are indicated, and you should refer to the first part of this chapter if you need to refresh your memory for details. Makeup techniques for loaves, rolls, and other items are described and illustrated after this recipe section. Hard Rolls
Soft Rolls French Bread
White Pan Bread Rye Bread and Rolls
Rolled-In Doughs: Danish Pastry and Croissants Rolled-In Doughs: Danish Pastry and Croissants Rolled-in doughs contain many layers of fat sandwiched in between layers of dough. These layers create the flakiness that you are familiar with in Danish pastry. Two basic kinds of rolled-in yeast doughs are made in the bakeshop: Sweet: Danish pastry Nonsweet: Croissants Rolled-in doughs are mixed only slightly, because the rolling-in procedure continues to develop the gluten. The preferred fat for flavor and melt-in-the-mouth qualities in rolled-in doughs is butter. Specially formulated shortenings are available when lower cost and greater ease of handling become more important considerations. Danish Pastry
Rolling-in procedure for Danish and croissant dough 1.1. Roll out the dough 1/2 to 3/4 inch (1 to 2 cm) thick into a rectangle about three times as long as it is wide. 1. 2. Spot the butter over two-thirds of the length of the dough as shown, leaving a 1-inhch (2 ½ -cm) margin at the edges. 1.3. Fold the third without fat over the center third. 1.4. Fold the remaining third on top. Rest the dough in the retarder (under refrigeration) 20 to 30 minutes to allow the gluten to relax. 1.5. Place the dough on the bench at right angles to its position in step d. This step must be taken before each rolling-out of the dough, so that the gluten is stretched in all directions, not just lengthwise. 1.6. Roll out the dough into a rectangle. 1.7. Fold again into thirds. Be sure to brush off excess dusting flour from between the folds. You have now completed the first turn or fold; incorporating the butter doesn't count as a turn. Press one finger in the dough near the end to make one indentation. This indicates "1 turn" to anyone who may have to take up where you left off, or to you if you have several batches going. Refrigerate the dough 20 to 30 minutes to relax the gluten. Repeat the above rolling and folding procedures for a second and third turn, resting the dough between turns. Mark the number of turns in the dough with two or three fingers. After the third turn, rest the dough in the retarder for several hours or overnight. Cover it with plastic film to prevent crusting. The dough is then ready for makeup. Croissants
ROLLING-IN PROCEDURE FOR DANISH AND CROISSANT DOUGH ROLLING-IN PROCEDURE FOR DANISH AND CROISSANT DOUGH The rolling-in procedure has two parts: 1. Enclosing the fat in the dough. In the method illustrated in Figure 1.-1.7, the fat is spotted on two-thirds of the dough and the dough is folded in thirds like a business letter. This results in five layers: three layers of dough and two layers of fat. 2. Rolling out and folding the dough to increase the number of layers. In these doughs, we use a simple fold, or threefold, which means that we fold the dough in thirds. Each complete rolling and folding step is called a turn. We give the dough three turns, creating over 100 layers of dough and fat. FILLINGS AND TOPPINGS FORSWEET DOUGH PRODUCTS AND DANISH Cinnamon Sugar Streusel or Crumb Topping
Clear Glaze for Coffee Cakes and Danish Date, Prune, or Apricot Filling Almond Filling
Makeup Techniques • Makeup Techniques • The object of yeast dough makeup techniques is to shape the dough into rolls or loaves that bake properly and have an attractive appearance. When you shape a roll or loaf correctly you are stretching the gluten strands on the surface into a kind of smooth skin. This tight gluten surface holds the item in shape. This is especially important for loaves and rolls that are baked freestanding, not in pans. • Units that are not made up correctly will develop irregular shapes and splits and may flatten out on the pan. • Following are a few of the many different makeup techniques for yeast doughs. • HARD ROLLS AND BREADS • Round Rolls • Scale the dough as indicated in the recipes, usually 1 lb (450 g) per dozen. • Round each unit as shown in Figure 1 • Place rolls 2 inches (5 cm) apart on sheet pans sprinkled with cornmeal. • Round Loaves • Flatten the rounded, benched dough into a circle. Fold the four sides over the center, then round again. • Place on sheet pans sprinkled with cornmeal. • Club Rolls • Make up as shown in Figure 2.1. • Place 2 inches (5 cm) apart on sheet pans sprinkled with cornmeal. • Crescent Rolls • Scale dough into 20-oz (600-g) units. • After rounding and benching, flatten dough and roll out into a circle 12 inches (30 cm) across. 2.1 Making club rolls. 2.2. Begin to roll up the dough by folding over the back edge of the rectangle. Press the seam firmly with the fingertips. 2.3. Continue to roll the dough, always pressing the seam firmly after each turn. As you roll up the dough, the front edge will appear to shrink. Stretch the front corners as shown by the arrows to keep the width uniform. 2.4. When the roll is finished, seal the seam well so that you have a tight roll. Figure 1 Rounding small rolls is nearly the same as rounding large loaves, except that the whole ball fits under the hand. Roll the piece of dough vigorously in a tight circle on the bench, using the edge of the thumb and little finger to stretch the dough across the top of the roll into a seam on the bottom—the same way you use the edge of your hand in Figure 25.1. 2.5. Docking the proofed roll with a single slash gives the baked roll this appearance.
3. With a pastry wheel, cut the dough circle into 12 equal wedges or triangles. (Alternative method: For large quantities of dough, roll out into a rectangle and cut like croissant dough. 4. Roll the triangles into crescents using the same technique as for croissants. Note: If using soft roll dough, brush the dough with butter before cutting into triangles. Do not use any fat with hard roll doughs. French-type Loaves Figure 1. Tying a single-knot roll. 1. Scale the dough into 12 to 18 oz (350 to 500 g) units. 2. Form into long, thin loaves following the general procedure used for club rolls, except that the ends should be tapered. Roll the loaf on the bench under the palms of the hands to even out the shape. This will produce an elongated, oval- shaped loaf. The ends should be tapered and rounded, not pointed. 3. If a longer, thinner loaf is desired, relax these units again for a few minutes. Flatten them with the palms of the hands and stretch the dough lightly to increase its length. Once again, roll up tightly and seal the seam well. Roll on the bench under the palms of the hands to even it out and to stretch it to the desired shape and length. 4.Place well apart, seam side down, on sheet pans sprinkled with cornmeal. SOFT ROLL DOUGHS Tied or Knotted Rolls 1. Scale dough 16 to 20 oz (450 to 600 g) per dozen. 2. With the palm of the hand, roll each unit on the workbench into a strip or rope of dough. 3. Tie rolls as shown: Single-knot rolls: Figure1 . Double-knot rolls: Figure 2 Braided rolls: Figure 3 Figure eight rolls: Figure 4. 4. Place 2 inches (5 cm) apart on greased baking sheets. 5. Egg wash after proofing. 1. Tying a single-knot roll. 2. Tying a double-knot roll. 3. Tying a braided roll.
Pan Rolls 1. Scale dough 16 to 20 oz (450 to 600 g) per dozen. 2. Make up as for round hard rolls. 3. Place on greased pans 1h inch (1 cm) apart. Parker House Rolls 1.Scale dough 16 to 20 oz (450 to 600 g) per dozen. 2.Make up as shown in Figure 25.9. 3. Place on greased baking sheet lh inch (1 cm) apart. Cloverleaf Rolls 1. Scale dough 16 to 20 oz (450 to 600 g) per dozen. 2. Make up and pan as shown in Figure 25.10. 4. Tying a figure eight roll. Parker House rolls. 1.Round the scaled piece of dough. 2. Flatten the center of the dough with a thin rolling pin as shown. Cloverleaf rolls. Divide each piece of dough into three equal parts, and shape into balls. Place three balls in the bottom of each greased muffin tin. 3. Fold the dough over and press down on the folded edge to make a crease. 4. The baked roll has this shape. 5.The baked roll has this appearance
Butterflake Rolls Make up as shown in Butterflake rolls. PAN LOAVES Shaping dough into loaves to be baked in loaf pans. BRIOCHE Brioche dough may be made into many shapes, but the traditional shape. 1. Pan loaves. 1. Roll the dough out very thin into a rectangle shape. Brush with melted butter. Cut into strips 1 inch (2 ½ cm) wide. 2. Stretch it out into a long rectangle. 2. Stack up six strips. Cut into 1 ½ -inch (3 ½ -cm) pieces. 3. Stretch it out into a long rectangle. 3. Place the pieces on end in greased muffin tins. Proof. 4-5 . Fold into thirds. 6. Roll the dough into a right roll that has the same length as the pan it is to be baked in. Seal the seam very well and place the dough seam side down in the greased pan. 4. The baked rolls have this appearance.
SWEET DOUGH PRODUCTS Making brioches. • SWEET DOUGH PRODUCTS • Note: Many sweet dough products may be glazed with Clear Glaze or iced with Flat Icing after baking. Flat Icing is drizzled over the cooled products, so that it doesn't cover them completely. • Cinnamon Rolls • Scale dough into 20-oz (600-g) units. On a floured board, roll each piece of dough into a rectangle 9X12 inches and about 1/3 inch thick (23 X 30 X ½ cm). • Brash with butter and sprinkle with 2 oz (60 g) cinnamon sugar. • Roll up like a jelly roll 12 inches (30 cm) long, as shown in the illustration. • Cut into 1-inch (2x2-cm) rolls. • Place cut side down in greased muffin tins or on greased sheet pans. One full-size 18 X 26-inch (46 X 66-cm) pan holds 48 rolls placed 6 by 8. • For variations on the basic cinnamon roll shape, see Figure 25.14. • Cinnamon Raisin Rolls • Prepare like cinnamon rolls, but add 2 oz (60 g) raisins to the filling. 1. For a small brioche, roll the dough into a round piece. 2. Using the edge of the hand, pinch off about one-fourth of the dough without detaching it. Roll the dough on the bench so that both parts are round. • Caramel Rolls • Prepare like cinnamon rolls. • Before panning, spread the bottoms of the pans or muffin tins with the following mixture. Use about 1 oz (30 g) of the mixture per roll. • 2 lb (1 kg) brown sugar • 8 oz (250 g) corn syrup • 10 oz (300 g) butter • 4 oz (125 ml) water • Cream the sugar, corn syrup, and butter. Beat in the water. Quantities given are enough for 1 sheet pan of 48 rolls. • Caramel Nut Rolls or Pecan Rolls • Prepare like caramel rolls, but sprinkle the sugar-butter mixture in the pans with chopped nuts or pecan halves before placing the rolls in the pans. • Wreath Coffee Cake • Make a filled dough roll as for cinnamon rolls, but do not cut into separate pieces. Other fillings, such as prune or date, may be used instead of butter and cinnamon sugar. • Shape the roll into a circle. Place on a greased baking sheet. Cut and shape as shown in the illustration. • Egg wash after proofing. 3. Place thedough in the tin large end first. With the fingertips, press the small ball into the larger one as shown. 5. For large brioche, separate the two parts of the dough. Place the large ball in the tin and make a hole in the center. Form the smaller ball into a pear shape and fit it into the hole. 6. A baked large brioche.
The filleddough roll is the starting point for a variety of sweet dough and Danish products. 1. Roll the dough out into a rectangle. Brush with butter and 2. Roll up like a jelly roll, sprinkle with cinnamon sugar, or spread with desired filling. 4. For combs or bear claws, make the roll thinner and cut into longer pieces. Flatten slightly and cut part way through each piece in three to six places as shown. Leave straight, or bend into a curve to open up the cuts. 3. For cinnamon rolls and similar products, cut off 1-inch (2 ½ cm) pieces. 5. For figure eight cinnamonrolls, cut the rolls almost through as shown. Open them up, and lay them flat on the baking sheet. 6. To make a wreath-shaped coffee cake, join the ends of the dough roll to make a circle. 7. Cut part way throughthe dough at 1-inch (2 ½ -cm) intervals as shown. 8. Twist each segment outward to open the cuts, as shown.
Braided coffee cake- Spiral Danish rolls Spiral Danish rolls. 1. Roll out the dough into a rectangle 8 inches (20 cm) wide, 12 to 18 inches (30 to 46 cm) long, and less than 1/4 inch (1.2 cm) thick. Make diagonal cuts from the outer edges 1 inch (2V2 cm) apart and 3 inches (71/2 cm) long, as shown. 1. Roll out the dough into a rectangle 16 inches (40 cm) wide and less than 1/4inch (1/2cm) thick. (The length of the rectangle depends on the quantity of dough.) Brush the dough with melted butter. Sprinkle half of it with cinnamon sugar as shown. 2. Fold the unsugared half over the sugared half. You now have a rectangle 8 inches (20 cm) wide. Roll the dough very gently with a rolling pin to press the layers together. 2. Spread the filling down the center and fold alternate strips of dough over the filling. • Filled Coffee Cake • Scale dough into 12-oz (350-g) units. • Roll each unit into a rectangle 9 X 18 inches (23 X 46 cm). • Spread half of each rectangle with desired filling, using about 6 oz (175 g) filling. • Fold the unspread half over the spread half to make a 9-inch (23-cm) square. • Place in greased 9-inch (23-cm) square pan. • Sprinkle with Streusel Topping (p. 695), about 4 oz (125 g) per pan. • Proof and bake. • Braided Coffee Cake • Make up with egg wash after proofing. 3. Cut the dough into strips 1/2inch (1 cm) wide. 4. Place one strip crosswise in front of you on the bench. 5. With the palms of your hands on the ends of the strip, roll one end toward you and the other away from you, so that the strip twists. strip twists. Stretch the strip slightly as you twist it. ROLLED-IN DOUGH PRODUCTS Danish Rolls and Coffee Cakes Most of the techniques given in the previous section for sweet dough products may be used for Danish pastry. Baked Danish dough products are frequently glazed with Clear Glaze and/or iced with Flat Icing. 6. Curl the strip into a spiral shape on the baking sheet. Tuck the end underneath and pinch it against the roll to seal it in place. If desired, press a hollow in the center of the roll and place a spoonful of filling (such as a fruit filling) in the center.
Danish pockets- Croissants 3. Fold the other two corners over the center, and again press them firmly together. 2. Fold two opposite corners over the center. Press down firmly to seal them together. (If desired, rolls may be left in this shape.) 1. Roll out the dough less than 1/4 inch (1/2cm) thick and cut into 5-inch (13-cm) squares. Place desired filling on the center of each square. Brush the four corner slightly with water this helps them seal when pressed together. Making croissants. 2. Cut into triangles as shown. Special roller cutters are available that do this very quickly. 1. Roll the dough out into a rectangle 10 inches (26 cm) wide and about 1/3 inch (3 mm) thick. (The length depends on the amount of dough used.) 4. Begin to roll up the dough toward the point. 5.Stretch out the point of the triangle slightly as you roll it up. 3. Place one of the triangles on the bench in front of you. Stretch the back corners outward slightly, as shown by the arrows. 6. Finish rolling up the dough. 7. Bend the roll into a crescent shape. The point of the triangle must be toward the inside of the crescent and tucked under the roll so that it won't pop up during baking.
Review& Questions • Terms for Review • 1) Lean dough 2) Sponge method 3) Young and old doughs • 4) Proofing 5) Rolled-in dough 6) Fermentation • 5) Punching 6) Oven spring 7) Straight dough method • Questions • 1. What are the three major purposes of mixing yeast doughs? • 2. Explain the difference in procedure between the straight dough method and the sponge method. How • is the straight dough method sometimes modified for sweet doughs, and why is this necessary? • 3. What are the 12 steps in the production of yeast products? Explain each briefly. • 4. Judging from what you know about fermentation of doughs, do you think it might be necessary for • bakers to modify procedures from winter to summer? How? • 5. As you know, butter is very hard when cold and melts easily at warm temperatures. What precautions • do you think are necessary when using butter as the rolling-in fat for Danish pastry?