Download
1 / 25
450 likes | 1.1k Views
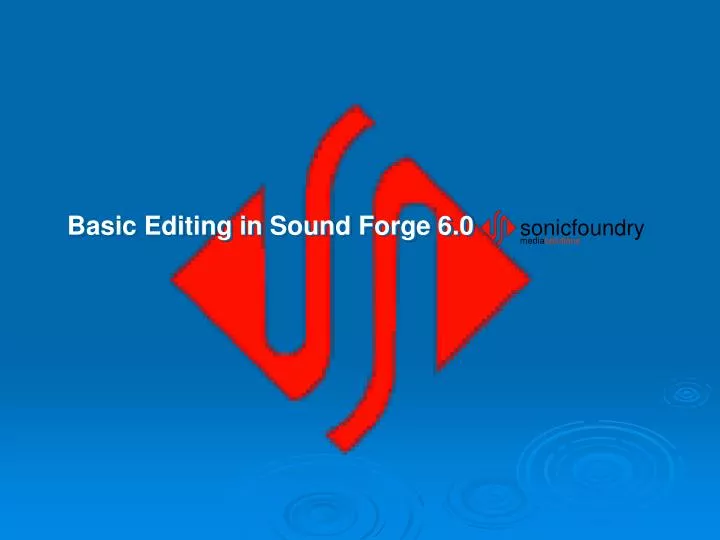
sonicfoundry. media solutions. Basic Editing in Sound Forge 6.0. Basic Editing in Sound Forge 6.0. sonicfoundry. media solutions. By the end of this tutorial, you will be able to: Make a selection for editing Perform basic sound file editing, such as Cut, Copy, Paste, and

E N D
sonicfoundry mediasolutions Basic Editing in Sound Forge 6.0
Basic Editing in Sound Forge 6.0 sonicfoundry mediasolutions • By the end of this tutorial, you will be able to: • Make a selection for editing • Perform basic sound file editing, such as Cut, Copy, Paste, and • Delete as well as Undo an edit • Create a new file from portions of existing file • Recording a new voice
Basic Editing in Sound Forge 6.0: Select, Then Do sonicfoundry mediasolutions Select, Then Do • Select the desired audio part First select the part to be edited • Edit the part Then use common edit commands such as Cut, Copy, and Paste to alter the audio • Like word processor for audio
Basic Editing in Sound Forge 6.0: Open the File: Voiceover sonicfoundry mediasolutions Open the File: Voiceover • Click the Open button The Open button Note that the Sound Forge workspace is blank until you open a file
Basic Editing in Sound Forge 6.0: Open the File: Voiceover sonicfoundry mediasolutions Open the File: Voiceover • Click the Open button The Play button Watch as the cursor moves through the waveform • Navigate to the file, • Voiceover • Click the Play button
Basic Editing in Sound Forge 6.0: Listening to Just a Second of the File sonicfoundry mediasolutions Listening to Just a Second of the File • Click and drag over a portion of the file Click and drag to select a portion of the audio wave Play • Click the Play button When you play the file, only the selected portion plays back • Only the selected portion of the audio part plays
Basic Editing in Sound Forge 6.0: Delete the Selected Audio Data sonicfoundry mediasolutions Delete the Selected Audio Data • Press the Delete key Undo The selected data (the word “Wow”) has been deleted Play All • Click the Play All button • The word “Wow” has been removed • Click the Undo button
Basic Editing in Sound Forge 6.0: Cutting and Pasting Audio Data sonicfoundry mediasolutions Cutting and Pasting Audio Data Paste Cut • Use Markers and Regions to divide the file logically Double-click between two markers to select the data between them • Double-click between two markers Markers and Regions help organize the file • Click the Cut button
Basic Editing in Sound Forge 6.0: Cutting and Pasting Audio Data (continue) sonicfoundry mediasolutions Cutting and Pasting Audio Data • Use Markers and Regions to divide the file logically The word “Wow” has been pasted to the end of the file • Double-click between two markers • Click the Cut button • Click the Paste button
Basic Editing in Sound Forge 6.0: Adjusting the Length of a Selection sonicfoundry mediasolutions Adjusting the Length of a Selection • Create a selection The cursor changes to indicate that you can now adjust the selection length • Click and drag either edge of the selection to adjust it
Basic Editing in Sound Forge 6.0: Copy, Paste Audio Data and Examine the file sonicfoundry mediasolutions Copy, Paste Audio Data and Examine the file • Copy selected data “And easier” has been pasted into the end of the file three times • Press Ctrl + End • Paste the data three times
sonicfoundry mediasolutions Basic Editing in Sound Forge 6.0: Copy, Paste Audio Data and Examine the file (continue) Copy, Paste Audio Data and examine the file • Copy selected data Choose Zoom, Out Full to see all of the audio data in the file • Press Ctrl + End • Paste the data three times • Press Ctrl + Down Arrow to zoom out full
sonicfoundry mediasolutions Basic Editing in Sound Forge 6.0: Adjusting Cursor Placement via Keyboard Shortcuts Adjusting Cursor Placement via Keyboard Shortcuts • Press Left Arrow to move cursor left Use your Arrow keys to position the cursor just before the last word • Press Right Arrow to move cursor right • Press Ctrl + Left/Right Arrow for larger movement • Position cursor directly before last word in file
Basic Editing in Sound Forge 6.0: Changing Cursor/Selection Focus sonicfoundry mediasolutions Changing Cursor/Selection Focus • Cursor flashes at one end of the selection Select the last two words of the file, and delete them • Press the key “5” Press the key “5” to switch focus from one end of the selection to the other • Focus switches to the other end of selection
Basic Editing in Sound Forge 6.0: Select All Data From Cursor to Beginning sonicfoundry mediasolutions Select All Data from Cursor to Beginning • Press Ctrl + Shift + Home to select all data to the beginning Place your cursor just before “Wow” • Press Delete Press Shift + Ctrl + Home to select all data to the beginning of the file
Basic Editing in Sound Forge 6.0: Select All Data to End of the File sonicfoundry mediasolutions Select All Data to End of File • Place your cursor just before “and easier” Place your cursor just before the last two repeats of “and easier” • Press Ctrl + Shift + End Press Shift + Ctrl + End to select all of the data to the end of the file • Press Delete
Basic Editing in Sound Forge 6.0: Using the Trim/Crop Command sonicfoundry mediasolutions Using the Trim/Crop Command • Discard data outside of the current selection Select the data your want to keep • Select “Sound editing just gets easier” • Click the Trim/Crop button
Basic Editing in Sound Forge 6.0: Using the Trim/Crop Command (continue) sonicfoundry mediasolutions Using the Trim/Crop Command • Discard data outside of the current selection All data outside the selection has been deleted • Select “Sound editing just gets easier” • Click the Trim/Crop button • Click the Undo button
sonicfoundry mediasolutions Basic Editing in Sound Forge 6.0: Creating a New Sound File From an Existing Sound File Creating a New Sound File From an Existing Sound File • Makeaselectioninthe existing sound file Drag the selected data to a blank space of the Sound Forge work area • Arrange your data windowtocreateblank workspace • Drag selected material to blank workspace Blank workspace
sonicfoundry mediasolutions Basic Editing in Sound Forge 6.0: Creating a New Sound File From an Existing Sound File (continue) Creating a New Sound File From an Existing Sound File Sound Forge creates a new data window • Makeaselectioninthe existing sound file • Arrange your data windowtocreateblank workspace The new data window contains the selected data from the original data window • Drag selected material to blank workspace
Basic Editing in Sound Forge 6.0: Record a New Voice sonicfoundry mediasolutions Record a New Voice • Check your recording equipment Click Record button for recording A Recording panel shows with a blank file behind • Click Record button
Basic Editing in Sound Forge 6.0: Record a New Voice (continue) sonicfoundry mediasolutions Record a New Voice Click New… to choose recording quality • Check your recording equipment A new Record window shows with a blank sound file behind • Click Record button Select the desired quality for recording • Click New…
Basic Editing in Sound Forge 6.0: Record a New Voice (continue) sonicfoundry mediasolutions Record a New Voice • Check your recording equipment • Click Record button • Click New… Click Record button to start recording Click Drop Marker button to set the markers while recording • Click Record button
Basic Editing in Sound Forge 6.0: Summary Basic Editing in Sound Forge 6.0: Summary sonicfoundry mediasolutions Summary • In this tutorial, you have learned how to: • Make a selection using the mouse or the keyboard • Audition and modify the selection until it is just right • Use the cut, Copy, Paste, and Delete commands to edit the • sound file • Experiment with the Trim/Crop command • Use the drag and drop method for creating a new file • Record a new voice Sound Forge Support File Formats
sonicfoundry mediasolutions End