Download
1 / 33
340 likes | 505 Views
Using Your Map and Compass. Troop 175 Foster City. Topographical Maps. Topographical Map Info. Map Contour Lines. Contour Lines . Determine Land Shape. More About Contours. Map Symbols. Symbols and Colors. Black - man-made features such as roads, buildings, etc.

E N D
Using Your Map and Compass Troop 175 Foster City
Symbols and Colors • Black - man-made features such as roads, buildings, etc. • Blue - water, lakes, rivers, streams, etc. • Brown - contour lines • Green - areas with substantial vegetation (could be forest, scrub, etc.) • White - areas with little or no vegetation; white is also used to depict permanent snowfields and glaciers • Red - major highways; boundaries of public land areas • Purple - features added to the map since the original survey. These features are based on aerial photographs but have not been checked on land.
Topographical Map Symbols Railroad Large Falls/Rapids Mine Woods
Topographical Map Symbols Trail Campground / Picnic Area Small Falls/Rapids Glacier
Topographical Map Symbols Scrub Highway Lake Sand
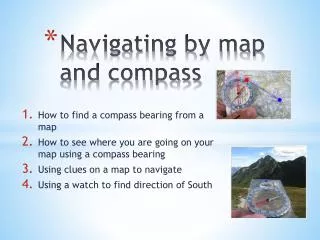
The first thing you need to learn are the directions. North South East West Look at the figure and learn where they are. North is the most important. The Basics!
Parts of the Compass The compass needle. On some compasses it might be red and white for instance, but the point is, the red part of it is always pointing towards the earth's magnetic north pole.
Parts of the Compass TheCompass Housing. On the edge of the compass housing, you will probably have a scale. From 0 to 360 degrees. And you should have the letters N, S, W and E for North, South, West and East.
Example “I want to go northwest” • You find out where on the compass housing northwest is. • Then you turn the compass housing so that northwest on the housing comes exactly there where the large direction of travel-arrow meets the housing.
Example “I want to go northwest” • Hold the compass flat in your hand so that the compass needle can turn. • Turn yourself, your hand, the entire compass, just make sure the compass housing doesn't turn. • Turn it until the compass needle is aligned with the lines inside the compass housing.
Let’s Do It! • Stand up • Using your compass as an aid, move five paces to the southwest • Go 3 paces to the east • Travel 5 paces to the northeast • Now go 3 paces to the west. • Sit down
Let’s Do It! It is extremely important that the red, north part of the compass needle points at north in the compass housing. If south points at north, you would walk off in the exact opposite direction of what you want! And it's a very common mistake among beginners. So always take a second look to make sure you did it right A second problem might be local magnetic attractions. If you are carrying something of iron or something like that, it might disturb the arrow. Make sure there is nothing of the sort around.
Using the compass with a map • Align the edge of the compass with the starting and finishing point
Using the compass with a map • Rotate the compass housing until the orienting arrow and lines point N on the map. • Rotate the map and compass together until the red end of the compass needle points north. • Follow the direction of travel arrow on the compass, keeping the needle aligned with the orienting arrow on the housing.
Keeping a Bearing • Hold the compass in your hand, with the needle well aligned with the orienting arrow. • Then aim in the direction the direction of travel-arrow is pointing. • Fix your eye on some special feature in the terrain as far as you can see in the direction. Then go there. Be sure as you go that the compass housing doesn't turn.
Keeping a Bearing • Winter conditions can make things a lot worse, when there is snow on the ground. The fog is white (or grey), the snow is also white. • Then aim in the direction the direction of travel-arrow is pointing. • Fix your eye on some special feature in the terrain as far as you can see in the direction. Then go there. Be sure as you go that the compass housing doesn't turn.
Measuring the Height of a Tree • Extend your arm holding a pencil until it is appears to be the same height as the tree
Measuring the Height of a Tree • Rotate the pencil 90 degrees • Pick out an object on the ground
Measuring the Height of a Tree • Have a friend “pace out” the distance.
Measuring the Distance Across a River • Take a bearing across the river (AB) • Add 90 degrees to it (AB+90) (AC) • Subtract 45 degrees (CB) • Walk AC until you reach C (Bearing CB) • Count paces back to A B C A
Magnetic Declination • Align
Compass Links • http://www.learn-orienteering.org/old/lesson1.html • http://www.trailsillustrated.com/skills/ • http://www.cis.ksu.edu/~dha5446/topoweb/guide.html • http://www.ghosttowns.com/topotmaps.html