Download
1 / 17
170 likes | 559 Views
Using Ericsson Phone Features. Analog Phone or Digital Phone. How to Use Phone Features. Features available for all desk phones Transfer Last Number Redial Conference (digital phones) Conference (analog phones) Directed Call Pickup Hold Automatic Callback Call Forward / Follow Me

E N D
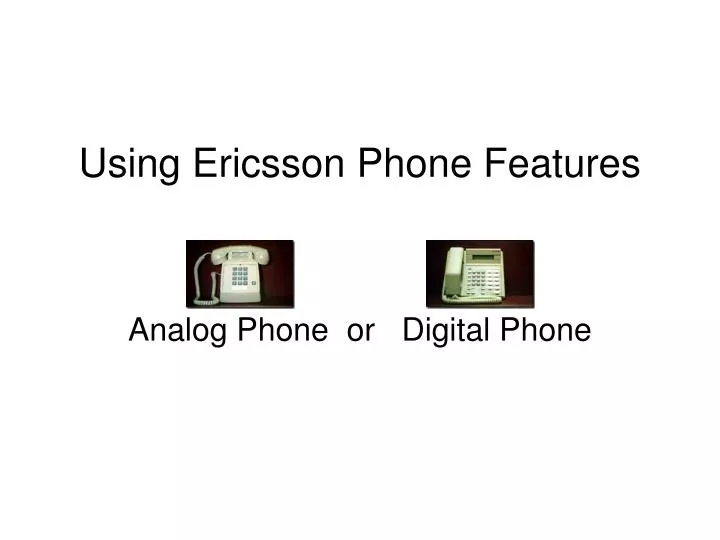
Using Ericsson Phone Features Analog Phone or Digital Phone
How to Use Phone Features Features available for all desk phones • Transfer • Last Number Redial • Conference (digital phones) • Conference (analog phones) • Directed Call Pickup • Hold • Automatic Callback • Call Forward / Follow Me Features available only for digital telephones • Call Diversion • Pickup Group • Name Display on LCD screen • Exclusive Hold • Speed Dial(Programmable Buttons) • Accept Second Call • Features available only for analog telephones • Call Park
Follow these steps to transfer a call on an analog phone. • Press the R, lightning bolt, or flash button. • Listen for a recall dial tone (three beeps and a dial tone). • Dial the number to which you want to transfer the call. • Either wait for the first ring or stay on the line to announce the call. • Hang up the handset. • Note: If the person you're trying to reach is on the line or doesn’t answer, press the R or lightning bolt, or flash button once and listen for the recall dial tone. Press the R, lightning bolt, or flash button again to return to the caller.
Follow these steps to transfer a call on a digital phone. • Press an unlit access button to place the call on exclusive hold. • Dial the number to which you want to transfer the call. • Either wait for the first ring, or stay on the line to announce the call. • Press the transfer button. • Note: If the line you're trying to reach is busy, press the access button to return to the caller.
Automatically redial the last off-campus number you dialed. • Lift the handset. • Press * * * • The last off-campus number you called will be automatically redialed.
How to Set Up a Conference Call (analog phones) • Establish an initial phone connection. • Call the first person you want to include in the conference call. • Add the second person. • Press the R or Lightning Bolt or Flash button. • Listen for the recall dial tone (three beeps and a dial tone). • Dial the number of the second person. • When the second person answers, press 3. • Listen for the conference tone — a long beep. This beep indicates that the second person has joined the first person on the conference line. • Note: You may include a maximum of two off-campus calls.Add additional parties. • Repeat Steps 1 and 2 to include up to a total of eight parties in the conference call (this includes a maximum of two external calls). • Note: If you call a party whose line is busy or who does not answer: • Cancel the second party by pressing the R or Lightning Bolt or Flash button once. • Listen for the recall dial tone. • Rejoin the first person or the conference by pressing the R or Lightning Bolt or Flash button again.
How to Set Up a Conference Call (digital phones) • Establish an initial phone connection. • Call the first person you want to include in the conference call. • Add the second person. • Press the available line button. For instance, if you placed the first call on access 1, press access 2. • On this second line, dial the number of the second person you want to add to the conference call. • After the second person answers, press 3. • Listen for the conference tone — a long beep. This beep indicates that the second person has joined the first person on the conference line. • Note: You may include a maximum of two external calls.Add additional parties. • Repeat Steps 1 and 2 to include up to a total of eight parties to the conference call (this includes a maximum of two external calls). • Note: If you call a party whose line is busy or who does not answer: • Disconnect by hanging up • Press the line (Access 1 or 2) of the first call to rejoin the first party or the conference.
Call Pickup • Follow this procedure to answer another person's phone at your desk. • Dial the number of the ringing phone. • Wait for the busy signal. • Press 8. • Note: Directed call pickup will not work if the ringing phone has a busy diversion. (You must hear a busy signal to retrieve the call).
Automatic Callback • Activate the automatic callback feature. • When you dial an on-campus number but get a busy signal, Press 6. • Note: You must hear a busy signal before you can activate automatic callback.Answer an automatic callback. • Lift the handset when you hear the distinctive callback ring — 8 fast rings. • After you lift the handset, the telephone will begin to ring at the number you called originally. • Cancel automatic callback. • Press # 6 # to cancel the automatic callback feature. • Note: Automatic callback cancels itself automatically after 20 minutes.
How to use Call forward/follow me • Activate the call-forward / follow-me feature. • Lift the handset. • Press * 2 * • Enter the four-digit extension for the phone number to which you want to direct calls. • Press # • Listen for the pulsating dial tone. • Replace the handset. • Note: If a diversion is programmed on your phone, the follow-me feature will override the diversion and send your calls immediately to the alternate number. When the call-forward / follow-me feature is removed, the diversion automatically becomes active again.Cancel the follow-me feature. • Lift the handset. • Press # 2 # • Listen for a normal dial tone. • Replace the handset.
How to Use Call Diversion • Summary: A call diversion re-routes incoming calls to an alternate phone number or to voice mail. The diversion must be programmed by the Broughton IRM Department. Use the instructions on this page after the diversion has been programmed on your desk phone.How it works: If your phone isn't answered after about four rings (14 seconds), the call will be diverted to an alternate phone number or to voice mail. • To activate: • Lift the handset. • Press * 2 1 # • Listen for an interrupted dial tone • Replace the handset. • To cancel: • Lift the handset. • Press # 2 1 # • Listen for a normal dial tone. • Replace the handset.
How to Use Call Diversion • Use call diversion's busy feature. • How it works: If your phone is busy, other incoming calls will be diverted to the alternate phone number or to voice mail. • To activate: • Lift the handset. • Press * 2 2 # • Listen for an interrupted dial tone. • Replace the handset. To cancel: • Lift the handset. • Press # 2 2 # • Listen for a normal dial tone. • Replace the handset.
How to Use Call Diversion • Use call diversion's no-answer and busy features. • How it works: The no-answer and busy diversions work together to divert calls if your phone is either unanswered or busy. • To activate: • Lift the handset. • Press * 2 # • Listen for an interrupted dial tone. • Press Clear. • Press * 2 # • Listen for an interrupted dial tone. • Replace the handset. • To cancel: • Lift the handset. • Press # 2 # • Listen for a normal dial tone. • Press Clear. • Press # 2 # • Listen for a normal dial tone. • Replace the handset.
How to Use Call Diversion • Use call diversion's all-calls feature. • How it works: The all-calls feature diverts all your calls immediately to the alternate phone number or to voice mail; your phone will not ring. • To activate: • Lift the handset. • Press * 2 # • Listen for an interrupted dial tone. • Replace the handset. • To cancel: • Lift the handset. • Press # 2 # • Listen for a normal dial tone. • Replace the handset.
How to Use Pick-Up Group • Answer a call in the pick-up group. • Lift the handset and dial 8 • To access the call by speakerphone, dial 8 without lifting the handset.
Phone Model: Ericsson DBC 561 Standard Features • 3 access buttons • Standard dialing keys • Clear button • Message waiting capability • Mute button • Program button • Dial Additional Digits (End-to-End DTMF Calling) • 12 programmable buttons • Speaker button • LCD screen (tilts) • Transfer button • Red indicator lights • Volume controls (handset and ringer) • Accept 2nd call
Phone Model: Ericsson DBC 561 • Ring Options Access 1 & 2 can be programmed for any of the adjustable ringing patterns listed below.Multiple-Appearance Directory Numbers (MDNS), Hotlines, Intercoms, etc. may be programmed for different ring options.To program: • Press Program function button. (lamp is on; handset is on hook) • Press line button to be programmed. (lamp is on) • Enter one of the following digits (0-6) for desired ring option: • 0 = Silent (flashes only)1 = Normal ring2 = Rings after delay3 = Two ring at half volume (continues to flash)4 = Two rings at half volume after delay (continues to flash)5 = Automatic loudspeaker connection (auto answer function button must be activated for use)6 = Automatic loudspeaker connection (no function button required) • Press line button being programmed. (lamp is off) • Press Program function button to complete entry. (lamp is off) • To check option: • Press Program function button. (lamp is on) • Press line button, option number appears in display. • Press Program function button to clear display.