Download
1 / 18
180 likes | 185 Views
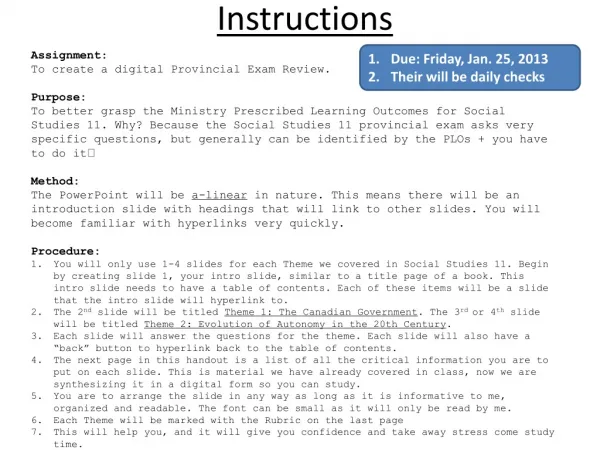
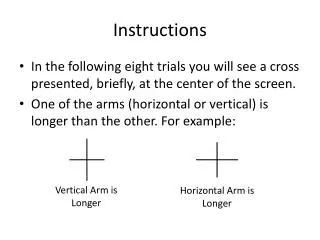
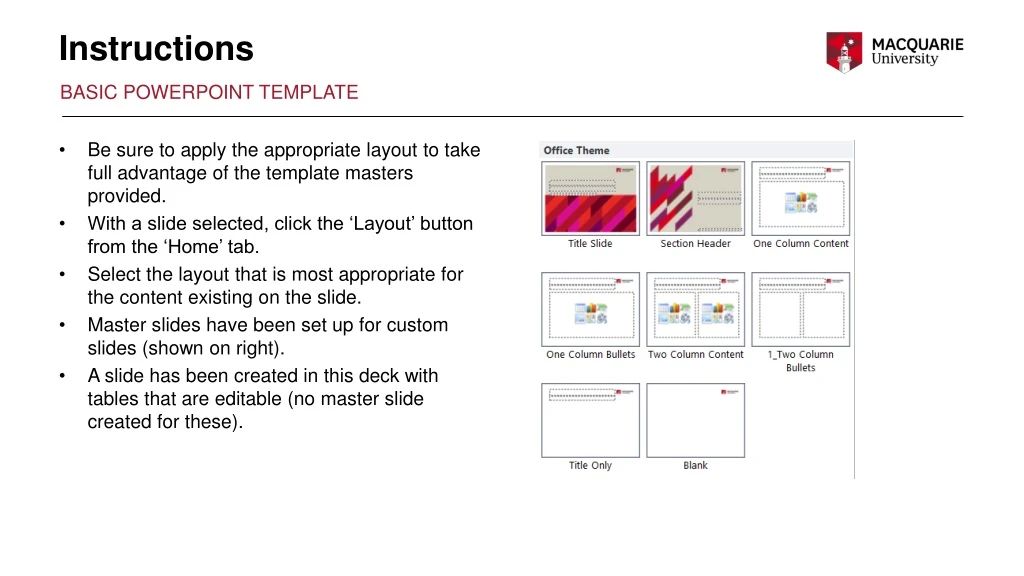
Instructions. BASIC POWERPOINT TEMPLATE. Be sure to apply the appropriate layout to take full advantage of the template masters provided. With a slide selected, click the ‘Layout’ button from the ‘Home’ tab. Select the layout that is most appropriate for the content existing on the slide.

E N D
Instructions BASIC POWERPOINT TEMPLATE Be sure to apply the appropriate layout to take full advantage of the template masters provided. With a slide selected, click the ‘Layout’ buttonfrom the ‘Home’ tab. Select the layout that is most appropriate for the content existing on the slide. Master slides have been set up for custom slides (shown on right). A slide has been created in this deck with tables that are editable (no master slide created for these). FOOTERS To update the footer on all slides complete the following: On any slide go to Insert | Header & Footer Click in the Footer Section to replace OFFICE | FACULTY | DEPARTMENT with the correct information. Ensure capitals are used. Click the checkbox next to Don’t show on title slide. Click Apply to all.
Title slide USE AS FIRST SLIDE IN PRESENTATION
Title slide USE AS FIRST SLIDE IN PRESENTATION
Title slide USE AS FIRST SLIDE IN PRESENTATION
Section header Use for topic changes
One column content USE WHEN ONE COLUMN REQUIRED This text frame has been designed not to include bullets. Content is Arial size 18. Select this layout by going to Home | New Slide | One column content. Change a slide to this layout by going to Home | Layout | One column content. This can be useful when converting presentations from an older style. OFFICE | FACULTY | DEPARTMENT
One column bullets Use when one column and bullets required • Bullets are set in Arial size 18. • Second-line bullets are Arial size 18. • Third-line bullets are Arial size 18. • Use Tab and Shift + Tab to promote and demote bullets. • Note: Your cursor must be at the beginning of the bullet for this to work. • You can also use the ‘Increase List Level’ and ‘Decrease List Level’ buttons under Home | Paragraph. • Select this layout by going to Home | New Slide | One column bullets. • Change a slide to this layout by going to Home | Layout | One column bullets. This can be useful when converting presentations from an older style. OFFICE | FACULTY | DEPARTMENT
Two column content USE WHEN two COLUMNs REQUIRED COMBINE TEXT AND GRAPHIC Two column content slide allows you to combine both text and graphic. Add text to one of the placeholders In the other placeholder click on the first icon on the second row to browse for a graphic. This text frame has been designed not to include bullets. Content is Arial size 18. This layout is also useful when you want to combine text and a graphic. Select this layout by going to Home | New Slide | Two column content. Change a slide to this layout by going to Home | Layout | Two column content. This can be useful when converting presentations from an older style. OFFICE | FACULTY | DEPARTMENT This text frame has been designed not to include bullets. Content is Arial size 18. This layout is also useful when you want to combine text and a graphic. Select this layout by going to Home | New Slide | Two column content. Change a slide to this layout by going to Home | Layout | Two column content. This can be useful when converting presentations from an older style.
Two column bullets Use when Two columns and bullets required Bullets are set in Arial size 18 • Second-line bullets are Arial size 18. • Third-line bullets are Arial size 18. Use Tab and Shift + Tab to promote and demote bullets. • Note: Your cursor must be at the beginning of the bullet for this to work. • You can also use the ‘Increase List Level’ and ‘Decrease List Level’ buttons under Home | Paragraph. Select this layout by going to Home | New Slide | Two column bullets. Change a slide to this layout by going to Home | Layout | Two column bullets. This can be useful when converting presentations from an older style. OFFICE | FACULTY | DEPARTMENT
Table slide Copy, paste and modify when table required TABLE STYLES Due to a limitation in how PowerPoint table styles are applied, it is important to follow the steps below if you need to add extra rows. Create alternate colour rows: Move outside the table. Select the row whose colour you want to copy. Click the format painter tool on the Home ribbon. Click the row that needs the new colouring applied. OFFICE | FACULTY | DEPARTMENT
Smart Art slide EXTERNAL SMART ART Due to a limitation in how Smart Art is inserted into presentations, copy and paste this slide as a base. If the colours don’t follow pattern, click on the shape and choose from these two colours found in the colour palette.
Example of picture slide OFFICE | FACULTY | DEPARTMENT
Icons library – Sand, page 1 Copy and paste where needed
Icons library – Sand, page 2 Copy and paste where needed
Icons library – Sand, page 3 Copy and paste where needed
Icons library – Charcoal, page 1 Copy and paste where needed
Icons library – Charcoal, page 2 Copy and paste where needed
Icons library – Charcoal, page 3 Copy and paste where needed