Download
1 / 42
420 likes | 424 Views
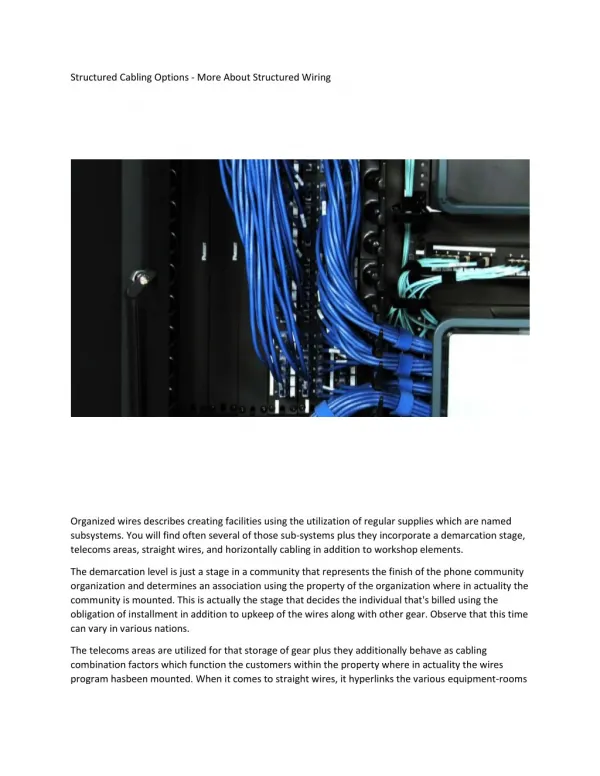
This chapter covers important safety guidelines for working on a structured cabling project, the importance of network documentation, and the basics of installation. It includes procedures for mounting RJ-45 jacks, punching copper wires, and guidelines for handling and documenting cables.

E N D
Structured Cabling ProjectChapter 9 By: Nisreen Otaky
Safety is primary concern • Never work on a device with the case open and the power plugged in. • Test electrical sockets with a multimeter • Locate all electrical conduits and power wires before installing any cables • Properly ground all networking equipment. Never cut or nick a live 120V AC line. • Wear safety glasses whenever you are drilling or cutting • Measure carefully before you cut, drill into, or permanently alter construction materials. • Investigate what you will be drilling or cutting into, before you begin • Cleanliness ex. minimize the amount of dust • Follow proper ladder placement and safety procedures whenever you must use a ladder
Network Documentation • Some of the documents you should create while planning/designing your network: • engineering journal: • logical topology • physical topology • cut sheets: a rough sketch of cabling runs • problem-solving matrices • labeled outlets • labeled cable runs • summary of outlets and cable runs • summary of devices, MAC addresses, and IP addresses
Project Planning • Structured cabling project is ideal for group work so assign different group members different jobs • Ex: Cable runner, project manager , Jack and Patch Panel Terminator • Create a flowchart to insure project is done thoroughly, accurately and on time • installing outlets, jacks • running cables and testing them • punching cables into patch panels • documenting cables • installing PCs, NICs, hubs, switches, routers • configuring PCs, switches, routers
TIA/EIA-568-A standards 6m 3m 90m
RJ-45 Jack • One side of the RJ-45 jack contains eight color-coded slots. The individual Cat5 wires are punched down into the slots according to color using a punch down tool.The other side of the jack is a female plug, which looks like a standard phone jack • There are 2 methods for mounting RJ-45 jacks • Surface mounting: mount the jacks on the surface of the wall • Flush mounting: cut through the wall
Surface-mounting an RJ-45 jack • Two types of boxes that you can use to surface mount RJ-45 jacks to a wall • Screw-mounted box • Adhesive-backed box • Adhesive-backed are faster to install; however once affixed, you can’t move them • Most network installers prefer to use surface-mounted RJ-45 jacks because they are easier and faster to install. You don’t need to cut into the wall • Details on how to surface-mount an RJ-45 jack are found in Chapter 9.2.4
Flush Mounting an RJ-45 jack • You must take several factors into consideration before you decide to flush mount an RJ-45 jack into a wall. • Is the wall made of plaster or drywall? • Plaster is harder to work with because it crumbles easily • Are there any wide wood baseboards on the wall? if so you may want to install the jack there. But make sure you don’t cut the opening into the bottom 5 cm of the baseboard, because the walls bottom plate will block you from pushing it in • Details on flush-mounting RJ-45 jacks are found in Chapter 9.2
Procedure for placing the copper wires in a jack • Steps you must use to place the cable wires into the jack: • Strip the jacket about 2.5 cm • Place the wires in front of the jack and keep them there while you work • Separate each pair of twisted wires • Place each wire on the corresponding color-coded slot of the jack • Punch the wires down into the slots using a punch down tool
Procedure for punching copper wires in a jack • A punch tool is a device that uses spring-loaded action to push wires between the pins on the jack while at the same time, skinning the sheath away from the wire.
Basics for Installing • Strip back only as much of the cable's jacket as is required to terminate the wires • Make sure that you maintain the twists in each pair of wires, as much as possible. It is the twisting of the wires that produces the cancellation that is needed to prevent EMI and RFI. CAT 5 UTP, the maximum amount of untwisted wire that is allowed is 13 mm • Never bend cable to the extent that it exceeds a 90º angle • Avoid stretching cable when you are handling it, wires inside will untwist • If multiple cables must run over the same path, use cable ties to cinch them together. • Never allow cables to be nicked or kinked • Leave enough slack for the cable to reach the floor, and extend another 60-90 cm at both ends. • Use cable ties, cable support bars, wire management panels, and releasable Velcro straps to secure cables. Never use a staplegun
Documenting cable runs • A cut sheet is a rough diagram that: • Shows the locations of the cable runs • Indicates the numbers of the classrooms, offices, or other rooms, to which the cables have been run. • Ex. Rm# 519, 201 • Can be referred to when its time to place corresponding numbers on all telecom outlets and patch panels in the wiring closet
Specifications for labeling cable • According to the TIA/EIA 606 standards, each hardware termination unit must have some kind of unique identifier. This identifier must be marked on each termination hardware unit. Termination hardware units include: • Patch panels • Jacks • Computer • Also important to label the cable at each end
Specifications for labeling cable • For example, if you have 4 cables going to room number 201: • Label each cable as 201A, 201B, 201C, 201D • Label each faceplate going to the particular workstation with the same number i.e. 201A • Also label each cable connection at the patch panel in the wiring closet in ascending order
Preparing cable for routing and labeling • If you need to route 4 cables to each room, route all four cables at the same time • Use 4 spools of cable • Assign a letter to each spool • Ex. A for the cable going to room A • Place the spools at the central point or wiring closet. • Unwind a segment of the cable and label it 3 times, each label being 60 cm apart • Ex. 201A, 201B • Use electrical tape to keep all 4 cables together while routing them • Tie a string around the ends to help pull the cables
Easiest procedure for routing cable • The easiest way to route cable is to mount it on a wall • Tie the cables with a tie-wrap then mount the tie-wrap to the wall. • You can use screws to put the tie-wrap on the wall • Or adhesive tie-wraps if you’re sure that the cables will not need to be moved • Never use staples to attach cable to walls
Mounting cable in raceway • Raceway is a wall-mounted channel that has a removable cover • decorative raceway • presents a more finished appearance • Placed in areas where the raceway may be seen • gutter raceway • less attractive alternative to decorative raceway • primary advantage is that it is big enough to hold several cables • restricted to spaces such as attics and spaces created by dropped ceilings. • Can be mounted with adhesive backing or with screws • After mounting the raceway, lay the cable inside it, and attach the top. • This will help to protect the cable
Running cable through existing raceway • Two concerns with routing cable in existing raceway: • First, is there room? The new bundle of cable you want to route in the raceway may exceed the capacity of the raceway. • Second, it is preferable not to route cable in a raceway with power wiring. This can potentially cause noise problems.
Personal safety precautions before installing cable • When working in walls, ceilings or attics, turn off all power that might pass through that area • Before you begin work, learn the locations of all fire extinguishers • Avoid wearing excessively baggy clothes • If you anticipate working in a dropped ceiling space, survey the area • If you need to cut or saw, wear safety glasses • Consult the building’s maintenance engineer to find out if there is asbestos or lead where you’ll be working • Keep your work area orderly and neat
Building safety • Always find out in advance what the local building codes are. • Some building codes may prohibit drilling or cutting holes in certain areas such as fire walls or ceilings • If you must route cable through spaces where air is circulated, you will need to use a fire-rated cable.
Supporting horizontal cabling • When running cable in a dropped ceiling space, never lay the cable on top of the ceiling. Use: • Wall-mounted gutter • Use tie-wraps • Ladder racks
Stringing cable in an attic, or room with a dropped ceiling • A telepole is a telescoping pole with a hook at one end to hold the cable. It is used to string cable across a dropped ceiling or attic quickly. • Used in areas where it’s cramped, dark, dusty, and there’s poor air circulation
Fishing cable from above a wall • When you fish cable through a wall you ordinarily work from an attic or a dropped ceiling space. • Locate the top plate of the wall, and drill a 19 mm hole through it. • feed fish tape through the hole you drilled, down into the wall • Your helper below you should grab the tape when he sees it • Then he should tape the UTP cable to the hook of the fish tape • Then you can pull the cable up through the wall
Fishing cable from below a wall • You can fish horizontal cable from a basement to the work areas on the first floor • Drill a 3.2 mm hole, at an angle, through the first floor • Push a coat hanger into the hole to indicate the spot when you are in the basement. • Go to the basement and locate the wire. • Mark the spot • Drill a new hole in this spot • Push the cable up through this second hole, to the wall opening where the work area outlet is located
Wiring Closet • A wiring closet can either be a specially designed room or cabinet. Equipment in a wiring closet include: • Patch Panels • Wiring Hubs • Bridges • Switches • Routers • When you have more than one wiring closet in a network, one closet is designated as the MDF and all the others are IDFs
Patch Panels • A patch panel is an interconnecting device that acts as a switchboard, where horizontal cables coming from workstations, can connect to other networking devices to form a LAN • The front of a patch panel resemble the ports on faceplates of telecomm outlets in the work area. • The back of a patch panel rows of pins, much like those in an RJ-45 jack
Laying wires in a patch panel • Lay down cable wires in ascending order, by cable number. • Keep the ends of the cable centered above the pin locations • Keep the jacket within 6.4 mm of the pin locations in order to avoid exposing too much wire. • Don’t untwist the wire pairs any more than necessary
Punch Tools • A punch tool has spring-loaded actions. This allows it to perform 3 functions: • Pushes the wire between two metal pins • Skins the sheath from the wire (so that it can make an electrical connection with the pins) • The punch tool's blade also cuts off any extra wire.
Mounting a patch panel • You can mount patch panels: • On walls • On distribution racks • In a cabinet • A distribution rack is a simple skeletal frame that holds equipment such as patch panels, repeaters, hubs, and routers. • Advantage is that it allows easy access to the front and the back of equipment • Height 1-1.9m • Width 0.5m
Network Operation Testing • The baseline is the set of data about your network: • Taken when network is operating at an acceptable level • Used to compare current measurements with the recorded measurements that were taken when the system was known to be operating properly
Cable testing equipment • A cable tester is a hand held device that can certify that cable meets the required IEEE and TIA/EIA standards • Some can provide printouts, others can be attached to a PC to create a data file.
Tests performed by cable testers • determine cable distance • locate bad connections • provide wire maps for detecting crossed pairs • measure signal attenuation • measure near-end crosstalk • detect split pairs • perform noise level tests • trace cable behind walls
Cable testers and distance measurements • Time domain reflectometers (TDRs), measure the distance to open-ended, or shorted, cable • They do it by sending an electrical pulse through the cable • Device then times the signal's reflection from the end of the cable. • Accurate to within 60 cm
Time Domain Reflectometers • In order for it to determine which connections in a cable run are faulty, • Attach the TDR to the patch cord at the patch panel • If it reports the distance to the patch panel, instead of a more distance point, then you know there is a connection problem at that level • Then you can measure through the RJ-45 jack located at the telecomm outlet. • If it reports the distance to the patch panel, instead of a more distance point, then you know there is a connection problem at that level
Wire Maps • When wires are connected in reversed order, they are referred to as crossed pairs • The connections are not good, and must be redone • A wire map indicates which wire pairs connect to which pins and detects crossed-pairs • Causes crosstalk
Crossed Pairs A crossed pair would be taking 1 and putting it in 2 on the other end. This is correct wiring
Split pairs • When wires split, they are no longer part of the same circuit • Therefore they provide no cancellation; no protection • Resulting in crosstalk • Detected by visual inspection and crosstalk measurements
Split pairs Pairs are supposed to be 1-2 and 3-6
Signal Attenuation • A reduction in the power of a signal is called attenuation • A signal injector sends out a signal onto the cable which is attached on the other end to a cable tester
Sources of noise • florescent lights • heaters • radios • televisions • computers • motion sensors • radar • motors • electronic devices of all kinds
Crosstalk Summary • Causes of crosstalk include: • Split pairs • Crossed pairs • Cable pulled too tightly • Untwisted too much at the patch panel • Outside interference