Download

1 / 3
30 likes | 47 Views
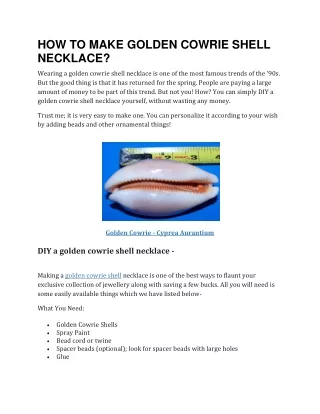
This is a great jewelry making tutorial for creating your own necklace out of leftover beads. You can wear the necklace with the dangles down your back or in the front. Courtesy of Jewelry Television Jewel School.

E N D
Custom Jewelry-making Projects and Tutorials Jewelry Making DIY Tutorial by JTV Jewel School Copyright JTV Jewelry Television All Rights Reserved
Supplies - 2 - heart shaped beads 2 - oval beads 6 - 3mm round beads 1 - 10mm-12mm round bead 15 - rectangle beads 1 - silk cord, size 6 This is a fun necklace - great for leftover beads. You can wear the necklace with the dangles down your back or in the front. Please use whatever bead combination you want. The only thing you have to make sure is that the cord will go through your center bead twice. In this pattern I am using a 10mm-12mm round bead. So before I started the necklace I made sure the cord would go through that bead twice. Now to get started: Open the silk cord and tie a double knot at the end of the cord. String on one 3mm round bead -- one heart bead (string it through the bottom of the heart) -- one 3mm round bead -- one oval bead -- one 3mm round bead -- one 10mm-12mm round bead. Bring all the bead you have just strung down to the knot. We are going to want a knot 7” from the previous knot. What I do I create the loop for the knot. Place the loop on the post and bring my previous knot to the middle of the underside of the Easy Knotter. That is approximately 7”. Take the knot off the post and give a tug. Bring down one rectangle bead, create the loop for the knot. Place the knot on the post and pull until the bead is right up to the post. Do not worry about the gaps, let them be. To take the knot off the post, take your next bead in one hand and the cord in your other hand. Bring the bead down to 2” before the knot that is on the post. Lift both of your hands to get the knot off the post. Let the knot and bead rest on the Easy Knotter board.
While holding the cord in one hand and bead in the other hand -- in one quick step -- push the bead that is in your hand to the knot while pulling on the cord with our opposite hand. The bead will push the knot close to the bead. With this necklace we are doing ½” spacing. Create the loop for the knot, place the loop on the post facing you. Pull the cord until the previous knot is at the ½” measurement. With your index finger and thumb, lift the knot off the post and give a tug on the cord while holding the knot. Continue this process until all 15 rectangle beads are knotted. Do not do the last ½” measurement. For this next step you want to take the needle and bring it back through the 10mm-12mm round bead. Make sure you bring the needle through the bead facing the first knotted rectangle bead. Pull both cords until the center bead is right up to the knotted rectangle beads. Now we want to string on the rest of the beads. String on one 3mm round bead -- one oval bead -- one 3mm round bead -- one heart bead (this time string it on top of the heart) -- one 3mm round bead. At this point you can either do another 7” knot or if you want one side to dangle a little longer than the other, you can do this measurement at either 7 ½” or more. Create the double loop for the knot. Place the loop on the post facing you. At this point you want to rest the necklace flat on your work area and pull until both knots are even on each side. Lift the knot off the post, give a tug. Again, if you want one side longer than the other, just pull until the desired length and lift the knot off the post and tug. Add a little bit of glue to the beginning and ending knot. Trim the excess cord after the glue dries and enjoy!! www.designsbyreenie.com Reenie Oliveto 2016