Download

1 / 23
410 likes | 703 Views
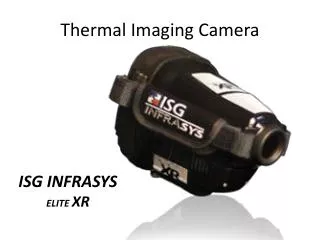
Thermal Imaging Camera Training. Howlett Hill Fire Dept. Developed Sept. 2002. The purpose of this training is to enhance our HHFD’s Training mission: of providing quality training to the members of the HHFD, who dedicate themselves to the protection of lives and property.

E N D
Thermal Imaging Camera Training Howlett Hill Fire Dept. Developed Sept. 2002
The purpose of this training is to enhance our HHFD’s Training mission: of providing quality training to the members of the HHFD, who dedicate themselves to the protection of lives and property. This course is a student-oriented approach and places strong emphasis on instructor-student interaction in both the classroom and the hands-on training. The mixture of classroom discussion and hands-on at the tower should create a positive environment for learning and promote confidence in handling our thermal imager camera. With the availability this state-of-the-art technology already in our station, this training offers instruction in “real-world settings” with an emphasis on safe application by the firefighter. The information in this course is a combination of a professionally developed course, plus additional information provided by officers of the HHFD. In the event that this technology prompts any changes to the HHFD Standard Operating Guide (SOG) EVERY member will be informed and re-trained as needed. Enjoy the course !
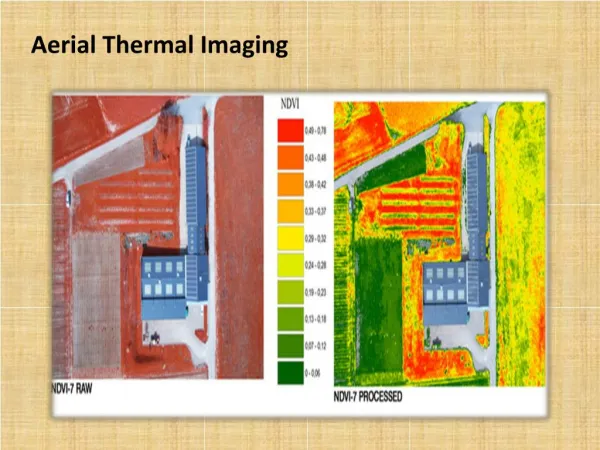
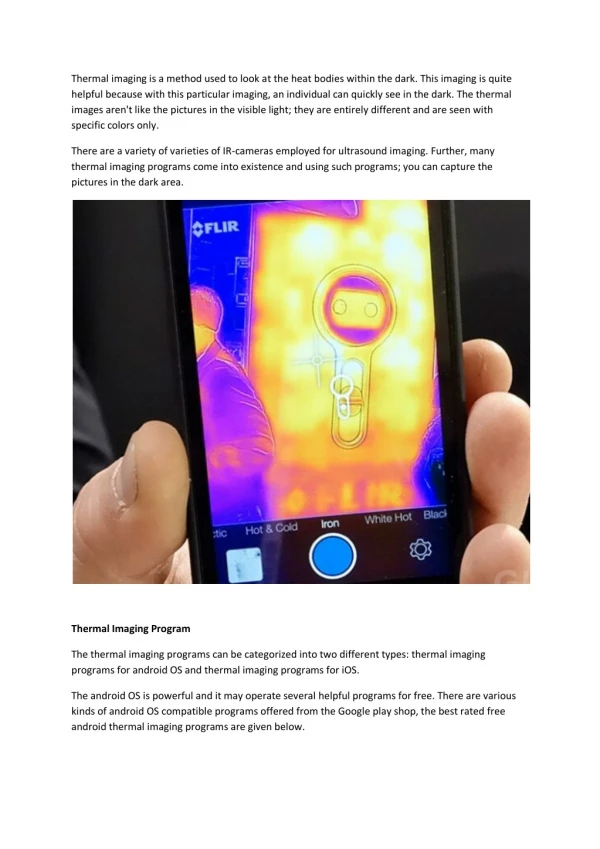
Thermal Imaging Background • Everything above –460 degrees F(absolute zero) radiate infrared energy • Black color = coldest • White color = hottest • True infrared works equally well in both Light and Dark conditions • It doesn’t need light (Note: the camera works well in daylight, but you need to shroud the viewer for best results) • This is not “night vision” • Smoke does not affect Thermal Imaging (you can’t see thru smoke with your eyes, but can see with the camera)
Thermal Imaging Background • We don’t see visible light with the camera, but we do “see” the temperature of objects • Example: go to a door – look at the air channel around the door. With the camera, if it looks White, then it is HOT on the other side of the door • A Cold Scene = nothing is happening at that place when you arrive on scene, like a High School on a Sunday. All things inside are pretty much the same temperature. • Passive emitters = furniture, doors, walls • Even a machine with a motor running is still a passive emitter
Thermal Imaging Background • *** NOTE: Thermal Imaging is VERY Sensitive to REFLECTION. (More later in Practical Exercise) • Active Emitters = generate their own energy (like people or animals). However the heat of that energy can be masked by clothing layers or wettness • Direct Source Emitters = these generate lots of thermal energy (examples are the sun, fire, chemical reactions) • NOTE: at a fire scene, when there is no water flowing thru a hose, it will appear WHITE as it is absorbing heat from the fire, but as soon as water flows thru the hose it appears BLACK because the water cools it and dissipates the heat
Thermal Imaging Background • Inside the fire scene, you can see the Thermal Layer building in the top of the room (be observant of other FlashOver conditions while using the camera, don’t just rely on the camera!) • But, you can see how much heat is up there in the layer and make call on ventilation and water application to eliminate the super heat • You would see the Hot Gases are WHITE in the camera
Thermal Imaging Background • Physics applies to Thermal Imaging • Heat travels from Hot to Cold • Density determines rate of transfer • Mass = volume and denisty of object • Big Rock = longer to heat up, and longer to cool once hot • Small Rock = quicker to heat, and quicker to cool once hot • At a fire scene: • Low Contrast scene = all objects in room are at the same ambient temperature • High Contrast scene = some objects in room are at higher temperatures than others • Talk about examples and reasons for BOTH types of scenes
Thermal Imaging Background • Hint: At the Fire Scene, when you go to a door, look for WHITE (heat) coming TOWARDS you, and you can FOLLOW that heat right to the fire source
Thermal Imaging and Reflections • Sometimes you get Reflection of heat and it shows WHITE (it might not be hot but it shows some absorption). So you have to think and evaluate the scene • Thermal Inversion • When a Fire Fighter is right in the middle of the thermal layer he will be the COOLEST thing (shows BLACK in your camera). In this case, both of need to GET OUT OF THERE !!! • BUT, before you get going check if you and that Fire Fighter are at the same height in the layer • Or are you LOWER than He is and you are looking up At him and INTO the thermal Layer so it looks hotter than It might be. But let’s be careful guys !
Thermal Imaging and Reflections • The camera doesn’t “SEE” thru Glass. It REFLECTS back like a mirror (same with waxed floors, they reflect what they “see”. • So, in that case, put your hand between the camera and the object to get a “reality check”. We’ll show this in the Practical Lab portion of training. • So, the image might “show” HOT but it might just be the reflection of something hot behind you • So, turn around and look, or ask your partner for a double check. • NOTE: the camera does not “see” into or under water. • NOTE: the best way to get condensation or fog on the camera lens, use a CLOTH….. NOT A GLOVE which will scratch the lens and damage a $25,000 tool!!
Thermal Imaging Methods • Once you “find” the fire source, scan the room for victims and if there are none, then direct the application of water to the nozzle man. • NOTE: before you apply water make sure you’ve really looked around with the camera, because once you apply water, you’ll cool down the scene and the image is not as good any more. • ALWAYS use the camera’s shoulder strap so you don’t loose track of the camera when you put it down. Besides the cost, it is your BEST WAY OUT of the fire scene !!!
Thermal Imaging Methods • Have a Battery Charging Log • The batteries do not have memory = good, so they can be charged at any level of charge • You can Auto, re-calibrate battery charges if there is a problem holding a charge
Thermal Imaging Tactics • The camera is a tool – a navigational tool • Never go anywhere that you can’t get out WITHOUT it • Stay low • You still need to do a left-hand or right-hand search, but it can go much faster and with more guided direction because of having the camera • You will have someone with the camera and those without the camera (called the “blind man”) • Still bring in tool (axe and haligan or pole)
Thermal Imaging Tactics • Approach ----- do in this order. Quickly size up the: • Ceiling – look up and view the condition of the Thermal Layer • Floor – do we have fire UNDER us ? • Look for Victims • Check the 4 walls – tell the search people how the Thermal layer looks, how far down it’s banking etc.. • Tell the search people the floor’s condition • Tell the search people if victims are apparent or not • Begin looking on the left: Tell search people, on the left wall, I see an open door with a window, then I see this, go all the way around the room and in the middle until you come back to the door you came in to start
Thermal Imaging Tactics • Now you’ve done this quickly, but it gives the Blind Man an orientation to the room and things to look for • Begin the left hand search: Guide the Blind Man around the room using the camera, you can keep furniture in place, you don’t have to knock it over • If you “see a lump of something” like clothes, give the blind man direction over to investigate it • Every once in a while, Stand up for an aerial shot of the room (if it’s safe enough, or you’re short enough!!) • By viewing the whole room, you can make the search much easier and cut the room search time down. • Remember to point out landmarks out to the blind man (things you told him in the initial sweep of the room) these are like mental landmarks to help him around
Thermal Imaging Tactics • Communicate…..Communicate…..Communicate • If the blind man is going to fast, tell him to slow down • If the camera man is talking to fast or moving to fast, the blind guy must yell for him to slow down • If the Battery Light indicates LOW batteries, immediately notify the blind man and get him over to you, and then together find a spot to go to, turn the camera button to STAND-BY mode, go to the spot and turn it back ON again, pick another spot to go to (always looking to exit) repeat until you get outside and can put in fresh batteries • DO NOT LEAVE the Blind Man !! • The Camera Man should stay just inside a doorway, so now you can see in the room, but also see anything in the hallway while the Blind Man searches
Thermal Imaging Tactics • A better search is a Camera Directed search, • Not a Camera Lead search • In a Directed Search = Jim, move forward 6 feet, Stop. Turn left 90 degrees. Stop • Where as in a Camera Lead search you might just be going way to fast • Remember: on the camera, the focal point is about 6 inches past the object, so you have to adjust for that when you reach for something while using the camera
Thermal Imaging Tactics • Remember: on the camera, the focal point is about 6 inches past the object, so you have to adjust for that when you reach for something while using the camera. • A technique to pick something up while using the camera is to: with your hand, for a “V” using your thumb as one side and the rest of hand as the other side AND PUT the object into the MIDDLE of the “V” • Never try to walk down steps looking thru the camera • If you are in a machine room and all motors are running, you might have to use the back of a gloved hand to test for temperatures, as the camera will show heat generating from all motors.
Practical use Lab Exercise • Train in darkened room at the station • Work on communication skills • Conduct directed searches around room • Do this before Live Fire exercises • Remember, Camera Man’s “turn left” MIGHT BE the Blind Man’s “turn right”. So work on that before going to the Live Exercise • Work on How the search will be conducted prior to going to Live Exercise
Practical use Lab Exercise • Live Fire generating lots of smoke • Look at “reflections” from outside windows at Tower vs. looking inside • Live Fire generating heat in Burn Room • Look at the Air Channel around Burn Room door • Look at Thermal Layer • Do a “guided”, directed left hand search • Find a hidden victim, remove the victim • (if Fire Fighter, roll on back, one grab SCBA shoulder harness, other grab legs, make like wheelbarrow and pull out on air bottle = much easier and faster) • Find an entangled Fire Fighter, remove the object
After training all active membersHHFD should consider if changes are required to SOG’s If changes are required, Refer to next slide and contact Safe IR for departments that have already written new SOG’s
Be Safe !! HHFD