Download
1 / 26
260 likes | 635 Views
Unreal Terrain. CIS 488/588 Bruce R. Maxim UM-Dearborn. What is Terrain?. Terrain is a tessellated piece of geometry used to model outdoor areas The geometry’s shape is driven by a height map (the z-axis defined by an 8-bit or 16-bit gray scale image) Dark shades used to define valleys

E N D
Unreal Terrain CIS 488/588 Bruce R. Maxim UM-Dearborn
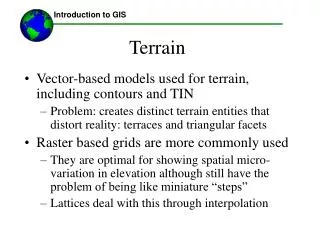
What is Terrain? • Terrain is a tessellated piece of geometry used to model outdoor areas • The geometry’s shape is driven by a height map (the z-axis defined by an 8-bit or 16-bit gray scale image) • Dark shades used to define valleys • Brighter shades are used to so peaks
Terrain Components • ZoneInfoActor • Defines the area in which terrain can exist (done by setting the bTerrain property to True) • Controls use of distance fog • TerrainInfo Actor • Used to generate the terrain geometry • Can blend multiple TerrainInfo actors • Divided into three categories: height map, layer textures, decolayer textures
Height Map • Used to define elevation and contours • Use must use G16 pixel shading format, if you plan to use Unreal’s Terrain editing dialog • Determines terrain’s physical dimensions: ResolutionX * TerrainScaleX – TerrainScaleX ResolutionY * TerrainScaleY – TerrainScaleY • The default scale is 64 units in all axes
Layers • Controls the visual aspects of the terrain • TerrainInfo actors can have 32 layers stacked on top of one another • Each layer has two texture maps a color map and an alpha map (controls transparency and blending)
DecoLayers • Decoration layer textures are used to drive the placement of decoration objects (grass blades, trees, shrubs, etc.) • Three types of texture maps associated with each Decolayer (density map, color map, scale map)
Terrain Editing Dialog Functions • Creation and manipulation of height maps • Assignment and blending of texture layers • Assignment and manipulation of DecoLayers • Automatic terrain generation
Preparing an Area – 1Tutorial 5.1 • Start a new level in UnrealEd and load the Ch5_Terrain texture package using the Texture browser • Select the MossWalls texture and subtract a (4096, 8128, 8128) cube • Select Actor>Info>ZoneInfo from the Actor class browser and add it to Top viewport near the center
Preparing an Area – 2Tutorial 5.1 • Open the properties box using the RMB and clicking on the ZoneInfo icon • Find the ZoneInfo section and set bTerrainZone to True • Rebuild and save the map
Terrain Editing Dialog – 1Tutorial 5.2 • Switch to terrain editing mode by clicking the terrain icon in the left menu bar • Click the new button (lower left hand corner) • Set the parameters • Package: myLevel • Group: Heightmaps • Name: Heightmap1 • Xsize: 128 • Ysize 128 • Rebuild the level
Terrain Editing Dialog – 2Tutorial 5.2 • New a texture layer to see anything so start by selecting the Dirt texture in the Texture browser • Make sure Heightmap1 is selected in the Terrain Editing Dialog and select the Layers tab • Use LMB to select the first undefined slot and click the New button
Terrain Editing Dialog – 3Tutorial 5.2 • Enter the following parameters for the new Layer • Package: myLevel • Group: TerrainLayers • Name: DirtLayer1 • AlphaHeight: 128 • AlphaFill: White • Uscale: 8 • Vscale: 8
Terrain Editing Dialog – 4Tutorial 5.2 • Click OK • Rebuild and save the level • To test the level, you need to add some lights and a Player start • You may need apply the dirt Texture to the bottom of the box (or at least I had to)
Terrain Generator - 1Tutorial 5.3 • Open the map and then activate Terrain Editing mode using the left menu bar icon • Use LMB to highlight Select in the scrolling menu in the Terrain Editing Dialog box • Highlight HeightMap1 and select the Misc tab • Use the following option values • Steps: 5 • Strength: 40
Terrain Generator - 2Tutorial 5.3 • Click the Build button to generate a random collection of hills and valleys • Fiddle with the Steps and Strength options if you wish to change appearance • Rebuild the turn (you will probably need to delete and replace the Player Start actor) • Save the map and test it
Using Sunlight – 1Tutorial 5.4 • Open your map and select the Actor Class browser and choose Actor>Light/Sunlight • In the 3D viewport, right click on the level ceiling and choose add Sunlight form the context menu • Rebuild the level • To make the level work you need to flag the ceiling as a FakeBack drop, use LMB to select the ceiling
Using Sunlight – 2Tutorial 5.4 • Use use the 3D viewport and press F5 or use Surface Properties button from top menu bar • Use the Flags tab and check Fake Backdrop and close the Surface Properties dialog box • To orient the Sunlight actor begin by clicking on the Lock to Selected Actor mode icon on the 3D menu bar
Using Sunlight – 3Tutorial 5.4 • Click on the Sunlight actor in the 3D view to lock the camera to the actor and rotate the Sunlight actor improve lighting • Release the Lock to Actor • Rebuild the level and test • You may need to increase the brightness attribute of the Sunlight to get the right level of shadows
Skybox • A subtracted space separated from the rest of the level (can be cylinders or spheres as well as cubes) • Use to provide the illusion of clouds, suns, moons, etc. far off in the distance • Great for creating cloudy skies, night scenes, and futuristic space scenes
Skybox Principles • Requires the use of a SkiZoneInfo actor • The skybox encloses 5 sides of the level box (top, east, west, north, south) • Each wall is marked as a Fake Backdrop, which allows the player to look through them to the sky box walls • The trick is to avoid creation of seams in the sky box
Avoiding Skybox Seams • Carefully align the 5 textures to the sky box walls so that no seams are visible • Use a cylinder static mesh to surround the SkyZoneInfo with a texture (blending) • Texture the ceiling and surround the SkyZoneInfo actor with static mesh “murals” • Place a TerrainInfo Actor in the skybox to create hills and valleys (Tutorial 5.5) • Enable distance fog to hide things
Adding Skybox – 1Tutorial 5.5 • Open your map and then select the Sky1 texture using the Texture browser • Subtract a (2048, 4096, 4096) cube from the level that is not connected to the Terrain box • Select the Black texture from the Sky group and apply it to walls and floor of the sky box (not the ceiling) • Select the ceiling surface and open the Surface Properties dialog (F5 or menu bar icon)
Adding Skybox – 2Tutorial 5.5 • Use the Alignment tab • Select Face, set the UTile and Vtile attributes to 2, and click the Align button • Open the Actor Class browser and add the Info>ZoneInfo/SkyZoneInfo to the center of the Top or Side perspective viewport • Move the SkyZoneInfo actor to the center of the box
Adding Skybox – 3Tutorial 5.5 • Add at least 8 lights to the Skybox using the lighting techniques from Chapter 3 • Rebuild the geometry and lighting • In the 3D viewport, choose the View menu item Show Backdrop to preview what you might see in Unreal • To add distance fog, select the SkyZoneInfo actor and open its properties
Adding Skybox – 4Tutorial 5.5 • Set the ZoneInfo>bDistanceFog item to True • Use the following settings for ZoneLight property values: • DistanceFogColoR: (R:125,G:176,B:185) • DistanceFogEnd: 1575 • DistanceFogStart: 400 • You might also want to move the SkyZoneInfo actor closer to the ceiling
Adding Skybox – 5Tutorial 5.5 • Select the four walls in the Terrain box and flag them as Fake Backdrops using the Surface Property menu (F5 or icon) • Rebuild the level and save it