Download
1 / 8
80 likes | 213 Views
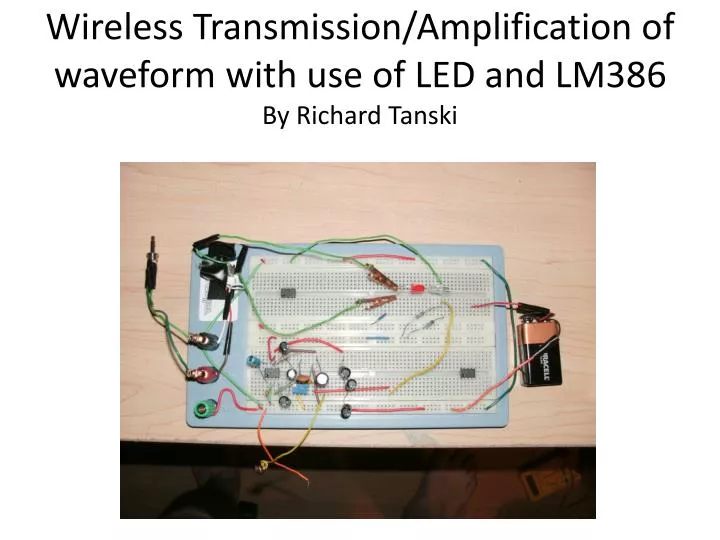
Wireless Transmission/Amplification of waveform with use of LED and LM386 By Richard Tanski. Receiver Circuit Used.

E N D
Wireless Transmission/Amplification of waveform with use of LED and LM386By Richard Tanski
Receiver Circuit Used The circuit below was used to create the receiving/amplification portion of the project. At the input of the circuit, I inserted a phototransistor that is powered by the same 9 volt cell battery and with 2 resistors (1Mohm and 500kOhm) in parallel (333kOhm equivalent).
Transmitter Circuit • A similar circuit to the one below was used to create the LED transmitter. • The laser tube was replaced with a IR LED that was amplitude modulated by the audio out of the computer jack (after passing through the audio transformer). • Instead of the voltage (from the audio jack instead of from a battery) being applied to the diode itself, the potential difference was applied to the 8ohm side of the transformer (as shown) and the output was connected across the diode (to power and modulate it).
Problems • As a first step, I tested all of the components that I was using to verify that all were in working order. In doing this, I discovered that the audio transformer I had would only work for very high frequencies (on the order of 100kHz to 1+MHz). Which was not practical for my purpose. • After a new and fully working transformer was acquired, I built the transmitting circuit, which was relatively simple. However, my first version of the receiving circuit was not so successful. I found, through some research, that a good way to amplify a signal, whether it be from an iPod or a phototransistor, is with a 741 op amp and a LM386 power amp (powered by the 741). However, after many failed attempts with this type of circuit and a talk with Dr. Marcy, I was informed that the main issue with powering a 386 with a 741 is the 741 does not have enough output to power the 386 effectively. With this new information I scrapped that design and moved onto the current design of the circuit (only the LM386 powered with a battery). • The only major problem that I had with the circuit is the board that I put the components on was segmented into 2 parts, which I did not realize, and this meant that there was no power going to my op amp. This also damaged the amp. After the 2 segments were wired together and the new amp was powered, (9V battery) the circuit worked. After some cleaning up of the board, the final fully functional circuit was completed. • The final change to the circuit was replacing the red (transmitting) LED with a IR diode. The purpose of this is to try to reduce the amount of noise/distortion that was seen at the output of the amp circuit. The reason that I made this last minute change is because while the LED was adequate the receiving diode was an IR phototransistor so I thought that a IR transmitting diode would work better.
Final Results 200-2000Hz range test
Output waveform of 1500Hz after passing through amplifier (gain ~40)
What could be made better? • The circuit could be made more portable by using smaller PCB components on an etched board. This would add practical applications to the project. • Allowing the audio transmission to be over a greater distance, as currently the effective transmission distance is only a few cm. The way that I would attempt to do this is with either a modulated laser (however this would only be effective if the laser were perfectly pointed at the receiver) or with a stronger/larger IR diode. My initial design of my project included a laser that I had built for a summer project. However, I was not able to obtain the laser diode in time to complete this circuit. • The receiving circuit could also be tuned more by calculating the exact values of the caps (especially the cap between the 1 and 8 pin of the LM386, since this represents the gain of the amp. The gain will vary from 20, with no cap, to 200 with a circuit specific cap).